How to Properly Expose R3D NE Footage on the Nikon ZR Cinema Camera
With ZR firmware 1.10, the Nikon ZR cinema camera introduces a new highlight clipping line that makes exposing R3D NE footage easier and more reliable. In this guide, we will walk you through a simple, step‑by‑step method to get the cleanest image with the most detail preserved.
Understanding the Basics
Before we look at the new clipping line feature, let’s review the three settings that control exposure: ISO, shutter angle, and aperture. These are often called the exposure triangle.
Choose the Right ISO
The ZR has two base ISOs: 800 and 6400. These deliver the cleanest image with the least noise and the best balance between bright and dark areas (see reference chart below)
• Use ISO 800 when filming in bright daylight
• Use ISO 6400 when filming in low light
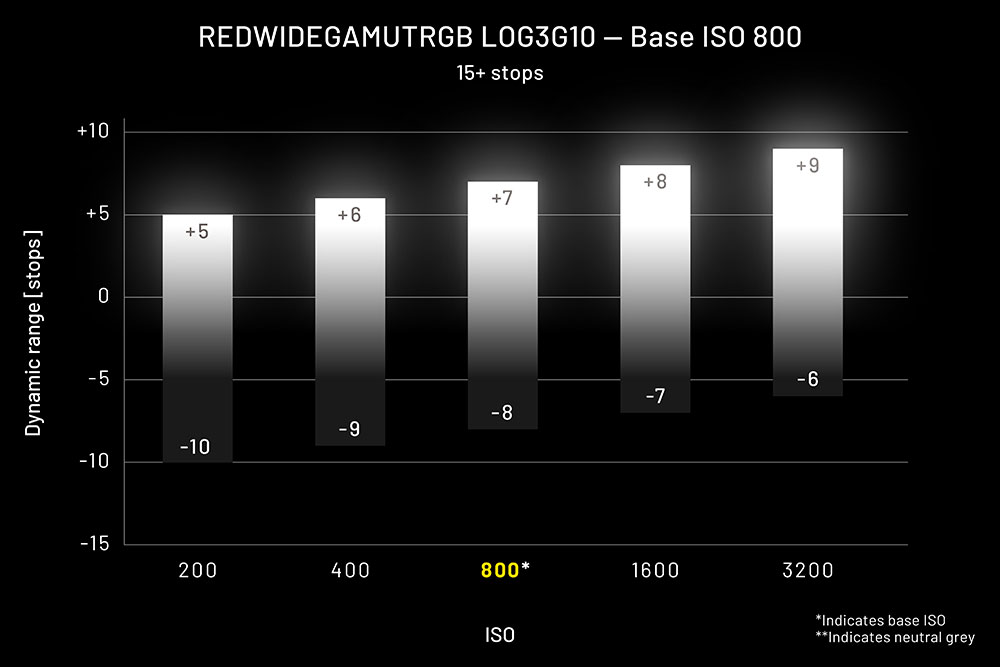
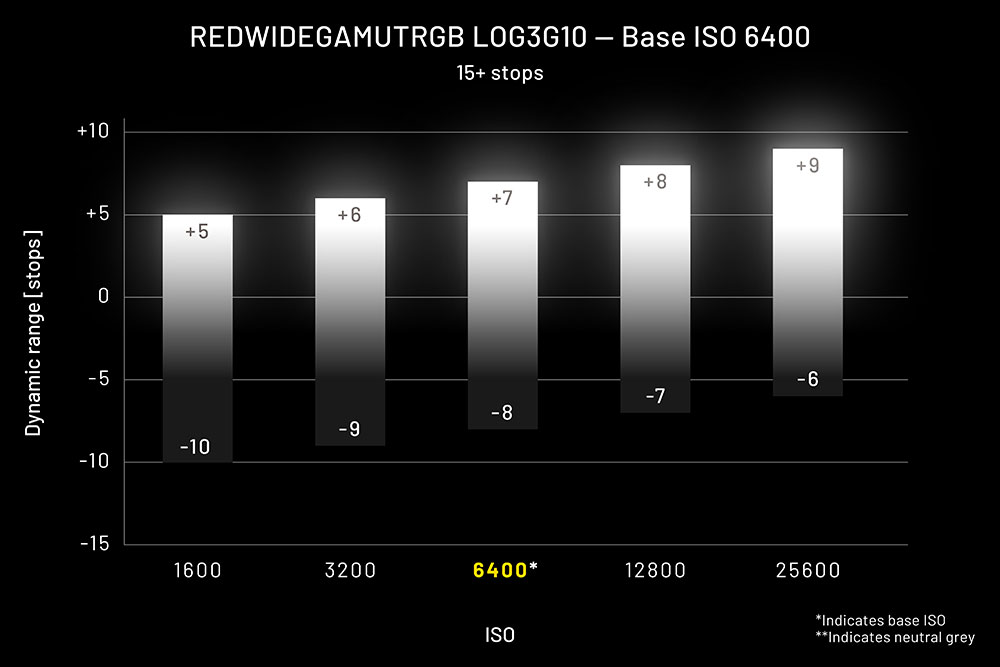
These charts illustrate the 15+ stop dynamic range of the ZR. Note that the base ISOs of 800 and 6400 in yellow will provide the cleanest results when properly exposed.
Set Your Shutter Angle
Next, set your shutter angle to 180°. This gives your footage natural looking motion blur that is most similar to what you would see in most professional film productions.
Adjust Your Aperture
Now the only part of the exposure triangle left is the aperture, which controls how much light enters the lens. While it can be tempting to open the aperture all the way, doing so can overexpose your highlights, meaning bright areas lose detail and appear washed out.
To avoid that, we will use the built-in waveform monitor on the ZR.
Using the Waveform Monitor and Highlight Clipping Line
When shooting R3D NE, you will greatly benefit from activating the ZR’s internal waveform monitor. Once on, you will notice that it has a small red line on the inside of the graph.
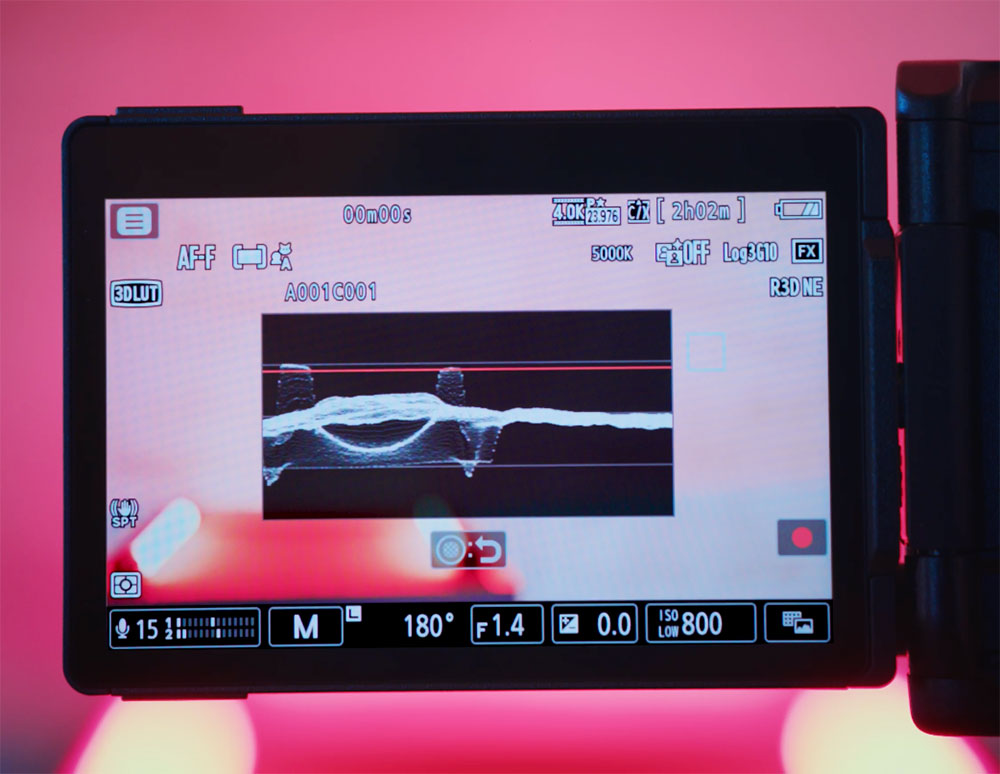
The red line shows the point where highlights clip and where detail in bright areas is lost.
To find the right exposure, slowly open and close the aperture. As you do this, watch the tallest part of the waveform. Stop once the waveform sits just below the red clipping line.
This ensures your highlights are fully captured without losing detail. At this point, your exposure is correct. But there is more that can be done if you want a different look.
For a Shallower Depth of Field
If you want a blurrier background (with a wide open aperture) but you’re in a bright environment, you may find it challenging not to pass the clipping limit. If opening your aperture pushes the waveform above the red line, then simply add a variable ND filter onto your lens. This reduces the light entering the lens so that you can keep the aperture wide open while protecting your highlights.
After adding the variable ND filter, adjust it until your waveform once again sits just below the red clipping line. You’re now set up to retain your highlights with a proper exposure.
ZR Firmware 1.10
Note that the highlight clipping line is a new feature found in firmware 1.10 for the ZR.
If you don’t see this feature on the waveform of your ZR, visit the Nikon Download Center to find the latest firmware with instructions or install it directly onto your camera from the Nikon Imaging Cloud.


