Photographing Arctic Wildlife
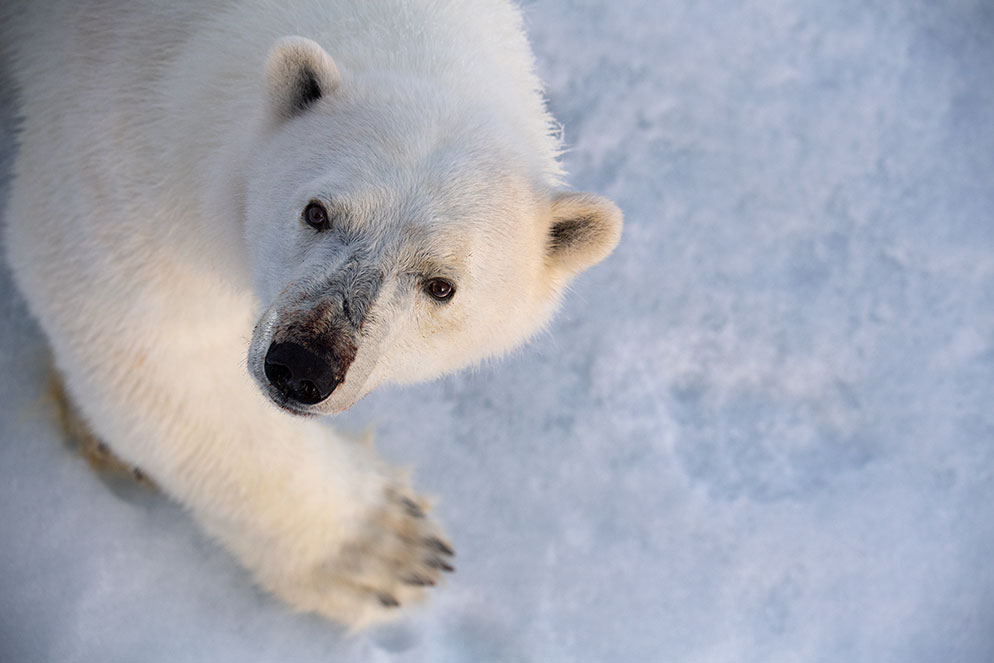
“Photographing from the deck of the ship, we were lucky that one of the bears was curious enough to come near for a close look.”
When might you find yourself in the arctic photographing wildlife? Perhaps on a cruise to Alaska that also includes a trek on land or maybe you’re treating yourself to a once-in-a-lifetime photo trip to photograph polar bears in Norway or in the remote Canadian wilderness.
Knowing what to expect and the best types of gear and starting exposures to use can make your life easier—especially when timid animals make scarce appearances amid the icy landscape.
Along with polar bears, there are lots of other wildlife living in the arctic—you just need to know where to look for them. In the water you’ll find Orca, Narwal and Humpback whales. On ice floes and land as well as in the water you might encounter walruses, seals and arctic seabirds. Further inland, you might come across reindeer, arctic foxes and arctic wolves.
While there are many people who can be found giving polar bear photography tours, do your research to find those who have had more experience finding the bears during their Ecotourism tours. Because of climate change, it has become necessary to go further north each year to find the bears.
These photographs were made while on a photo tour/workshop in the arctic led by Nikon Europe Ambassador Marsel Van Oosten.
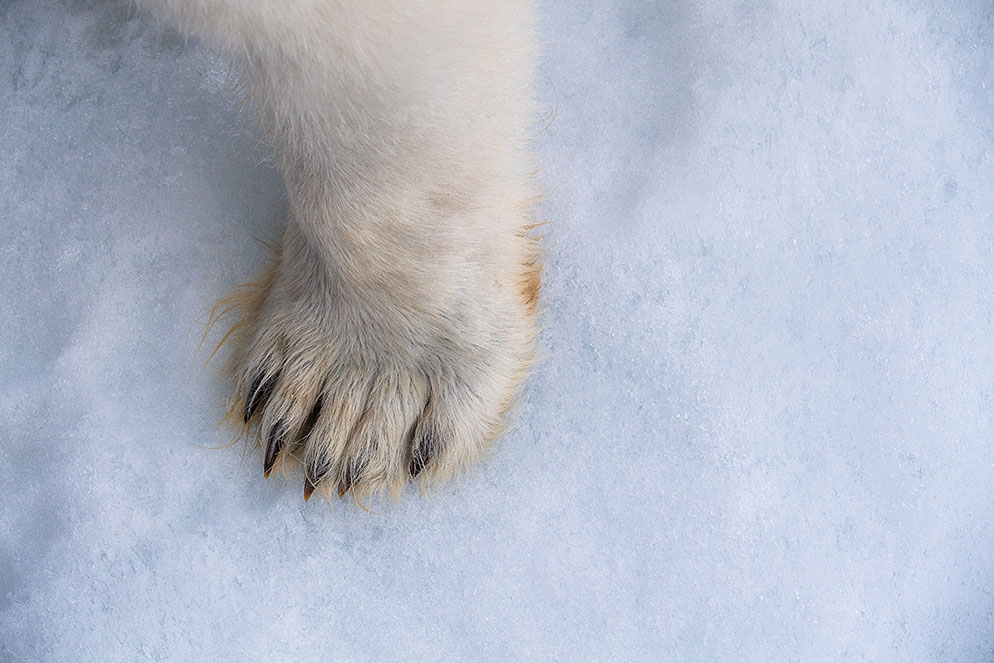
Isolate a polar bear’s large paw as it walks on the ice with a super-telephoto lens.
Depending upon how much gear you own (or might want to borrow or even rent) for a trip to the arctic, you will have to decide how much of that gear to bring with you. Weight limits on aircraft or other vehicles you will be traveling in may make some of that decision for you, but you may have the opportunity to bring extra gear. Ultimately you’ll have to decide if the extra gear is going to be a burden, weighing yourself down or a benefit as having an extra body and lens or two will give you the option of having two cameras at the ready. You could dedicate one camera to a super-telephoto and the other camera to a wider-angle lens. You could also dedicate one camera to capturing stills and the other to video.
This polar bear missed the ice floe and is waiting for the ice around Svalbard to freeze back up.
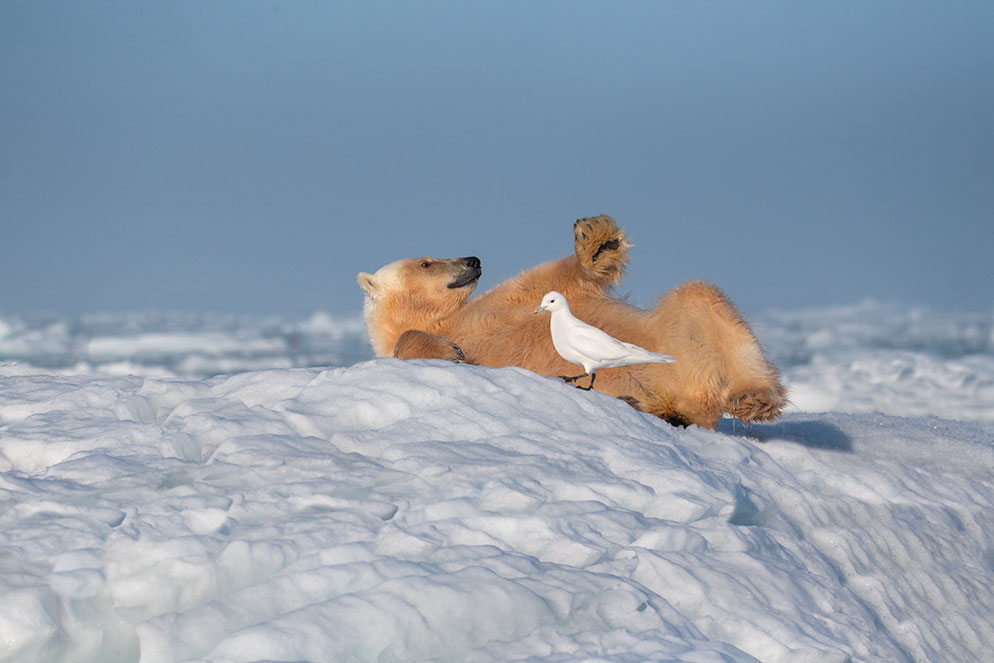
Polar bear relaxing on an ice floe off Nordaustlandet. His fur looks orange from a combination of spending a lot of time in the water and a seal diet. We watched him from a Zodiac, he had little interest in us being so close.
Tips for photographing polar bears:
Basic composition tips apply here.
-
The rule of thirds
-
Subjects facing into the frame
-
Leading lines
-
Always be prepared. If you don’t know what to expect, having an all-purpose lens is sometimes best.
Polar Bear using it's keen sense of smell to see if there's anything it needed to be aware of.
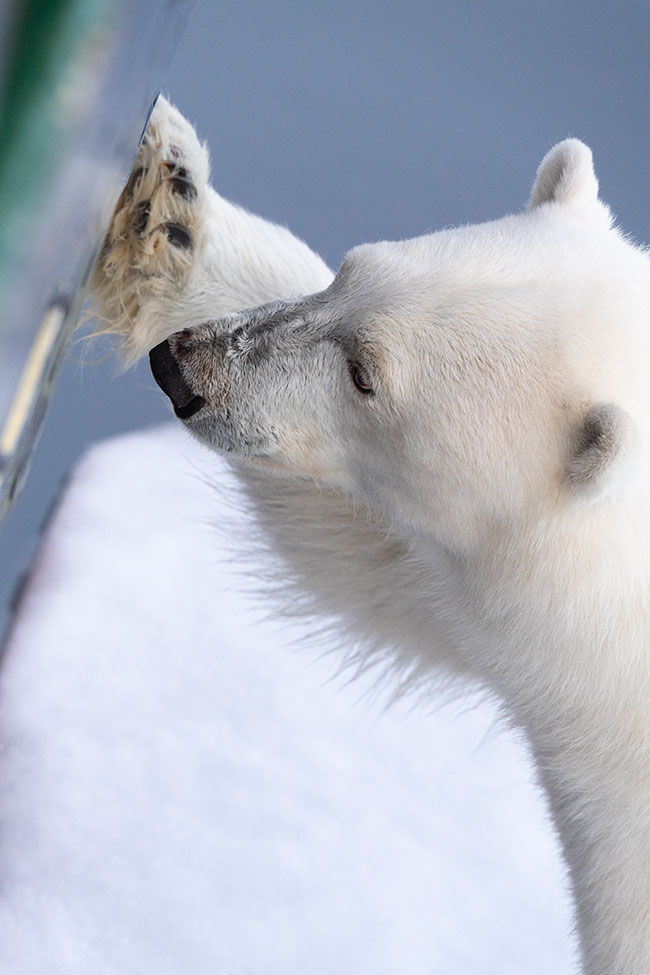
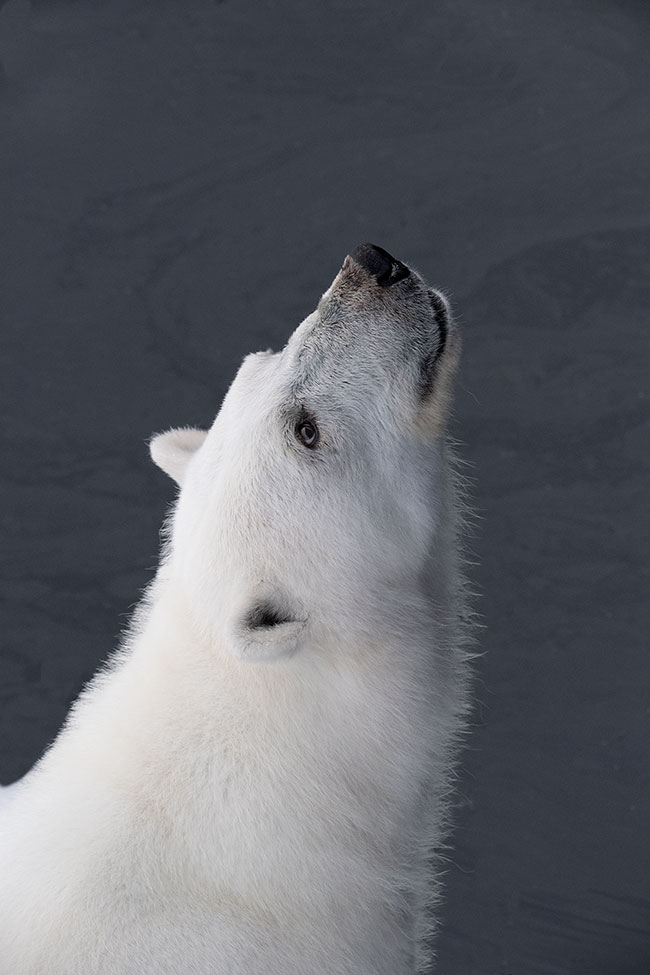
A curious polar bear (same bear as at the very top) took a morning stroll right up to the ship to say hello, he was the only one to come that close.
Photographing Polar Bears in Action:
-
Zoom in close to highlight a bear’s face or gigantic paws
-
If a bear is jumping from one ice floe to the other, try to zoom out to compose the photo so you include the reflection of the bear in the water
-
Don’t be afraid to show a bear devouring a kill. It’s the circle of life. If you’re lucky enough to witness a kill or even the bear or bears eating, don’t try to hide the kill.
-
You may also be lucky in viewing two polar bears interacting with one another. If you’re using a zoom lens, zoom out so you can capture some of the ice around the bears. A full grown polar bear weighs upwards of 1,200 pounds and stands almost 10 feet tall on its hind legs and makes for quite the sight. Full grown female bears can weigh over 600 pounds and stand seven feet tall on their hind legs.
-
If you’re extra lucky, and witness a polar bear mother with her cubs, photograph the interaction among the animals along with individual portraits of each. Cubs will venture out of the den for the first time in the spring.
-
When photographing action, set the camera to the continuous shooting mode so you don’t miss a moment. You can always delete photos later on but you can’t get back that decisive moment you missed.
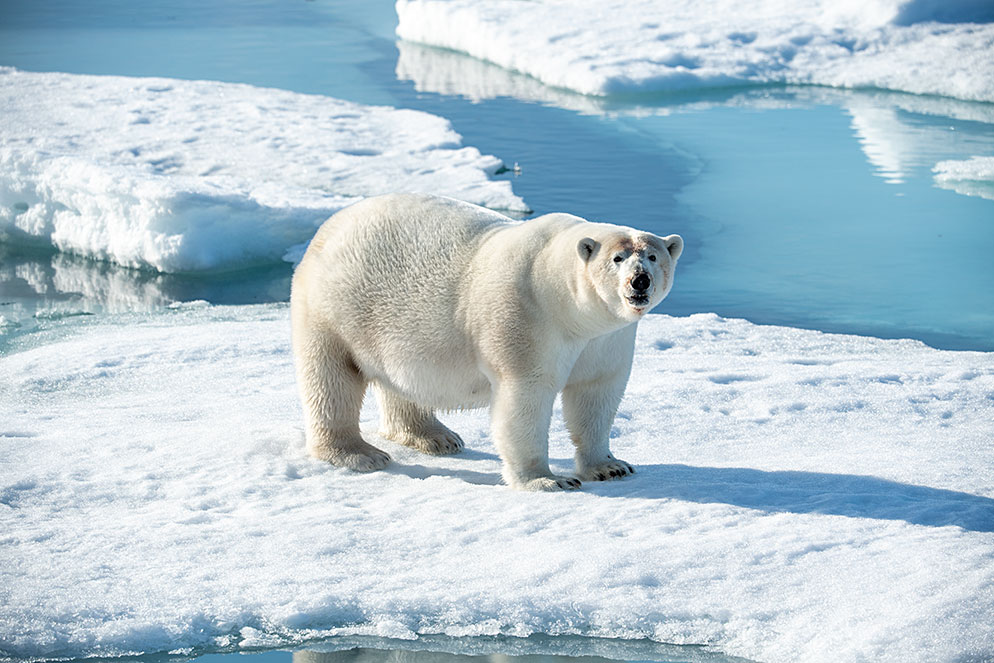
The “traditional” image one expects to capture of a polar bear—standing on an ice floe, made even better by the bear looking towards the camera.
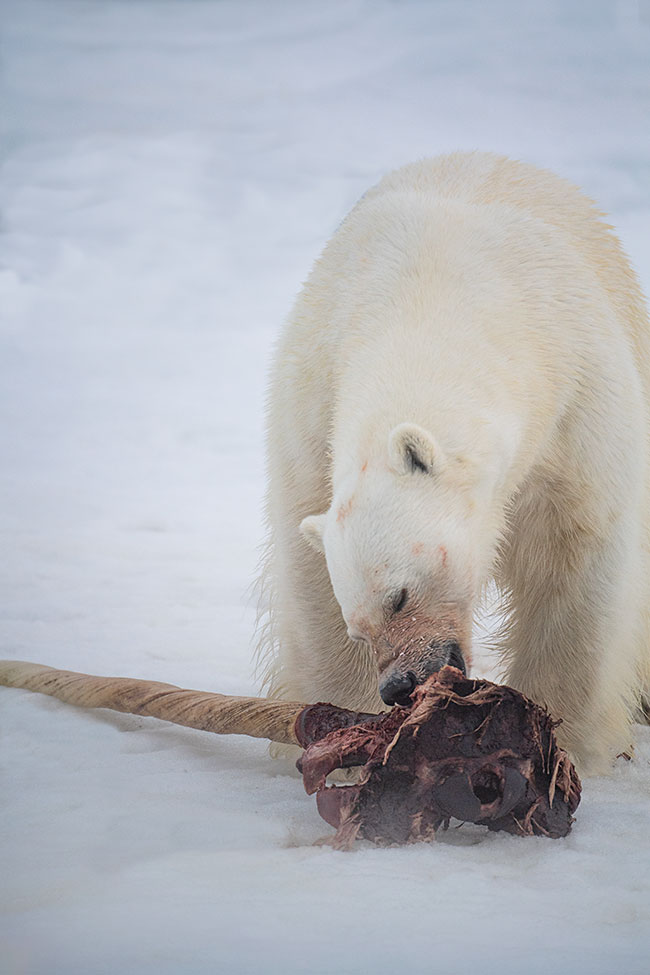
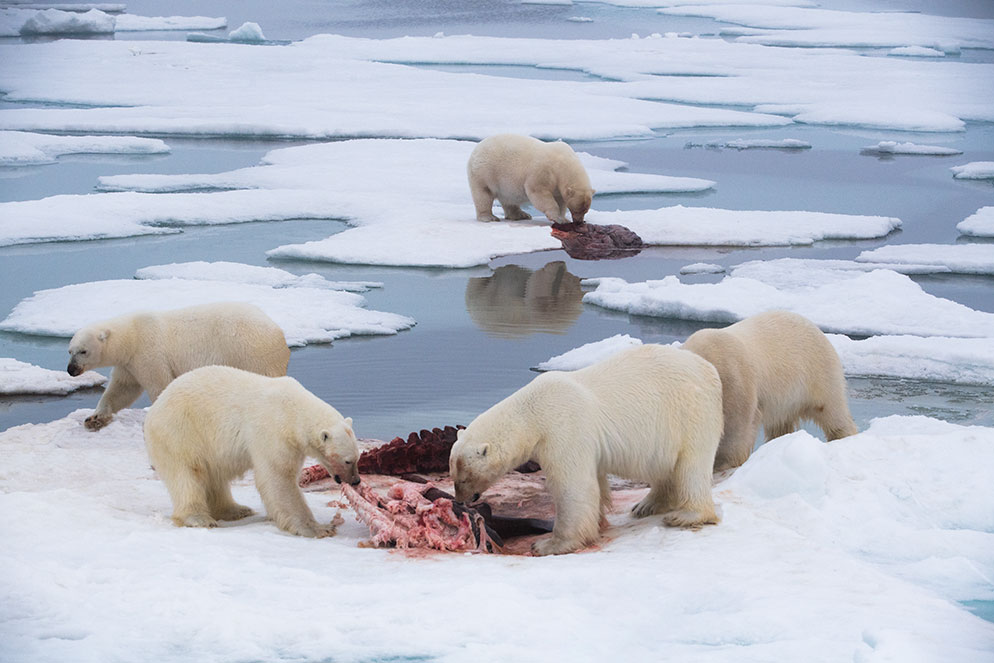
“We were only a few hundred miles from the North Pole, when we came across a large group of Polar Bears just finishing a feast of Narwhal (whale) and a very rare Greenland shark on the packed ice at 82.5 degrees north.”
Getting the Right Exposure:
White Polar Bears on a snowy white background could be tricky for some cameras, but the Matrix metering mode in your Nikon camera will most likely get you a good exposure. There are a couple things you can do to ensure your exposure is correct.
Shoot in Manual exposure mode. Looking at the camera’s meter you set the aperture and shutter speed. If you feel the camera isn’t recording the white on white correctly you can adjust by overexposing or underexposing when necessary. Depending upon whether the light is constantly changing, you may have to constantly make adjustments.
Bracket your exposures if you aren’t sure whether or not you have the correct exposure set on the camera. You can either do this while shooting manually or set the camera to bracket exposures.
Another option is to use the Exposure Compensation on your camera to adjust the exposure. With the camera set to Aperture Priority, Shutter Priority or Program modes, you can adjust exposure by increasing or decreasing in 1/3 of an f/stop increments.
Yet another option is to use the histogram to determine whether your exposure is correct.
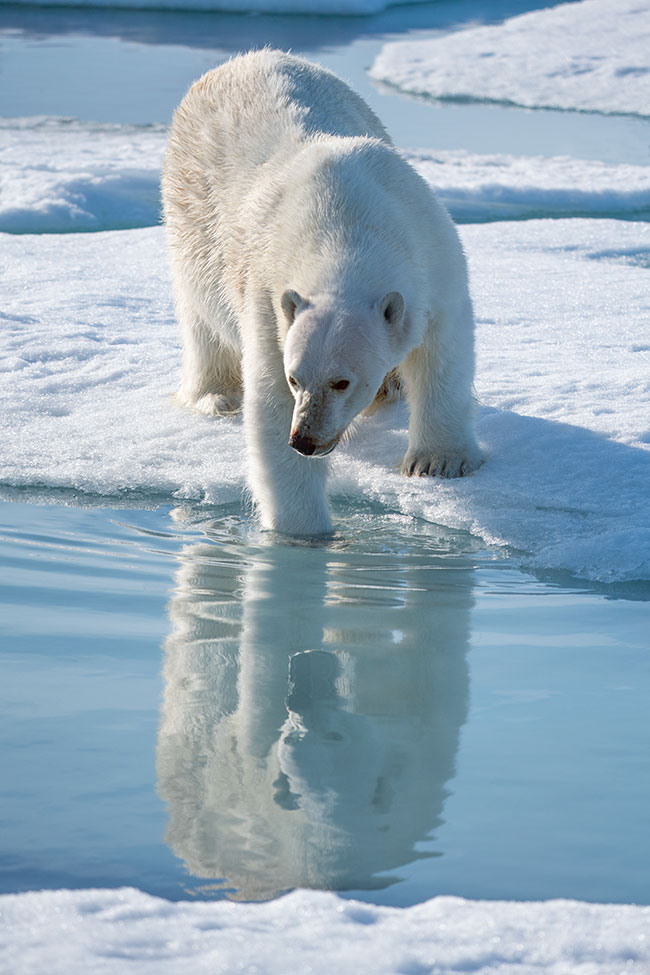
Polar bear checking the depth of the water before strolling across.
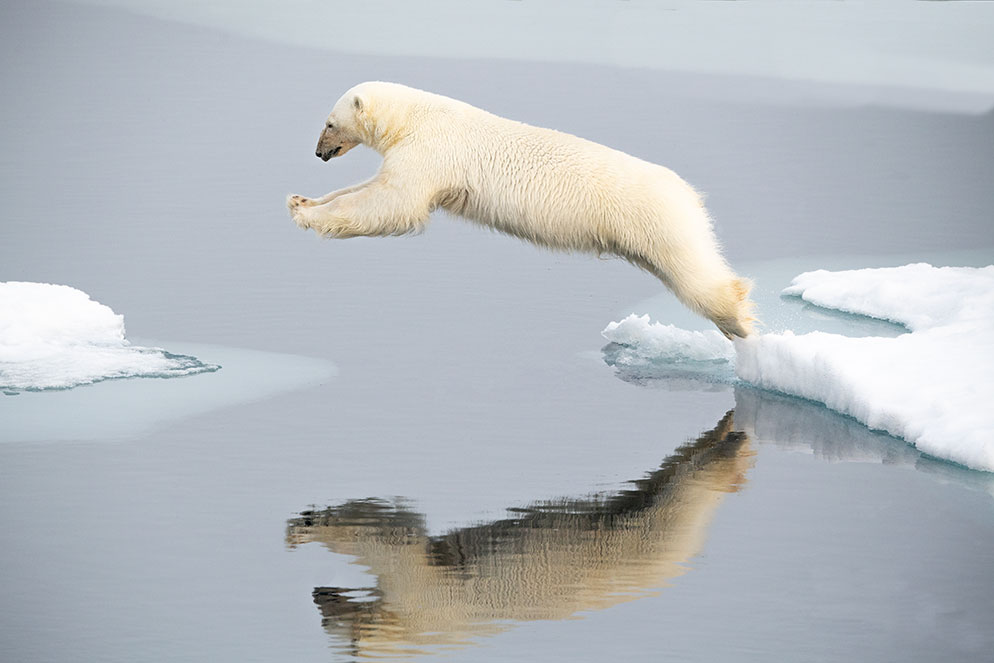
As large a creature as a polar bear is, they are nimble when it comes to jumping from ice floe to ice floe.
Bring a Polarizing filter for your lens(es). These filters are designed to be used around very reflective surfaces such as water to reduce and possibly remove unwanted reflections. Doing so also increases the saturation of colors. They can cut glare as well and deepen blue skies, making clouds stand out more prominently.
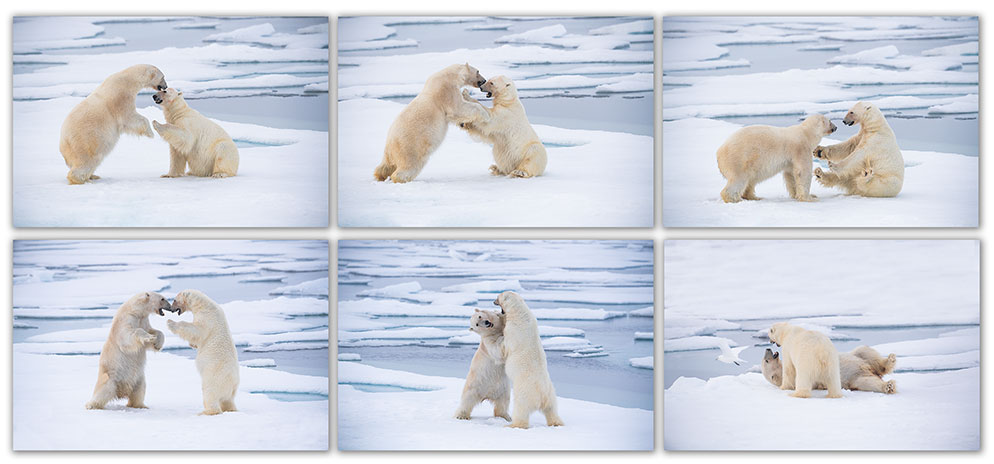
Polar bears playfighting. Often when you capture a series of images, creating a montage or composite of the images together can be more powerful or tell more of a story for the viewer than if they were viewed individually.
Photographing polar bears from a vehicle:
Tundra Buggy: An all-terrain vehicle that is used to study, photograph and view polar bears, often the vehicle that you’ll be viewing the bears from if you travel to Churchill and Hudson Bay (Canada). They are built high off the ground. Churchill, Manitoba in Canada is known as the polar bear capital of the world! The bears are known to converse on Hudson Bay to get out onto the Arctic sea ice so they can hunt seals, which are their main source of food..
Ship: If you venture to Svalbard, Norway (an Arctic archipelago) in search of polar bears, your Ecotour may cruise through the pack ice on a ship.
Zodiac boat: Some tours offer Zodiac boat rides through the ice or from larger ships to the ice or land where it is safe to do so. Photographing icebergs from this vantage point will really accentuate their size—if there’s an opportunity to photograph another Zodiac in the vicinity, do so as it will provide a sense of scale. A waterproof bag can be a “lifesaver” for your camera gear if you’re on a Zodiac and the water is choppy. Cleaning the camera after each day’s shooting is important if you’re out on a Zodiac or even a larger boat and there’s spray coming off the [salt] water.
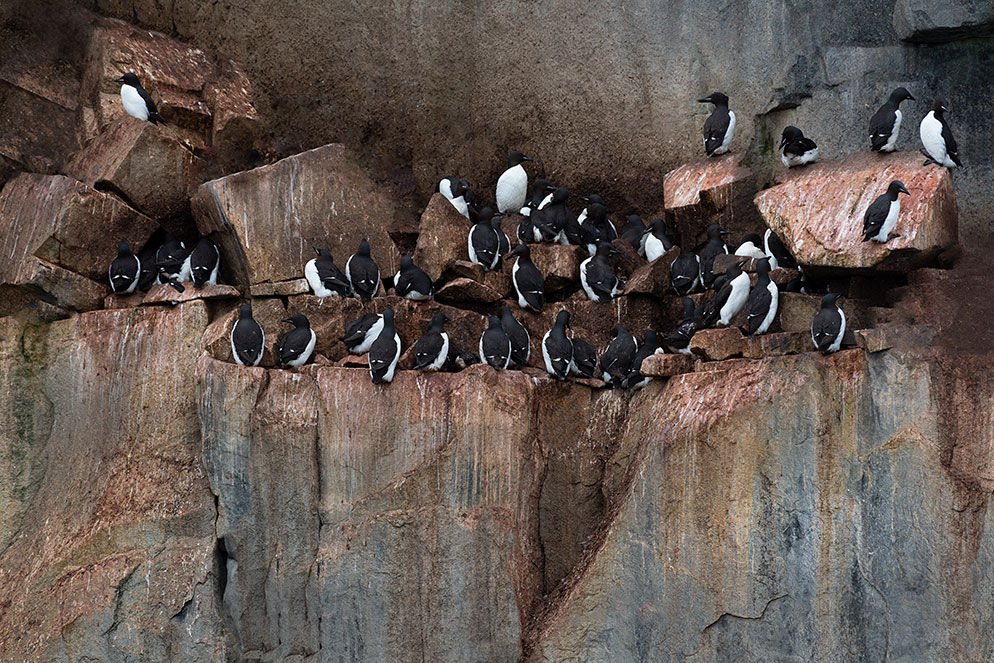
The thick-billed murre or Brünnich's guillemot resting before diving for food.
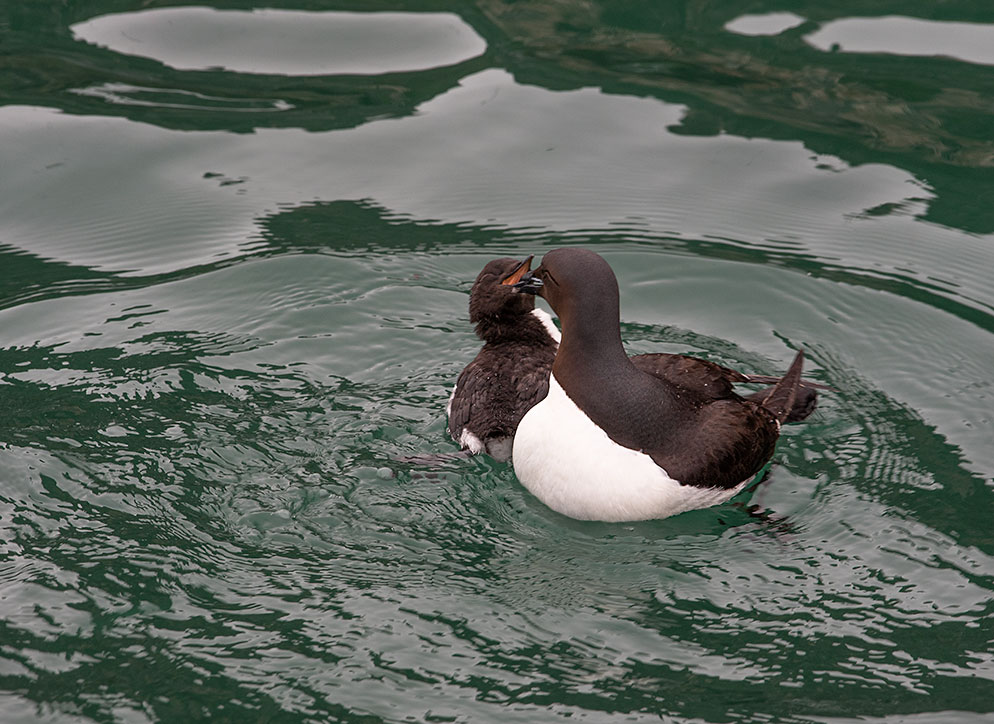
Male thick-billed murre or Brünnich's guillemot tending to his chick, he will stay with the chick for about two months until it can fend for itself.
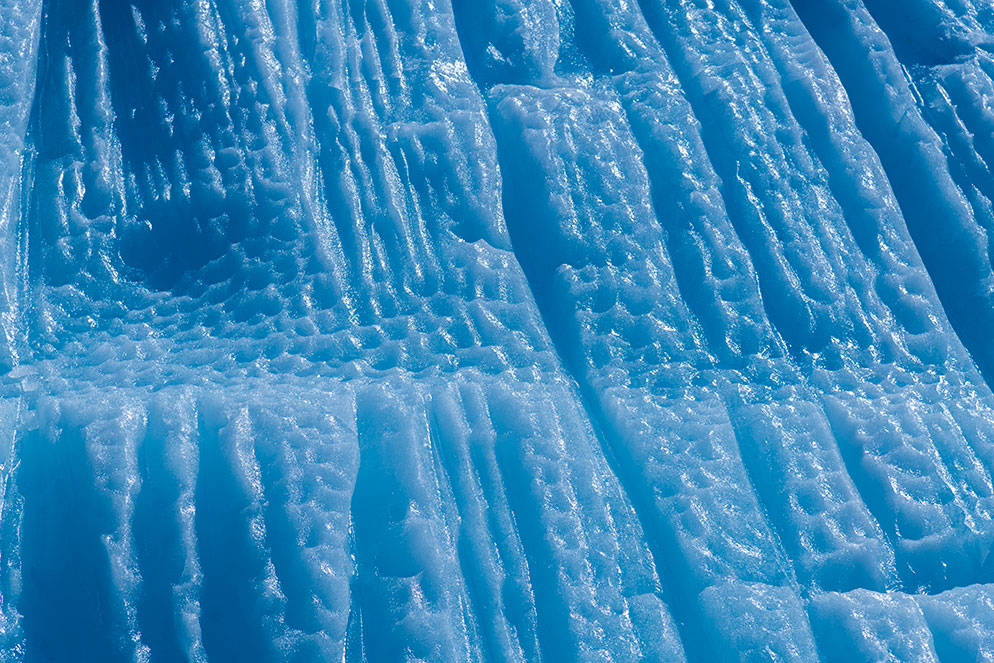
For those times when the wildlife is elusive there’s always landscape photography to be had, including seascapes of icebergs and close-ups of the texture of the ice itself.
A wide-angle lens is ideal for taking in the breathtaking ice-covered landscape (or seascape) around you.
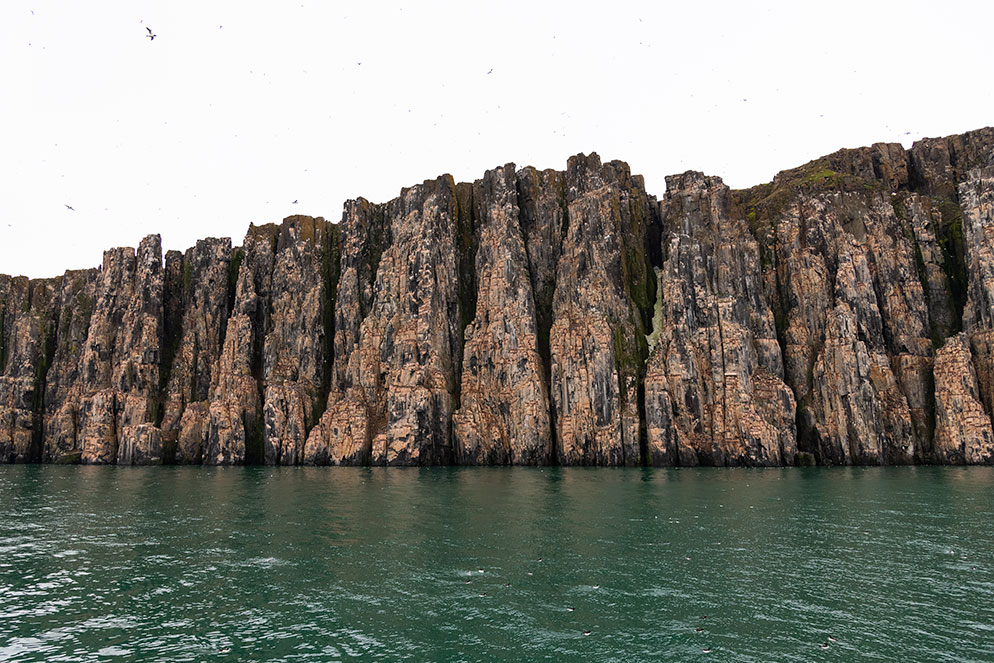
When the polar bears are scarce, there are plenty of icebergs to photograph and you may find cliff faces as well. Zoom in to capture the color and texture and take a wider shot to include some of the sky.
The different colors of icebergs you may see in the arctic:
-
Pristine white icebergs. This is what most people expect when they think of an iceberg.
-
Icebergs that are a mixture of white and blue. Glaciers form from snow and ice. As the ice is compressed, it will become bluer in color.
-
Pure blue icebergs. You may see pure blue ice which comes from the compression of snow and ice in a glacier to the point that the air bubbles have been squeezed out, leaving the denser, blue colored ice.
-
White ice with black or brown stripes. The black or brown color is due to sediment picked up as the ice sheet slid downhill.
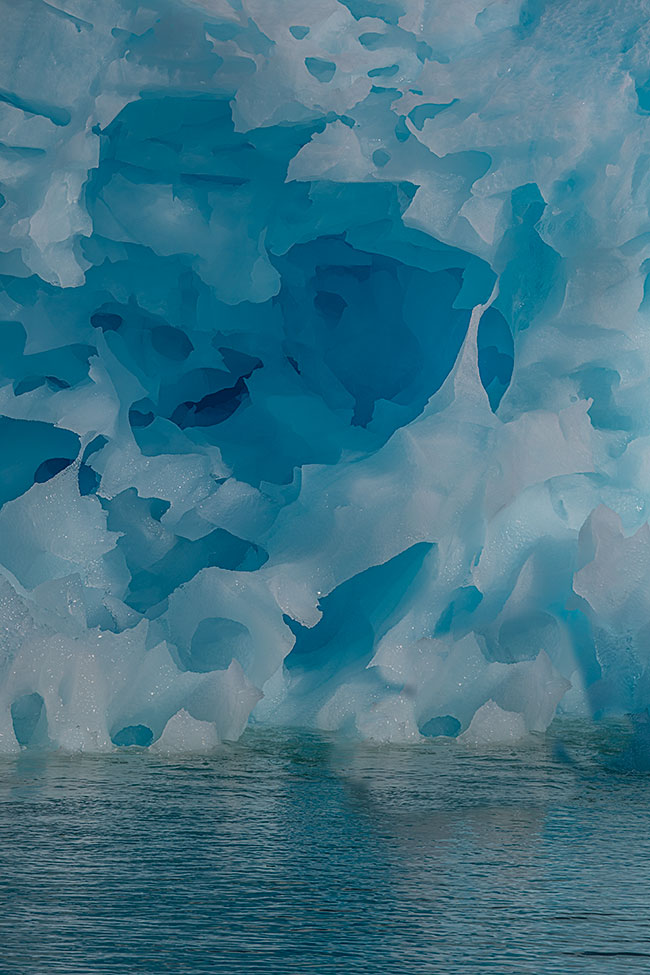
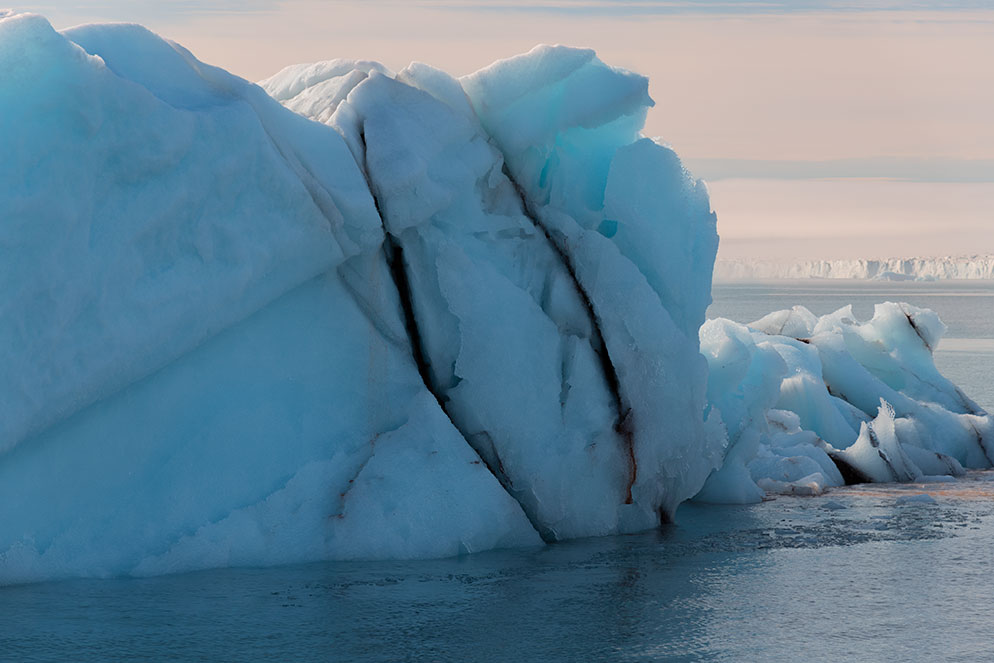
The Arctic is full of icebergs, which make for great abstract images. Depending upon where on a glacier the ice came from, it may have picked up colors, like this one did, due to sediment as the ice sheet slid downhill.
When On Land
If you’re also planning on doing any hiking, you may even come across wildflowers or other flora that would make for an interesting photograph so bringing a small macro lens may be a good idea if you have the extra room for the lens.
Your workshop or tour group may also venture onto land to photograph wildlife such as walrus, reindeer and fox. An obvious tip is to know what you’re going to shoot and have the camera ready to go as soon as you get off the boat.
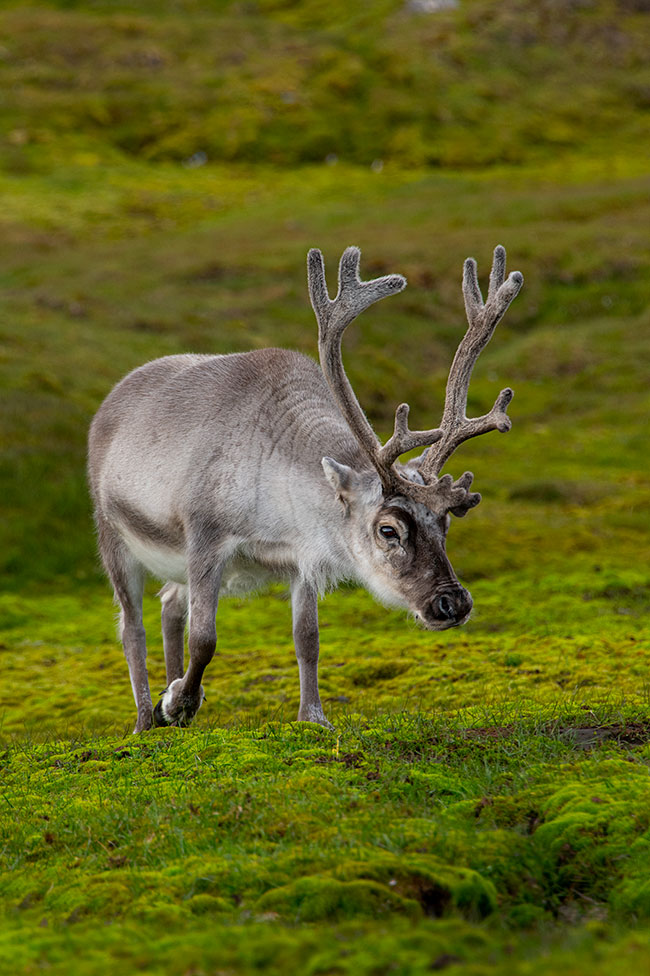
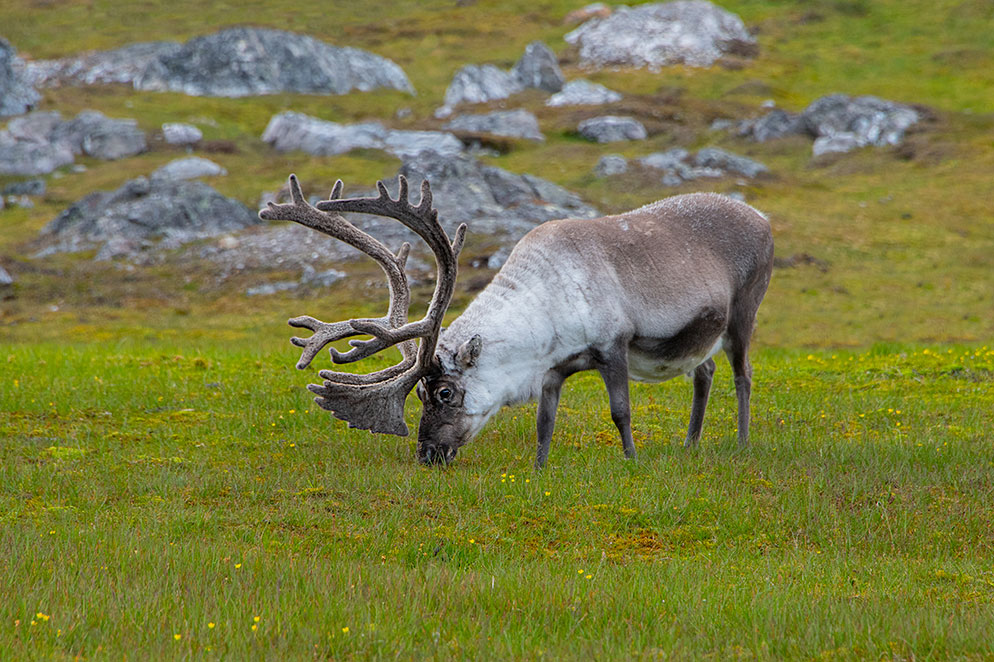
Reindeer grazing.
It’s likely that you’ll be given instructions on precautions to take when on land. These may include:
-
Don’t wander off alone
-
Always have a buddy
-
Continually check your surroundings. Generally the animals are more afraid of you but they can be curious so it’s best to always be aware and always have an escape route (so you can move out of their way if they move towards you.) We’re in their territory and we need to respect it.
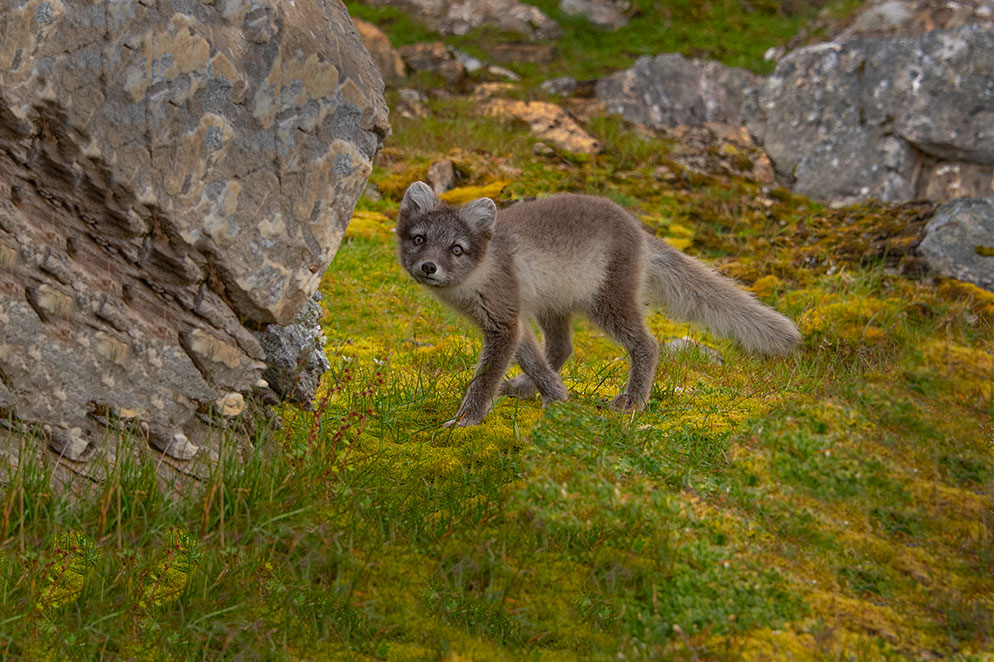
A fox kit looks at the camera with an inquisitive look.

Two fox kits, near their den. While we watched, one woke the other up, they growled a little at each other and then settled down for a nap together.
Gear Handling Tips
Bring extra batteries and keep them in an interior jacket pocket. Batteries of any kind tend to lose power faster in the cold.
If your camera accepts a battery pack (Nikon calls them Multi Battery Power Packs because they usually can accept a variety of battery options) and you have one or have access to one, use it.
Bring extra memory cards. You won’t want to be on the frozen tundra only to run out of memory card space and have to either delete some photos to be able to shoot more, or miss taking more images and video altogether—and your photographic companions may not want to part with any of their extra cards, or they may not even have the same format cards your camera uses.
You might want to get a dry bag for your camera, especially if you’re going to be out in the elements. They are also useful to warm up your camera slowly after it's been outside in the cold. You can also use an ordinary camera bag or backpack to place your camera gear into, so it warms up slowly when going from the freezing cold into a warm building or vehicle. Otherwise there’s a chance that condensation will form on the lens and possibly inside the camera.
We know photographers who will leave their gear outside in a dry bag when they’re certain it’s going to be safe and secure—rather than bringing it in and out of the cold. If you do this, you may want to take the media card(s) out of the camera so you can download your photos and videos in the interim.
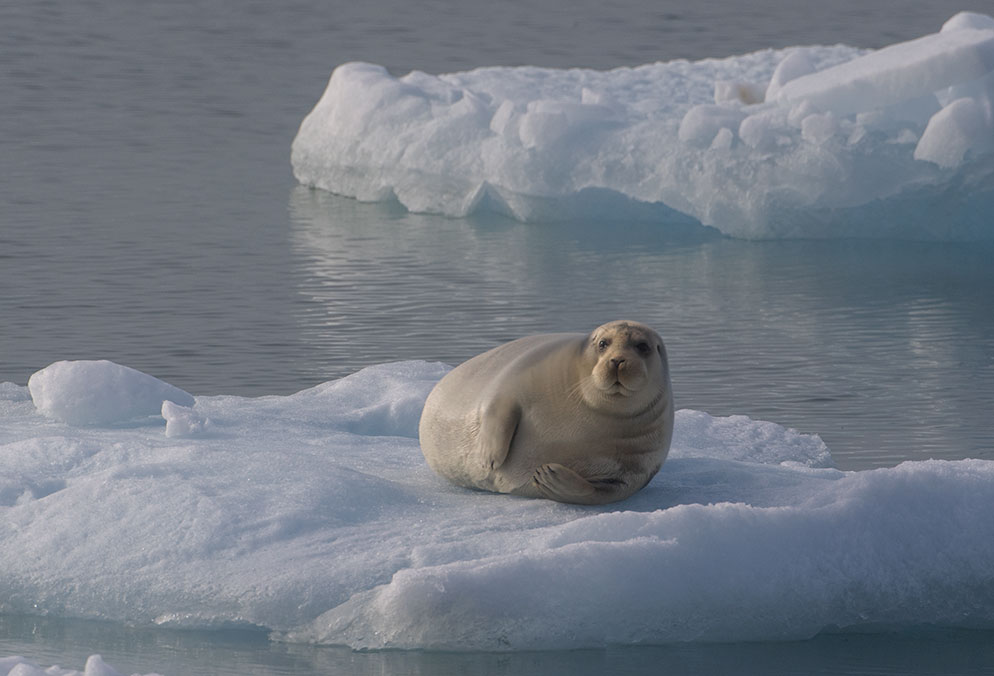
A lone seal rests on the ice.
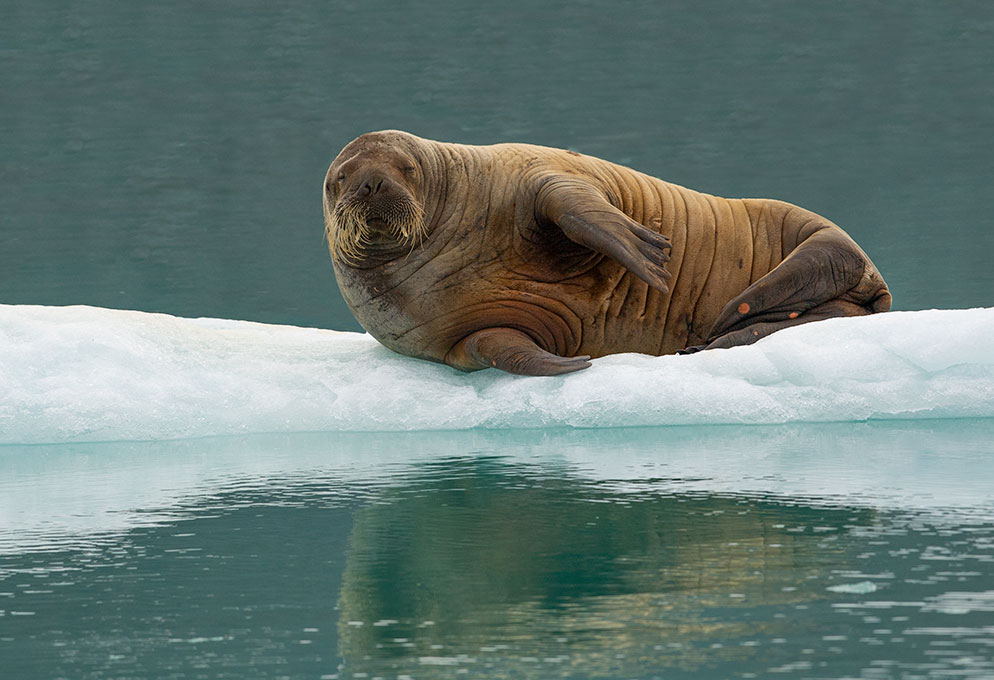
A lone walrus lounges on the ice.
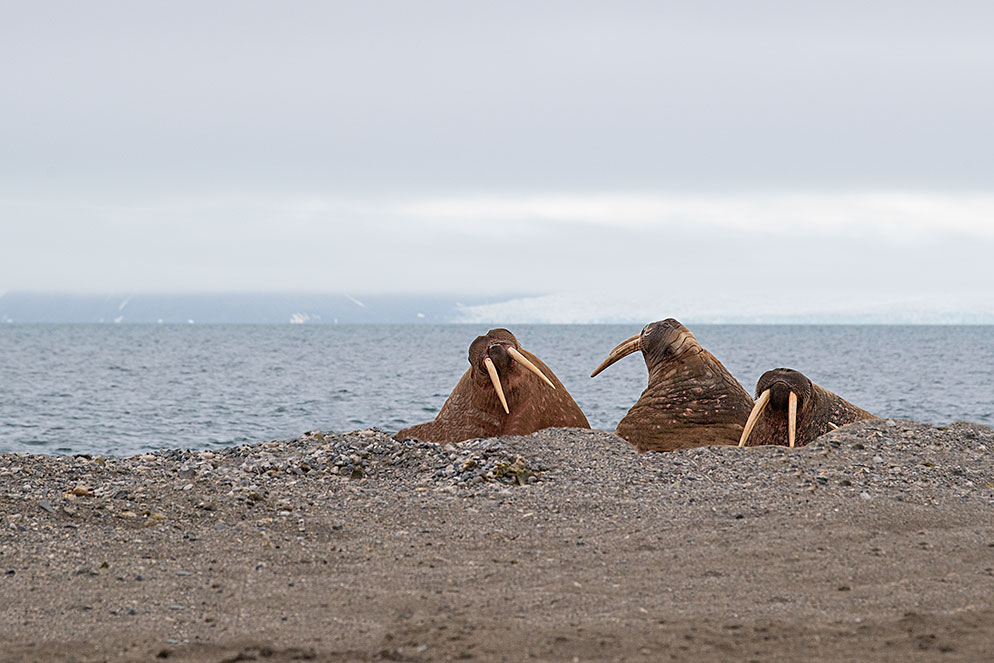
A trio of walruses lounge on the beach.


