How to Photograph Hummingbirds
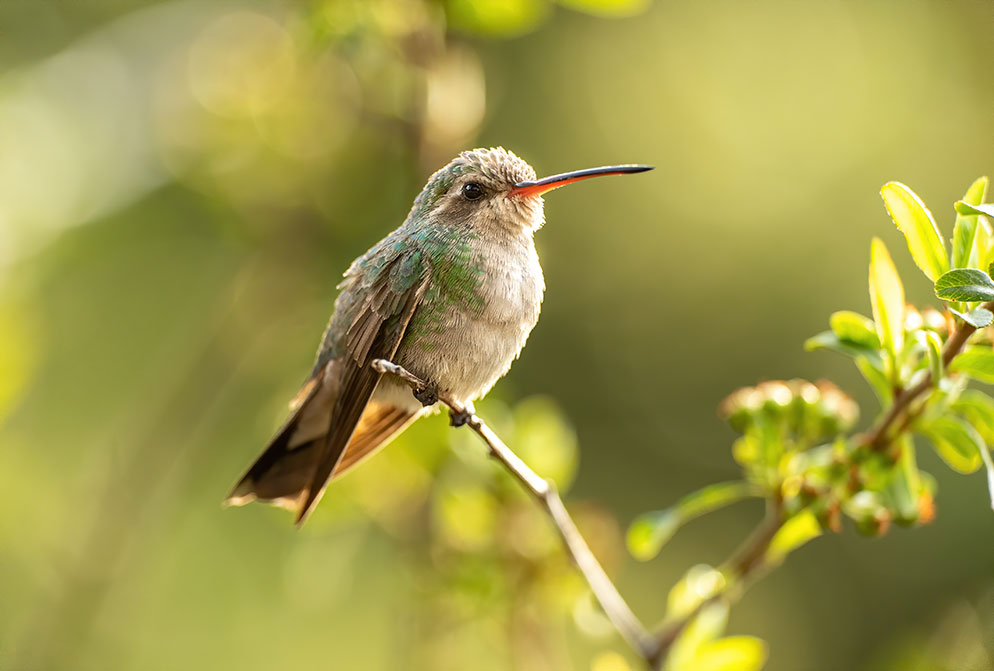
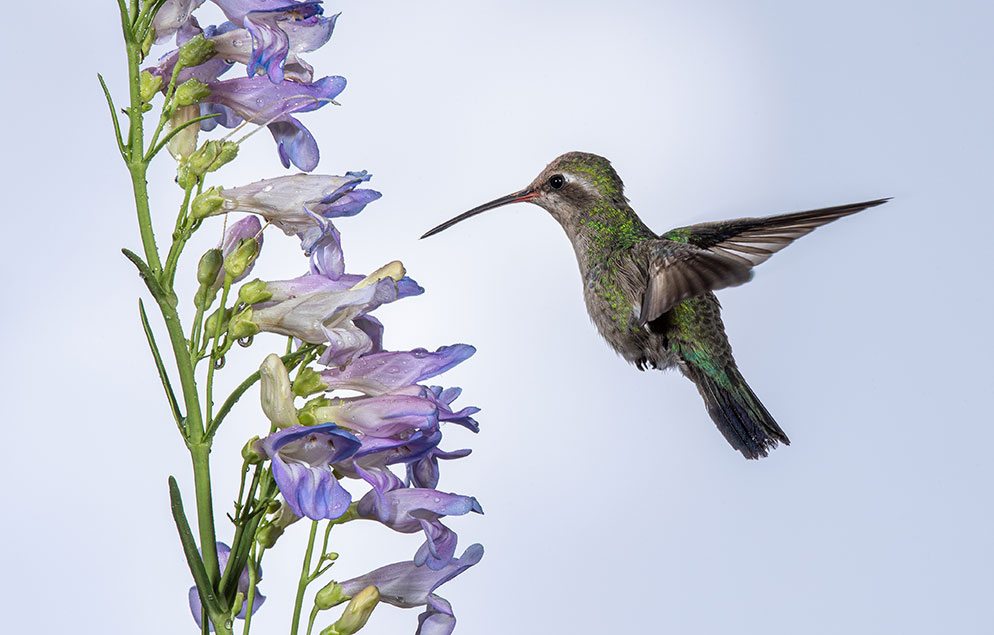
Female broad-billed hummingbird in available light. D6, AF-S NIKKOR 600mm f/4E FL ED VR, 1/2000 sec., f/4, ISO 2800, manual exposure, Matrix metering.
I’m sitting in a camp chair with my face pressed against my D6. A cacophony of bird calls permeates the air. The action has been so constant I’ve barely moved in hours. An incessant buzzing and whirling noise drifts through the air. I am determined to get a perfect shot of my subject, a broad-billed hummingbird. Luckily for me hummingbirds are swarming the feeder, frantically sipping sugar water.
This scene might sound like a photo shoot in a remote tropical jungle, but this is occurring near Tucson, Arizona. I’m in Madera Canyon, a bird watching hotspot, and I’ve come here to photograph hummingbirds.
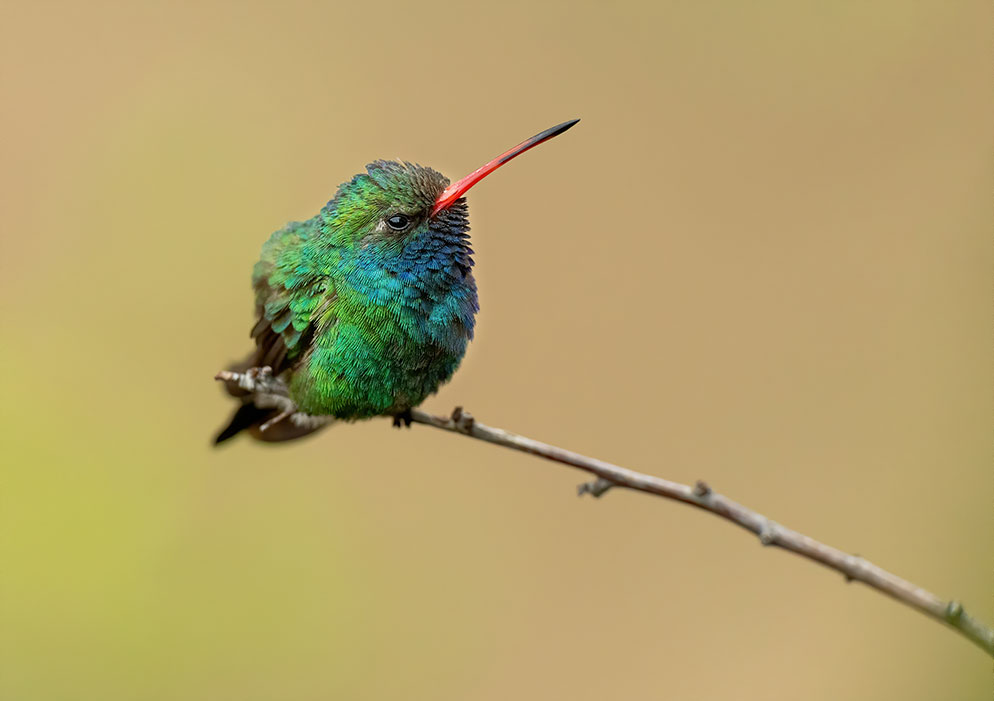
Male broad-billed hummingbird in available light. D6, AF-S NIKKOR 600mm f/4E FL ED VR, 1/640 sec., f/4.5, ISO 3600, manual exposure, Matrix metering.
Basic Equipment for Photographing Hummingbirds
First, what lens do you need? Hummingbirds are very tolerant of humans, and you can get close without disturbing them. A 300mm lens is generally long enough for close-up images of hummingbirds. Often the real question isn’t how long your telephoto lens is, but what is the minimum focus distance of your lens. My 180-400mm w/1.4x lens (AF-S NIKKOR 180-400mm f/4E TC1.4 FL ED VR) can focus as close as 6.6 feet, plenty close for hummingbirds. See how close you can focus on a flower, and then just imagine a tiny hummingbird sipping nectar in the frame.
A fast frame rate is important for wildlife photography, and the same is true with hummingbirds. Any Nikon body will work, but the faster your frame rate, the more images you can get. I love using my D6 at 14FPS, but I also use my D850 and Z 7II. A tripod is very helpful. You might be sitting in one place for hours waiting for the shot and being able to pre-focus and lock your lens in position is very convenient.
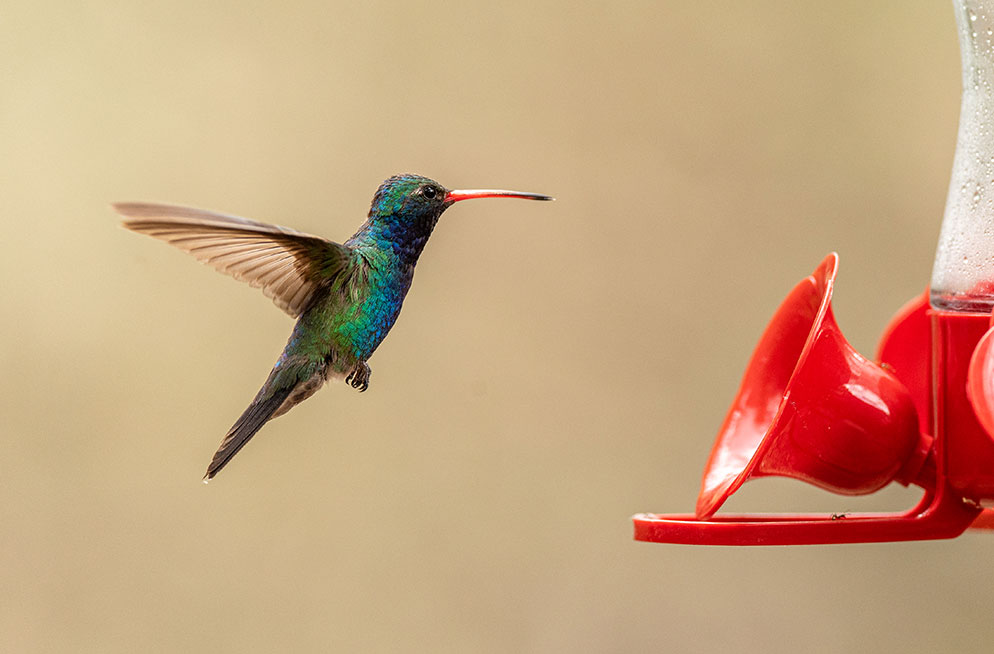
Male broad-billed hummingbird at feeder. D6, AF-S NIKKOR 600mm f/4E FL ED VR, 1/2000 sec., f/4, ISO 1250, manual exposure, Matrix metering.
One more piece of ‘equipment’ will really help your hummingbird photography. Consider setting up a hummingbird feeder in your backyard to attract the birds. Since hummingbirds need to feed constantly, a feeder is very effective at bringing birds to your yard. Pick up a feeder at your local nursery and mix up a solution of one part sugar to four parts water. That’s all they'll need. Place the feeders in your yard near flowers and give the birds time to find them. Once the hummingbirds discover your feeder, you’ll have regular visits from the birds.
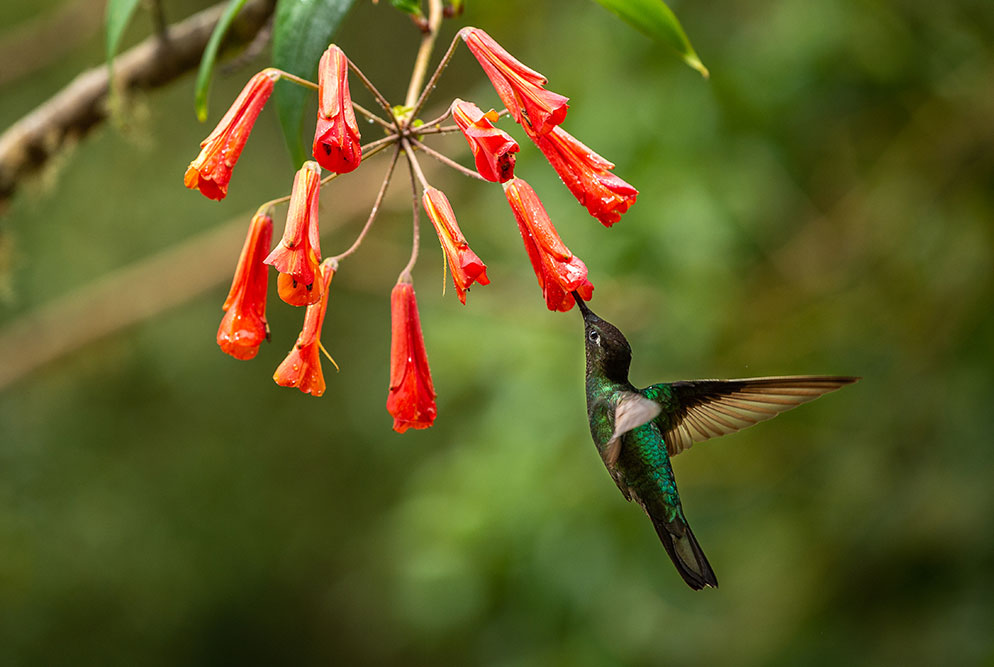
Talamanca hummingbird, photographed in Costa Rica. Df, 70-200 f/4, 180mm focal length, 1/2000 sec., f/5.0, ISO 800, aperture priority, Matrix metering.
Do you want the wings sharp or blurry? There isn’t a right or wrong answer here, only a creative choice.
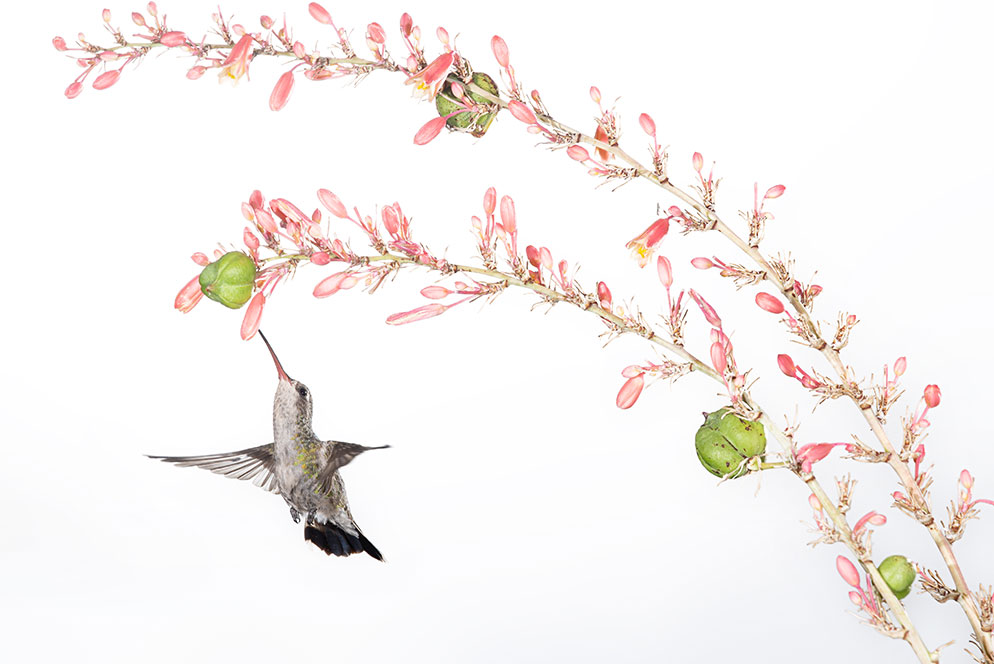
Female broad-billed hummingbird, lit with Speedlights. D6, AF-S NIKKOR 600mm f/4E FL ED VR, 1/200 sec., f/20, ISO 200, manual exposure, Matrix metering.
Helpful Techniques
Before you decide to photograph hummingbirds, there’s one very important question to ask yourself. Do you want the wings sharp or blurry? There isn’t a right or wrong answer here, only a creative choice. Since a hummingbird’s wings are beating 60 beats or more a second, even fast shutter speeds may not entirely freeze the bird’s wings. But if the bird is perched you can easily capture sharp images using slower shutter speeds.
To get started, try this approach. Set your camera to shutter priority, choose 1/250 of a second, ISO 800 (or higher in low light) and let the camera choose your aperture. Set your frame rate to CH mode (fastest setting), metering to Matrix, and focus to single point. Next, pre-focus on the edge of your feeder where the birds will land. It helps to cover the other feeding holes with tape so the bird will come to one perch. Hummingbirds often hover a few inches away from the feeder, so pre-focusing on the tip of the feeder should produce sharp photographs. However, some birds will approach the feeder out of the focus plane, so you may need to focus on the bird as it hovers nearby. Try using Group-area, 3D or a Wide-area AF for these situations. Shooting at 1/250 of a second will freeze the body of the hummingbird, and the wings will have a natural blur. Expect to shoot hundreds of frames for a few keepers.
For a more advanced hummingbird photograph technique, try using manual mode with Auto ISO (this is the technique I use). Using Auto ISO allows you to control both aperture and shutter speed, while your camera chooses the ISO for correct exposure. Go into your camera’s shooting menu to set the highest ISO your camera can use for exposure. On my D6 I set ISO 6400 as the maximum ISO. I really like to photograph wide open using apertures of f/5.6 or wider to render my backgrounds soft. I choose the shutter speed based on how blurry I want the wings to render. I may even choose to photograph at 1/8000 of a second, which will get very close to freezing the hummingbird’s wings in flight. Different species have different wing beat rates, so your results will vary. Patience is important here. Pull up a comfortable chair, set up your tripod, pre-focus and wait. Some photographers like to use a remote to trigger the shutter. This allows you to sit back away from the camera and see the approaching bird, improving your reaction time for the shot.
Female broad-billed hummingbird, lit by flash. D6, AF-S NIKKOR 180-400mm f/4E TC 1.4 FL ED VR, 400mm focal length, 1/200 sec., f/16, ISO 100, manual exposure, Matrix metering.
Photographing Hummingbirds Using Flash
After shooting in available light, you may want to try another technique that will produce sharper hummingbird wings. These images require using flash, but the results are worth the effort. You can use a single flash on-camera to help freeze a hummingbird in flight, but the best results come from using multiple flash units off-camera.
I use 4-6 Speedlights in manual mode at low power settings like 1/16th or lower. Since flash will be the only light source illuminating the hummingbird, flash duration, not shutter speed, will freeze the motion. Low flash power settings have very fast flash durations. The result is the hummingbird wings are frozen in flight. Using my SB-5000 flashes and WR-R10 wireless remote, I can control flash output right in the camera menu.
I set up 2-3 flashes aimed at the front of the hummingbird feeder where the bird will hover. Next, I add another flash aimed at the backside of the bird, creating some highlight separation from the background. Finally, I place a poster board background on an easel and aim two Speedlights at it. This ensures the background and my bird are all getting flash illumination. You can choose any type of background you like. White creates a fine art look, while green backgrounds appear more natural. You’re the artist, choose what you like! Try making a large print of a blurry soft green scene and using that for a natural background.
To eliminate daylight in my photographs, I use manual mode and set exposure to f/16, 1/250 at ISO 100. This ensures only the flash lights my subject. I try to photograph in early morning or on overcast days so the ambient daylight isn’t too bright. If any daylight affects the flash exposure, you’ll get ghosting (blurry edges) on the hummingbird wings. You can only shoot one frame at a time using flash since the flashes need time to recycle. Be patient, and time your shots when the bird is in the perfect position.
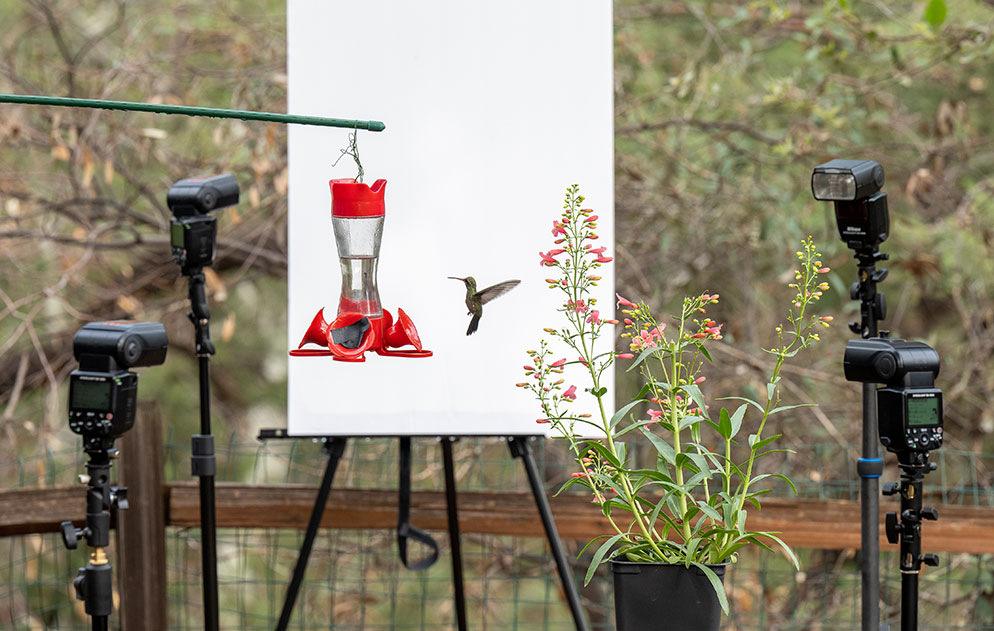
Behind the scenes of Tom’s hummingbird photo shoot, showing the set-up he used which includes the camera and four Speedlight flashes on light stands.
Male broad-billed hummingbird, photographed as a multiple exposure. D6, AF-S NIKKOR 600mm f/4E FL ED VR, 1/200 sec., f/20, ISO 320, manual exposure, Matrix metering.

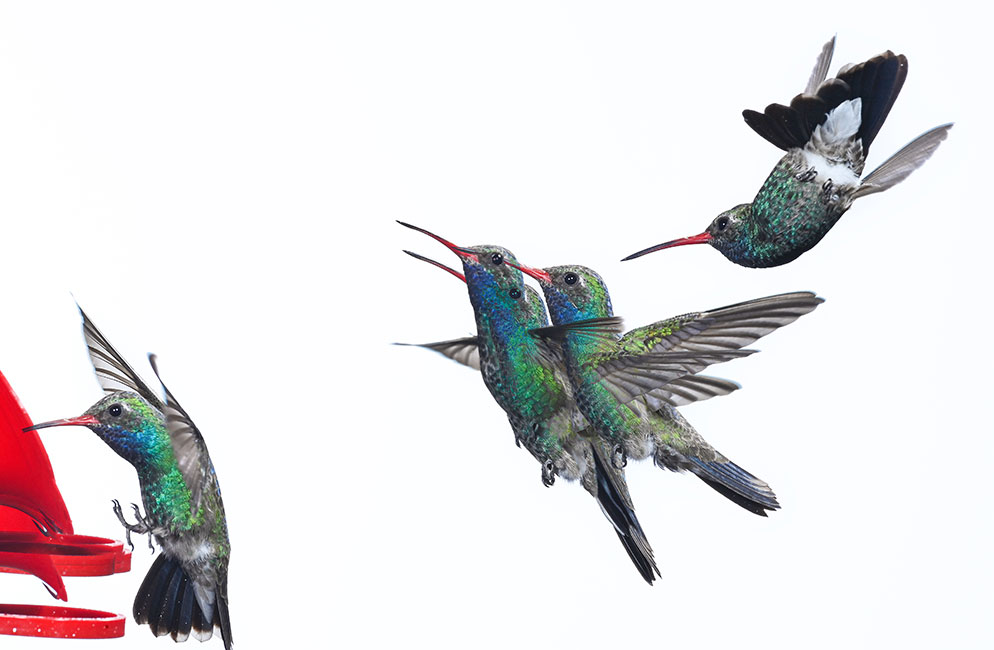
Male and female broad-billed hummingbirds photographed as a multiple exposure. D6, AF-S NIKKOR 600mm f/4E FL ED VR, 1/200 sec., f/20, ISO 200, manual exposure, Matrix metering.
Multiple Exposures of Hummingbirds
If you want to take your hummingbird flash photography to the next level, try using multiple exposure mode. I love using this technique because it captures the beautiful elegance of wing positions in flight.
First, set your up multiple exposure in the shooting menu of your camera. Start with three frames. If you’re shooting on a white background, make sure to set the Overlay mode to Darken to render the images dark enough in the final shot. On my D6 I turn on Keep All Exposures so I save the individual frames as well as the combined image final shot. Set up on a tripod to minimize camera movement between frames. Take your three frames carefully, trying to hit the shutter when the bird is in a different position each time, which gives separation in the final frame. The camera will seamlessly blend the exposures into a perfect multiple exposure photograph.
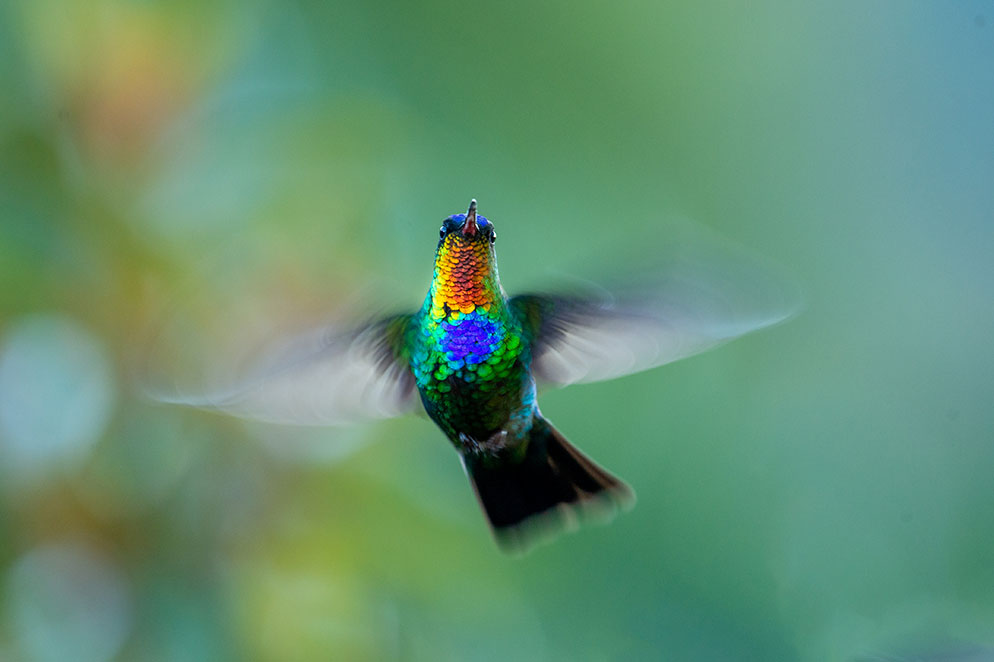
Fiery-throated hummingbird, photographed in Costa Rica. Df, 500mm f/4, 1/160 sec., f/6.3, ISO 1600, aperture priority, Matrix metering.
Hummingbird photography is very rewarding, and something most photographers can do close to home. And rather than hiking through the woods searching for birds, all you need to do is set up a feeder and wait. But get ready, because when you hear the buzz of an approaching hummingbird, you’ll be amazed at these nimble flyers.


