How to Customize the i Menu on the Z 30 Mirrorless Camera
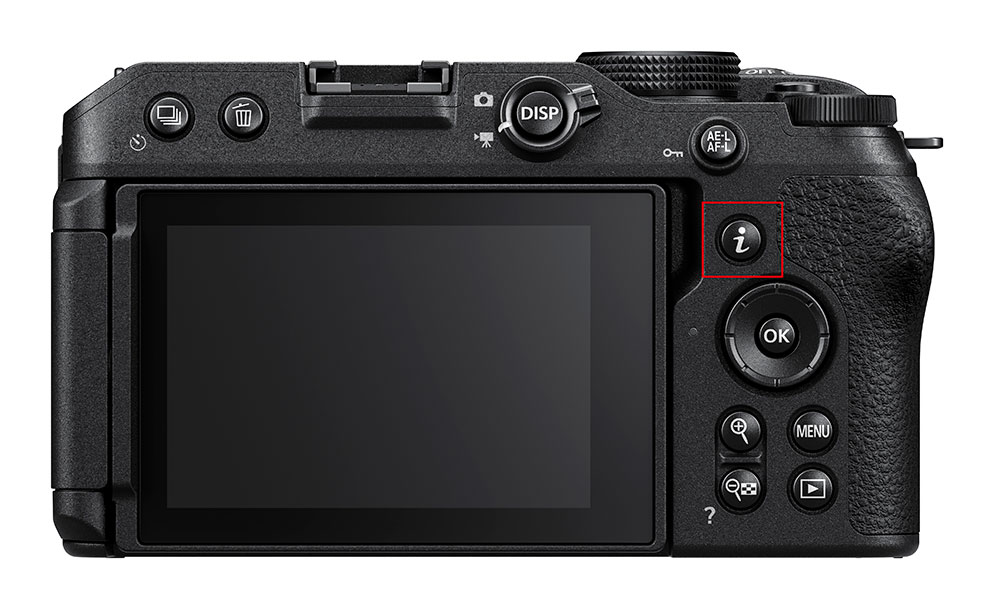
Pressing the i Menu button brings up the i Menu on the LCD screen. When in photo mode, the photo settings are visible, when in movie mode, movie settings are visible.
When you first pick up a camera, it may seem overwhelming with so many buttons, menus, screens and options. But there’s a shortcut system built into the Nikon Z 30 that you can configure to include those features you use most. You won’t need to dive through menus looking for the settings you need often, simply add the features to the i Menu and with the press of the i button, they jump onto the screen. Ready for you to make needed adjustments and get back to recording videos or taking pictures.
The “i” menu can be accessed from either the physical “i” button on the rear of the camera body or via the touch screen LCD. Nikon preloads 12 most used video settings and 12 most used photography settings in the camera, but you can further customize that if you find there are items in the i menu that you don’t use much.
The great thing about the i menu is that you can customize each position with one of 34 different options in the stills menu or choose from 22 different items in the movie menu.
To change out the options for features that are accessible in the i Menu, just navigate to the custom settings menu. Its represented by a pencil on the main menu screen. Then select G1 to customize the i Menu for video or F1 to customize the i Menu for photography.
Using the i Menu in the Z 30 Mirrorless Camera - Watch the video to see exactly how to set up the i Menu on your Z 30.
Customizing the i Menu
For Video:
Press the menu button.
Go to the CUSTOM SETTING MENU tab.
Go to section G for Movie.
The first option is G1 for Customize “i” menu.
When you select this option, you’ll see the current 12 boxes in your “i” menu for the Movie mode.
Select the box you want to adjust.
Then scroll down until you find a feature you want to add to the I menu.
Select it and the box changes icons.
For Photography:
Press the menu button.
Go to the CUSTOM SETTING MENU tab.
Go to section F for Photography Controls.
The first option is F1 for Customize “i” menu.
When you select this option, you’ll see the current 12 boxes in your “i” menu for the Photography mode.
Select the box you want to adjust.
Then scroll down until you find a feature you want to add to the i menu.
Select it and the box changes icons.
Explore the various options and customize the menu to fit your personal shooting style based on the settings you use most. And if after time you find you aren’t using one of the items you’ve placed in the i Menu, you can replace it with something that’s more useful. How’s that for convenience!


