Video Primer for Still Photographers
What still shooters need to know when taking the leap into video capture with Nikon Mirrorless Cameras
Throughout my career, I’ve been extremely fortunate to cover many fascinating once-in-a-lifetime moments. But as I take time to look back and reflect upon my images, I seem to have one common regret and that is having not taken just a few minutes to capture video. Don’t get me wrong, still imagery is incredibly important, rewarding and a key role in the foundation of visual storytelling. Although as technology expands, my eyes have been opened to just how powerful video is within the world of storytelling. Whether you’re a still photographer looking to incorporate video into your workflow, or picking up a camera for the first time, here are 10 of my favorite tips to help you get going in the world of video using the Nikon Z series mirrorless camera system.
1: Choosing a video file type & video quality
What is probably one of the more intimidating parts of videography, really shouldn’t be. Sure, when you open the Video file type menu, it might be overwhelming, but let’s break down file types to build a better understanding of what your choice should be. For this article I'll be talking about features and setting options that are in the Z 8 and Z 9 mirrorless cameras—checking your camera's user's manual, you'll be able to see what options you're able to use.
To start, for those familiar with shooting stills, think of video as compressed or uncompressed files. Anything compressed is going to have limitations on editing, be smaller in file size, but easier to share quickly. Files that are uncompressed are going to require post-processing in third-party software like Davinci, Adobe Premiere Pro, or Final Cut before being published, and will be larger in file size.
Compressed video file formats:
H.265 10 & 8-bit (MOV): H.265 is a newer format than H.264 with about 50% better compression while maintaining better quality level, and a smaller file size. This format is ideal for 4K & 8K video, but with limited editing capabilities. The files may also have issues working in older editing software programs and may be slower to playback on older computers. When shooting in 10-bit, you’ll have more grading capability, although not as much as you would in a RAW format.
H.264 8-bit (MP4): A file format that has been around for quite some time and is less efficient while having larger file sizes than H.265. This format also shows artifacting quicker in the grading process. It is a more compatible format though and requires less processing power if you’re using an older computer.
ProRes 422 HQ 10-bit (MOV): While visually lossless, it is not technically RAW. It is a compressed video file that is already “developed” from the data. 10-bit color, so still workable but not as much as 12-bit. Although due to the compression, it is quicker to work with than a RAW file type. If you’re looking to shoot in a compressed format, while maintaining the best options for post-production, this would be my choice.
Uncompressed Video File Formats:
N-RAW 12-bit (NEV): Nikon’s proprietary raw video format. It is approximately 50-60% smaller in file size than ProRes RAW. It unlocks all features in regards to frame rates and resolution (8.3K 60fps / 4.1K 120fps / 6K 60p). Some of these options are not available in any other format besides N-RAW. Stored as 12-bit color, so lots of wiggle room when it comes to grading in post. Like any RAW format, you will have the ability to non-destructively adjust exposure, white balance, shadows, highlights and more in post-production.
ProRes RAW HQ 12-bit (MOV): This is another option to shoot in RAW and have full access to the data in post-processing. ProRes RAW is a much larger file size than Nikon N-RAW and only supports up to 4.1K / 60fps shooting. As a RAW shooter, I always find myself utilizing N-RAW to access the fullest capabilities of my Nikon mirrorless cameras.
Another option you may see while setting up your file formats, are the options for SDR / HLG / N-LOG. I’ll quickly explain these as they will tie into your file format choice:
SDR (Standard Dynamic Range): Basically a “get what you get” out of the camera format. There is little room for editing in regards to color, shadow/highlight recovery and such. A good option to quickly deliver a clip but with no real editing functionality.
HDR (Hybrid-Log Gamma): A high-dynamic range video where you may see more highlight and shadow detail and a bit more color than SDR. Still not as flexible as N-Log when it comes to post-processing.
N-Log (Nikon-Log Gamma): Nikon’s logarithmic gamma curve that results in capturing a flat profile, allowing you to post-process with access to maximum dynamic range. N-Log in combination with N-RAW is my go-to choice.
...don’t stress too much, have fun, shoot a few clips here and there, review your footage, and grow!
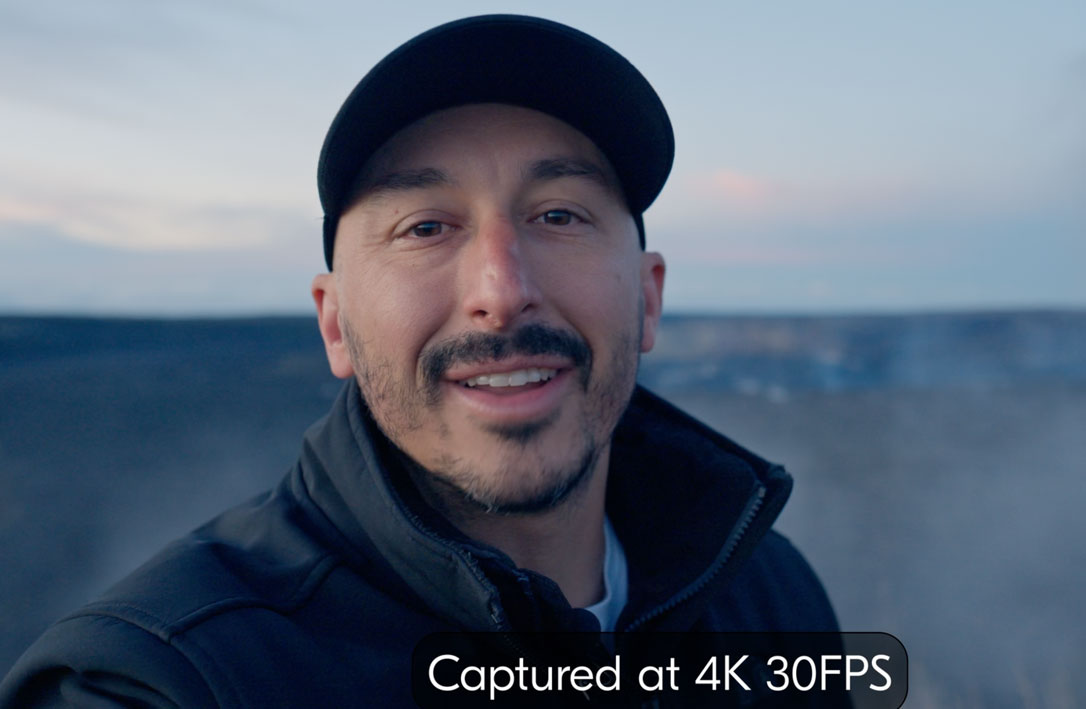
2: 1080p vs. 4K vs 6K vs 8K – When and Why?
Alrighty, deep breath! I know that was a lot, but it gets easier from here! Let’s talk about frame size and frame rate. First off, frame size. The words 1080p, 4K, 6K & 8K probably sound very familiar to you, but which resolution should you be shooting in? Well, in my mind, it really depends upon two factors: what your final product is going to be used for and do you need to crop in post-production?
Just for starters, it’s quite handy to know what the dimensions are for each resolution:
1080P = 1920 x 1080
4K = 3840 x 2160
6K = 6144 x 3160
8K = 7680 x 4320
Now when you go through the settings on your Nikon mirrorless camera’s frame rate menu, you may notice that these numbers slightly differ, and that’s due to sensor design and crop factors, but the numbers above allow you to select your option to be in the ballpark of a certain resolution.
So now which resolution to go with? First, let’s say we don’t need any cropping or zooming in in post-processing. If I’m shooting strictly for social media like Instagram or TikTok, 1080p will get the job done. If I’m shooting for YouTube, Vimeo, or a client, 4K will be my choice. 6K and 8K are incredibly dense resolutions, and may be overkill for most work, unless (insert suspenseful music), you need to crop or zoom in after shooting. This touches on my second thought for factors to consider when setting up your camera. For example, when I’m documenting wildlife, and my 600mm f/4 isn’t quite reaching the scene I want, I’ll switch to 8K and then have double the resolution to zoom into afterwards while still achieving a 4K final output. Just a note, 8K will create quite large file sizes that you will need to be prepared for with regards to memory card and hard drive storage. So, unless I have a dire need for that size of resolution, I’m mostly recording in 4K.
3: Understanding Frame Rates (frames per second)
Choosing a frame rate to record at plays an important role in how your footage will be perceived by the viewer. The higher the frame rate, the smoother the motion between frames. Let’s take a quick look at the four most common frame rates available on your Nikon mirrorless camera.
24fps: this is the “cinematic” standard for most films and provides a slight motion blur feeling that seems natural to the human eye.
30fps: slightly smoother than 24fps, and what most people utilize for television and live streams.
60fps: a very smooth motion, that most consider semi-slow motion. Can be useful for capturing high action scenes like wildlife and sports.
120fps and above: typically used for slow motion to capture extreme detail, emotion, and energy.
Here are a couple examples of how I use various fps settings.
24 & 30fps: B-roll while walking through a scene, vlogging to the camera, or doing an interview.
60fps: Slowing down an erupting volcano that has high energy to reveal details in the lava.
120fps: Capturing a grizzly bear attempting to scare off a raven from stealing its food—you see the claw slowly swinging through the air as the dust kicks up.
180-degree rule
A quick note, it’s a good practice after you’ve selected a frame rate to keep your shutter speed double what the fps are. This is known as the 180-degree rule. For example, if I’m shooting 24fps, I’ll aim to have my shutter speed around 1/50s. If I’m shooting 120fps, I’ll aim for a shutter speed of 1/250s. Utilizing this technique helps achieve a natural looking motion blur.
4: Utilizing filters for video
As mentioned previously, you want to keep your shutter speed set at double your frame rate. This can be quite difficult if you’re shooting in bright daylight or utilizing a small aperture for depth-of-field. In order to achieve the desired shutter speed that I want, I always travel with a variable neutral density filter that allows me to cut out anywhere from three-to-ten stops of light. By doing so, I can reach shutter speeds of 1/60s or so and with an aperture of f/2.0 if I wanted to.
5: Focus modes
Unless you plan on manually focusing during filming, getting familiarized with Nikon’s focus modes is beneficial. Nikon offers three different focus modes, each with its own purpose and use.
Autofocus Single (AF-S): You’ll want to utilize AF-S when you have a subject that isn’t moving. For example, while photographing Half Dome in Yosemite. Half Dome has been there for millennia, trust me, it’s not going anywhere, so AF-S is a good choice to establish tack sharp focus and then know you don’t need to refocus afterwards unless you move your camera.
Autofocus Continuous (AF-C): This mode will continuously focus on the subject as long as the subject is moving through the frame. If the subject stops moving, so does the focus. A great choice for wildlife, sports or anything action.
Autofocus Full-time (AF-F): Whether the subject is moving or not, AF-F will always continuously adjust focus. I utilize AF-F when I’m vlogging or doing interviews. This mode is a bit smoother in its focusing transitions than AF-C, which is a bit “snappier” from my experience.
Also take note that within your focus mode selections, you have a secondary option of utilizing one of Nikon’s many “subject detection” options. These can include birds, people, wildlife, vehicles and aircraft.
6: Histogram & Waveform
If you’re coming from a photography background, the word histogram shouldn’t be anything new, but waveform…what is that? Let’s discuss. First off, the histogram. This is a fantastic tool that allows you to visualize how brightness is being distributed to your image and to make sure you aren’t clipping your data. The right side of the graph represents your highlights, or the brightest tones and the left side of the graph represents your shadows, or the darkest values. The area between is your midtones. With the histogram, you want to make sure you aren’t pushing the data too far left or right, which results in underexposed or overexposed tones respectively. The graph can be utilized in video shooting as well to help you maintain a proper exposure. To make sure you have either histogram or waveform enabled on your camera body, go into your Custom Settings Menu and select Brightness information display. Here you can choose which tool you’d like to use.
Now for waveform. This display allows you to once again see the luminance values within your scene, but unlike a histogram which focuses on the distribution throughout your entire image, waveform shows detailed exposure from shadows to highlights in a frame-by-frame or horizontal distribution context. This allows you to see exactly where in your frame a certain luminance value may be too bright or too dark. I prefer using waveform display over histogram because of this. I’m able to see exactly where in my frame my over or underexposure may be occurring, and to adjust accordingly. It does take some getting used to though!
Compare the difference in the way the histogram looks vs. the waveform in showing exposure while filming.
7: Hi-Res Zoom Functionality
On select Z series mirrorless camera bodies, you have the option to enable this feature when in need of a bit more reach—and its only available in certain frame rates/frame sizes. For example, if your NIKKOR Z 70-200mm f/2.8 VR S lens just doesn't quite get you to that perfect frame, you can enable Hi-Res Zoom to simulate a longer lens. Using software and advanced image processing, the days of “being just out of reach” are no more. Once activating Hi-res Zoom, you can use the thumbstick toggles to zoom-in (push right) or out (push left) to perfect your frame. There are limitations though on how far you can zoom, so don’t expect your 70-200mm to become a 600mm.
Hi-Res Zoom in action. Note that Hi-Res Zoom is only available in certain frame sizes/frame rates.
8: Recording Audio
If you’re wanting high-quality audio to go along with your incredible video footage, I recommend utilizing an external microphone attached to your camera body. These can easily mount on your camera’s hot shoe, or if you invest in a cage for your camera, onto that. Whether a shotgun microphone or lavalier, these can plug directly into the microphone port of your camera and record simultaneously with your video content, so no synchronization will be needed in post. You can also keep a keen eye on your audio levels through Nikon’s audio level meter which is displayed on the LCD, and you can also plug-in headphones through the headphone port to monitor audio while in the field.
Audio captured with an external shotgun mic.
9: Utilizing a Gimbal or Tripod Head
When it comes to shooting video versus stills, there is definitely a lack of forgiveness for a shaky shot. Now I know what you’re saying, “But Mike, ever see the [insert movie reference here]?!” Sure, there are definitely shots that require a shaky scene, but most of us want to walk away with something that doesn’t quite require nausea medicine to watch. With that being said, I highly recommend investing into one or two pieces of gear to help you create the best video content possible.
Gimbal: If you plan on creating vlogs or want any sort of video footage where you’re filming while moving (think about possible filming out the window of a moving car, or a selfie while walking and talking), a gimbal of some sort will provide great stability and ease of use. With the light weight of the Z8, Z6III and other mirrorless bodies, gimbals can easily handle holding these cameras in a stable and controlled manner. Take note though, that shorter focal length lenses are better used with gimbals than longer ones.
Tripod Video Head: If you plan on shooting in a more static environment, a good tripod video head will provide the ability to pan, tilt and record nice stable footage, even with long lenses.
10: Framing & Shot Duration
Finally, one of the more important tips that I feel I can share with you all is the following. First off, make sure you have the frame you want before you wrap a shot. There are plenty of scenes afterwards that I wish I had tweaked just a little bit! This may be in the overall composition, the focus, or the leveling. Luckily Nikon camera bodies have focus peaking and a built-in level [it’s called Virtual Horizon] to help manage these refinements.
Secondly, and I can’t emphasize this enough, if you’re not shooting a scripted scene, shoot longer than you feel you need! If you want 30 minutes of footage, shoot 45 minutes, if you want a minute of footage, shoot a minute-and-a-half. When it comes down to it, it’s better to have a tad more of a scene, than not enough.

Mike Mezeul II is a photographer and photojournalist addicted to storytelling and adventure. He's photographed landscapes, professional sports, natural disasters, concerts, air-to-air aerial photography and more.
More articles by this contributor


