Shooting Spectacular Sunrises and Sunsets


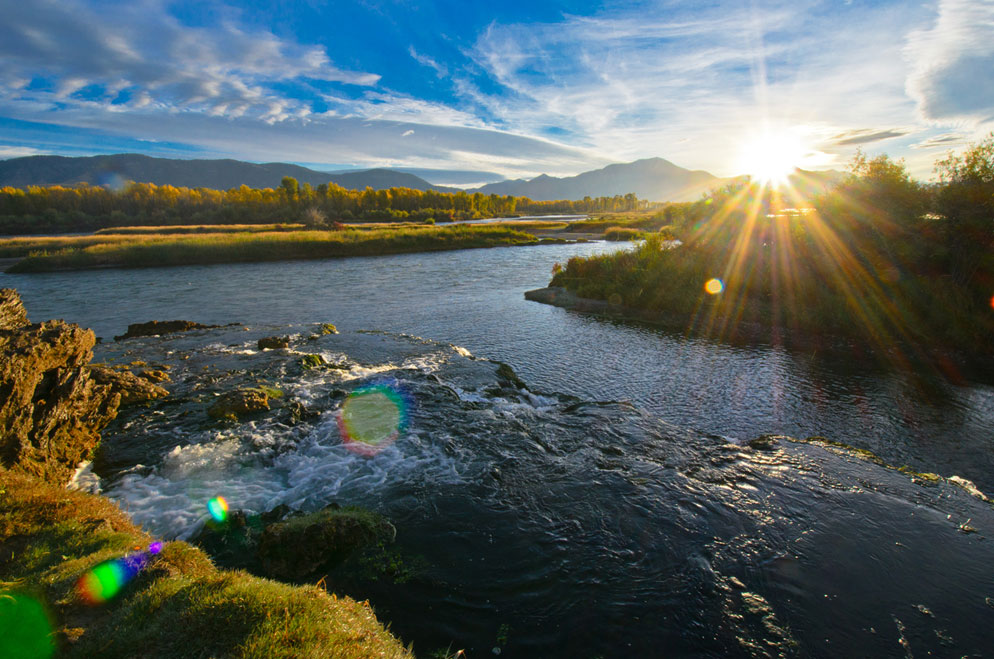
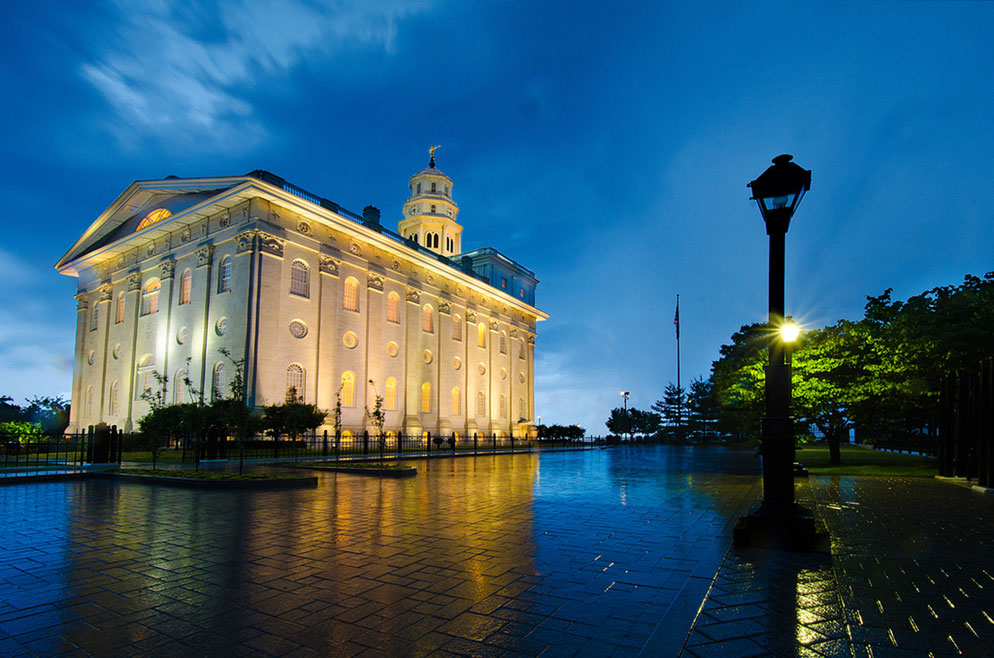
D7000, AF-S DX Zoom-NIKKOR 10-24mm f/3.5-4.5G ED, one second, f/18, ISO 200, aperture priority, Matrix metering
There are two ways to think about sunset images: see the sun in the picture or see the effect of the sun in the picture. Both types of photographs are okay with photographer and photo instructor Jim Harmer, but he'll tell you that the latter requires that you spend a little more time on the scene.
"Don't take a shot or two of the sun going down and think you've got it," Jim says. "I used to live in Florida, and I'd see tourists line up on the beach ready to take a sunset photo, and as soon as the sun dipped below the horizon, they'd vanish; the beach would be empty."
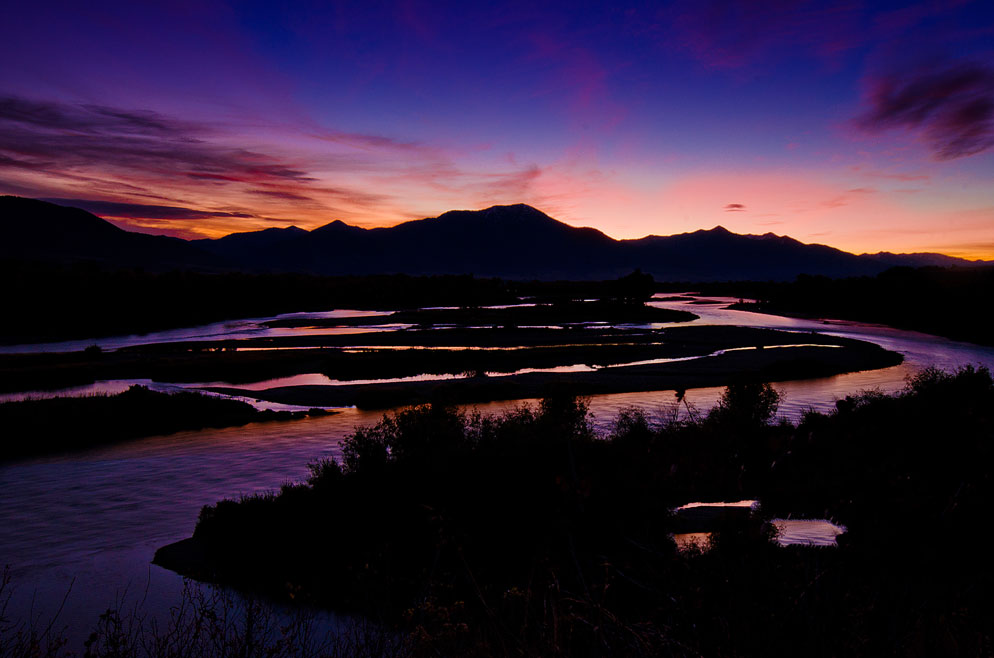
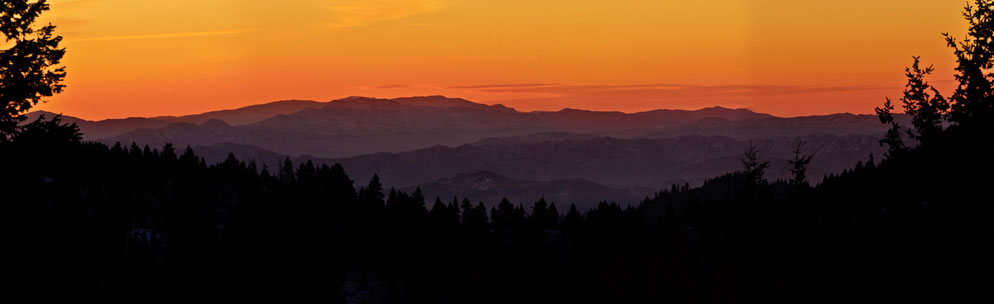
It's not that Jim doesn't like having the sun in the photograph, it's that he knows the most vibrant colors usually appear after the sun's gone from view. "The sky will calm down after the sun sets, and then, all of a sudden, it will light back up with the most amazing colors. You'll get photos with a lot more mood because they're almost night photos. That's my favorite time to shoot—about 15 to 20 minutes after the sun's gone."
Jim began photographing sunsets because of the disparity between what he saw in the sky and what he viewed on the screen.
"There'd be a beautiful sunset the night before and everyone on Facebook posted their cell phone pictures of it. I saw the photos and thought, that was an incredible sunset, but these pictures don't even come close. So I sort of set out to look at every website I could and find out what makes a great sunset picture. Little by little I found out what works and what doesn't."
First he found that while the colors in the sky are the obvious attraction for most people, what drew him was a sense of urgency and excitement. "It's that the light changes so quickly. I arrive to shoot a sunset and have maybe 20 minutes to make something happen, and from one minute to the next the photo can be dramatically different because of the way the light reflects off different things and how its intensity changes. You have to react quickly—this is not landscape photography where you sit around all day."
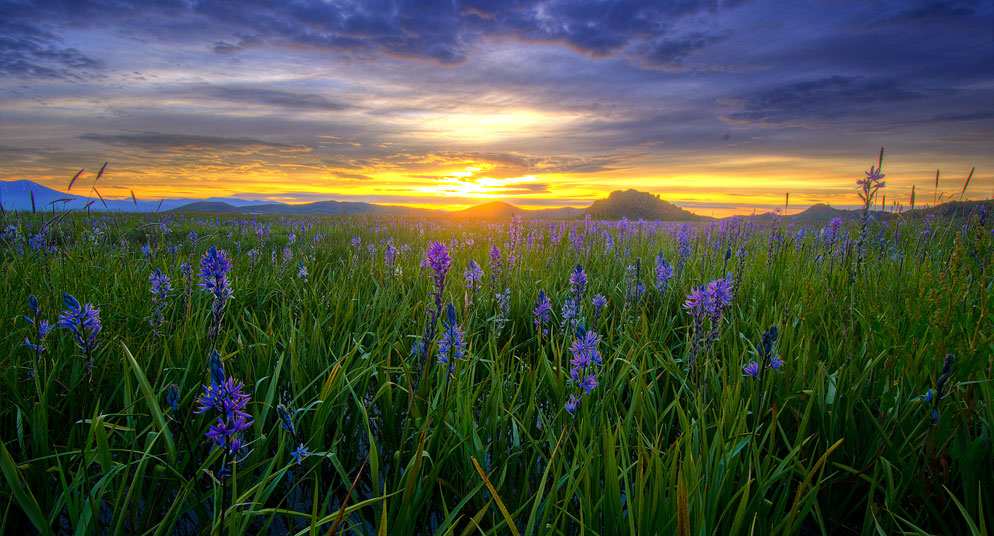
Then he found that to produce really effective, dramatic sunset images, he needed more than just the sunset. He needed shapes, shadows, details, textures. He needed other subjects.
"The sky will calm down after the sun sets, and then, all of a sudden, it will light back up with the most amazing colors. You'll get photos with a lot more mood because they're almost night photos. That's my favorite time to shoot—about 15 to 20 minutes after the sun's gone."
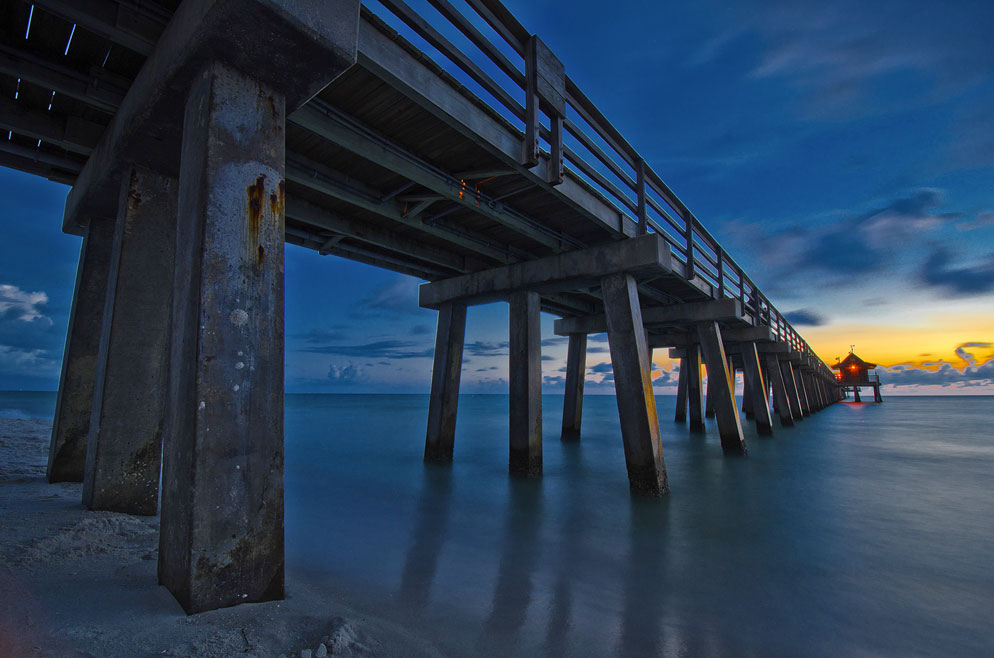
D7000, AF-S NIKKOR 70-200mm f/2.8G ED VR II, 1/200 second, f/11, ISO 400, manual exposure, Matrix metering
"I'll go out to shoot a sunset, and it'll be a beautiful sunset, and when I come home my wife will say, 'That was a great sunset, you must have gotten some great pictures.' And I'll say, 'I didn't even take out the camera.' And that's because I didn't find the right thing to put in the foreground. It doesn't matter what's happening in the sky—if I don't have something happening on the land or in the water as well, it's just going to be a snapshot."
What he's looking for is...well, almost anything. A pier, a farmhouse, rocks, flowers—"anything I would have taken a picture of anyway. That's the most important thing I do to make pictures: find a really cool rock formation, a barn, even weeds on the prairie that'll be blowing in the wind. I see that and I think, it'll be even better with a sunset behind it."
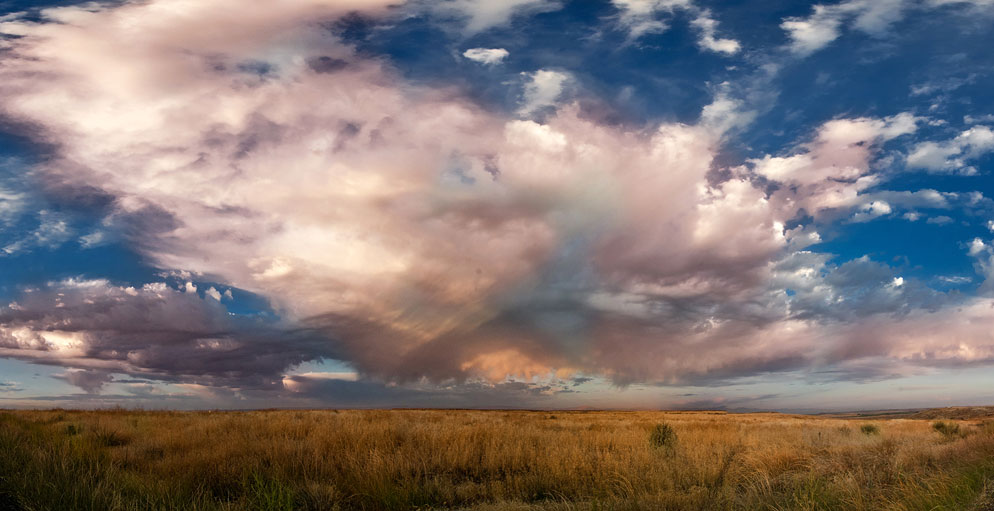
Then he found the indicator of a promising sunset. "It's all about the clouds. The sun will set the same way every night, but you've got to look for the right clouds. I'll come outside and see the clouds a couple of hours before sunset and I think, okay, cancel whatever's on for tonight, I'm going to shoot the sunset. What I'm looking for are high, spotty clouds with lots of space between them. The pattern of those clouds will dictate how the light's going to come through, and each one of those separate clouds will grab a little bit of light and color. A sheet of clouds? Not good for photography."
The rest is timing and technique.
"You kind of get used to knowing where and when the sun's going to set," Jim says. When he lived in Florida it was easy enough to know the vantage points because the land was flat. Now he lives in Idaho, and that's a different story. "Knowing the where and when of sunset is really tough because there are mountains everywhere," he says. "The sun might actually disappear long before the official sunset time because while it's still technically above the horizon, there are mountains between me and the [setting sun]. So the official time for sunset is more or less a guideline. If you can expect a clear view, look up the sunset time online, but if buildings or mountains are going to come into play, be ready to adjust."
Time to Get Creative
For Jim, technique starts with a tripod. "I often like really long exposures, so if I were hand holding the camera I wouldn't be able to use creative shutter speeds."
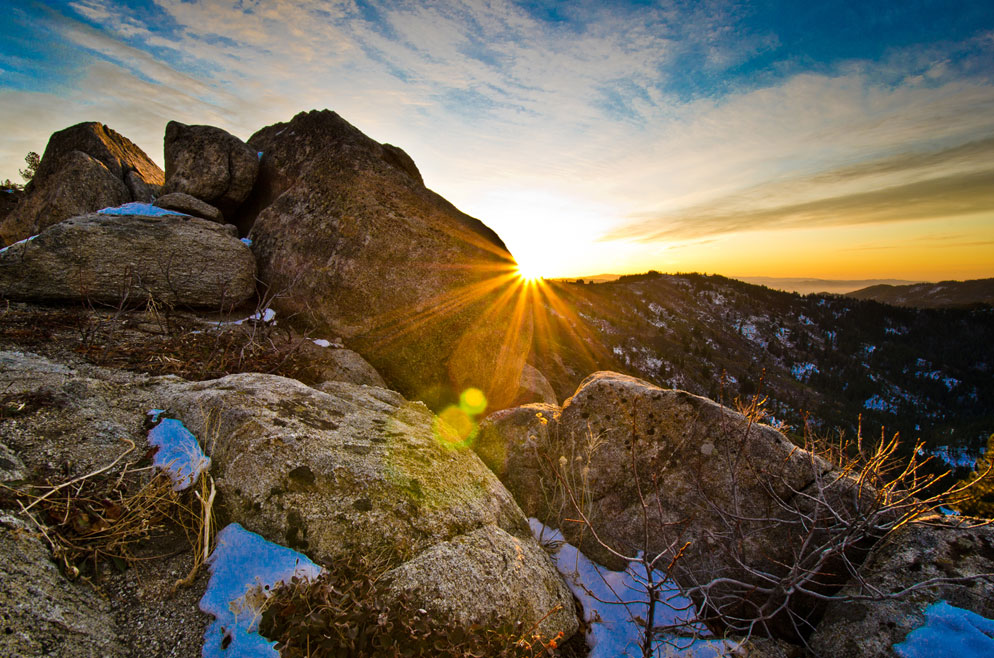
Creative shutter speeds? "There's so much more you can do with shutter speed than just get the right exposure," Jim says. "You'll get the rippling of water in a scene when you use a slow shutter speed, and a major part of the story of that image will be your capture of that little bit of movement, that texture. If you shoot at 1/200 second you don't capture any of that." What Jim will do is set the camera for aperture priority, then choose a small aperture—say, f/16, f/18 or f/22—to force a slow shutter speed.
Exposure can be tricky—after all, you're shooting into the sun, and although your camera's meter is going to do the best it can, it can often fool you. "When the sun's in the picture, it's always going to cause the camera to underexpose," Jim says. "The sun is so bright that you'll get a silhouette of whatever is in the foreground." If a silhouette is what he's looking for, he'll set the camera for aperture priority and let the meter do its thing. Also, he says, "it's nice to shoot in aperture priority when the sun's still up because the light is changing so fast. If I were shooting in manual, I'd be changing settings every 30 seconds or so. I like aperture priority especially when I'm moving around a lot, trying to find the right composition. I'll look at the image on the LCD from time to time, and if it's too dark, if I don't want a silhouette, I'll crank in some exposure compensation.
"But once the sun goes down, I like to shoot in manual. When it gets too dark, there often isn't quite enough information for the camera to read, so when the sun's below the horizon, that's when I switch to manual mode."
To verify that his manual choices are working, he'll check not only the image on camera's LCD but the histogram as well. "It's kind of a necessity with sunsets—you're looking into the bright sun, there can be reflections off water. You can't really tell what's going on in the picture unless you view the histogram."

D7000, AF-S DX Zoom-NIKKOR 10-24mm f/3.5-4.5G ED, 1/30 second, f/18, ISO 100, manual exposure, Matrix metering
The histogram is essentially a graphic representation of the range of tones in a photo. It's an instant analysis of the picture you've just taken, and in a sunset shot it'll tell you if you're overexposing and ending up with burned-out highlights due to the sun's strength. Simply look for highlight clipping—that is, a heavy concentration of jagged peaks on the right side of the histogram.
Jim has found that if the sun's in the picture, chances are some of the highlights will be clipped, but in many cases that's going to be okay. "What you look for is that most of the data is in the picture; most of it can't be clipped off."
Jim always allows for some after-capture adjustments by shooting RAW files. "You have to shoot in RAW with sunsets because they're so tricky. You want all the unprocessed information the camera has captured if you want to get a keeper." Most of his image manipulation involves a simple contrast boost. "I often get a flat-looking image in the RAW file, so I add some contrast."
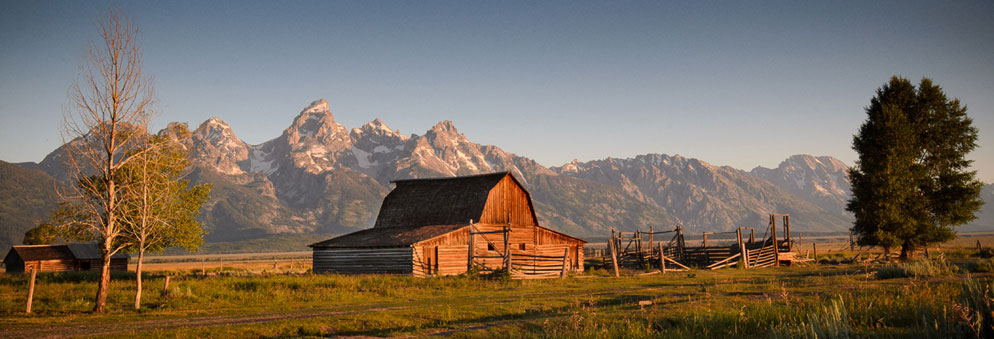
Finally, because the sun also rises (several of the images shown here are early morning shots), we wondered if there are significant differences between shooting early and late. "Maybe scientifically, in the sense that sunsets are a little more vibrant because of the dust that's kicked up during the day," Jim says, "but in a practical sense they're very similar. Sunrise also has those 20 minutes of changing light and changing color."
Ultimately it's a question of how you want to portray those all-important foreground elements. "Shoot in the morning and you might get the perfect light coming up behind you and striking the cabin. Shoot in the evening and you get the sunset behind the cabin for a totally different story."
Read more about the functionality of the digital camera's histogram.Tips for Sunrises and Sunsets $
-
Always use a tripod.
-
Add interest by incorporating a subject other than the sunrise or sunset.
-
Scout locations; know sunrise/sunset times.
-
Afternoon clouds indicate the sunset's photo-op potential.
-
General rule-of-thumb: Sun in sky? Aperture priority. Sun already set? Use manual exposure.
-
Always check your histogram.
-
Always shoot RAW (NEF or NRW) files.


