Creating A Long Exposure Look Without The Wait or ND Filter
Water has a life, rhythm and romance which, when trying to capture it in a still image, can be a challenge. Photographers have long tried to interpret that smooth blurring of water’s motion and to communicate its flow.
Blurring the Lines of Fast Moving Water
To technically achieve our goals for this long exposure look we must set a slow enough shutter speed so that movement of the water in our frame appears to softly blur during our exposure time. However, settings must also be determined so that the meter will not overexpose our image or, if ancillary motion such as a leaf moves due to a breeze, other elements in the frame will not shift and thereby lessen overall image sharpness.
To achieve our desired long exposure look there are a few ways to work: we can lower our ISO, close down our lens to its smallest aperture, add a neutral density filter (up to 16 stops now), or work with a combination of these with the goal of slowing down that shutter speed to smooth the water. All of these are good options to create that soft blur look, but it may still take a little adjusting and trial and error to get things balanced.
I have just learned about a simple technique that, in a snap, lets you create the look of smooth and softly blurred water, something that typically requires a long exposure on a tripod. It is as simple as turning ON the Multiple Exposure setting in our camera, then tapping the shutter.
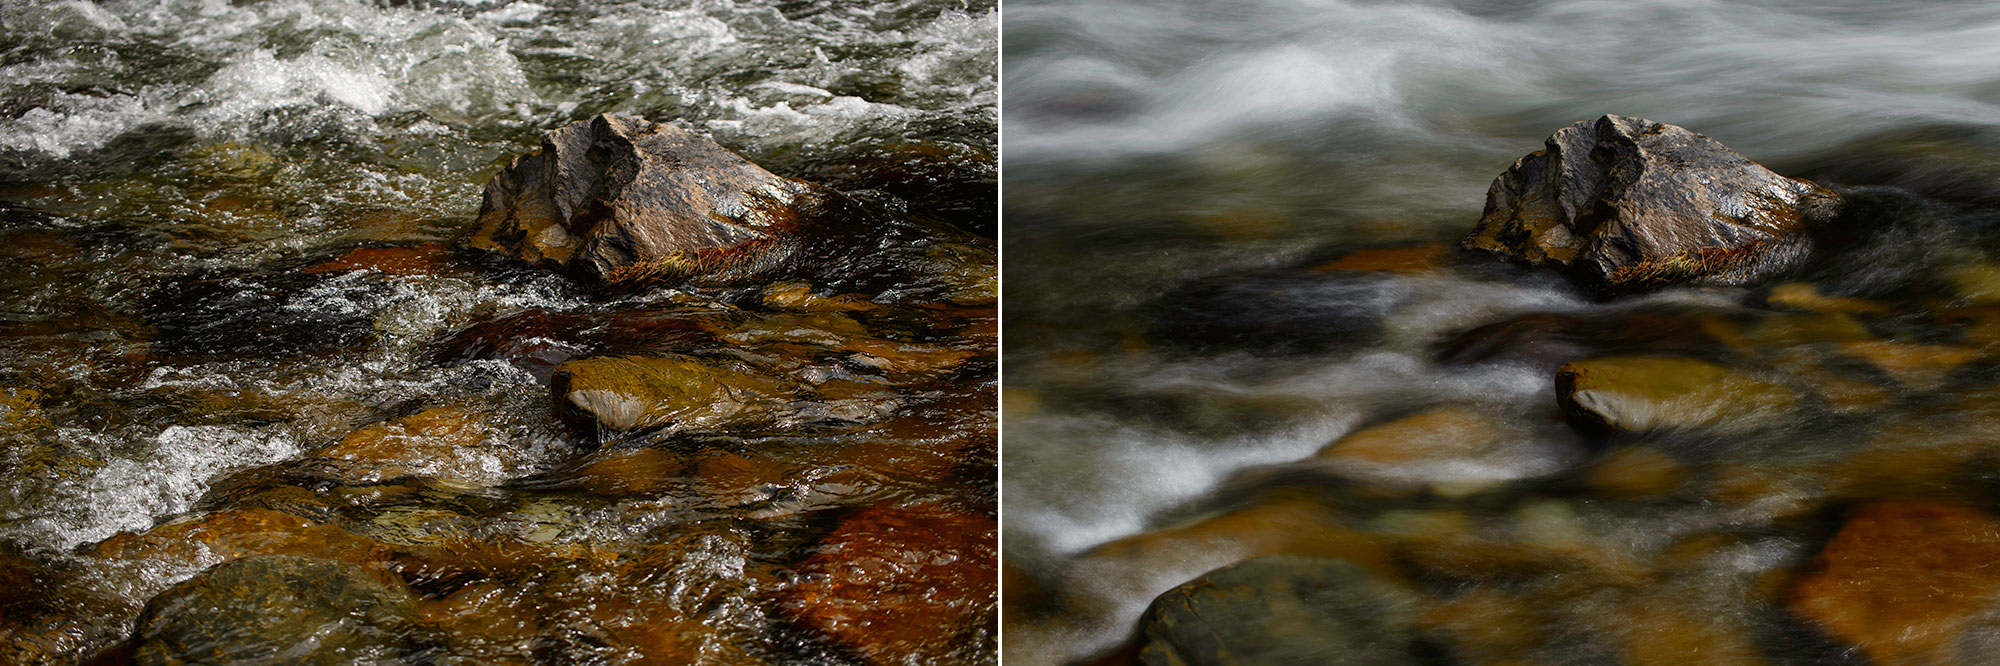
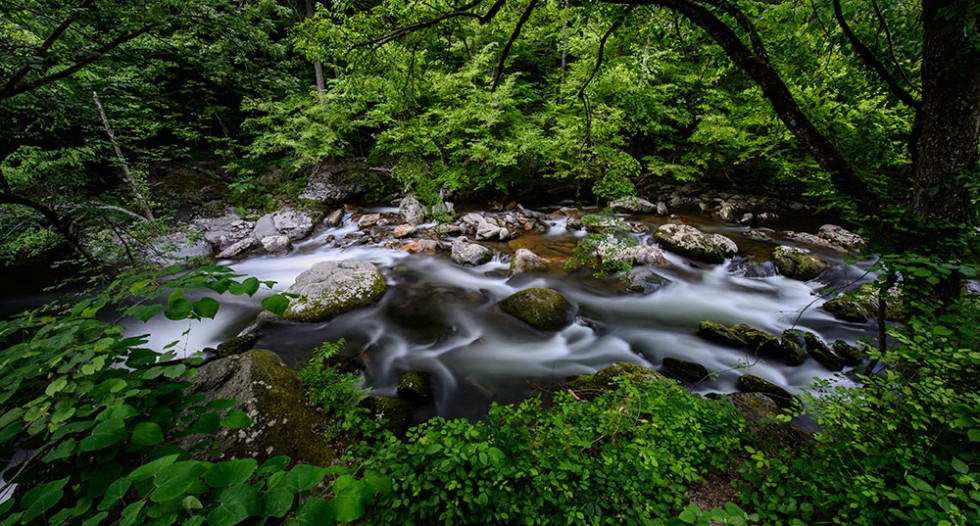
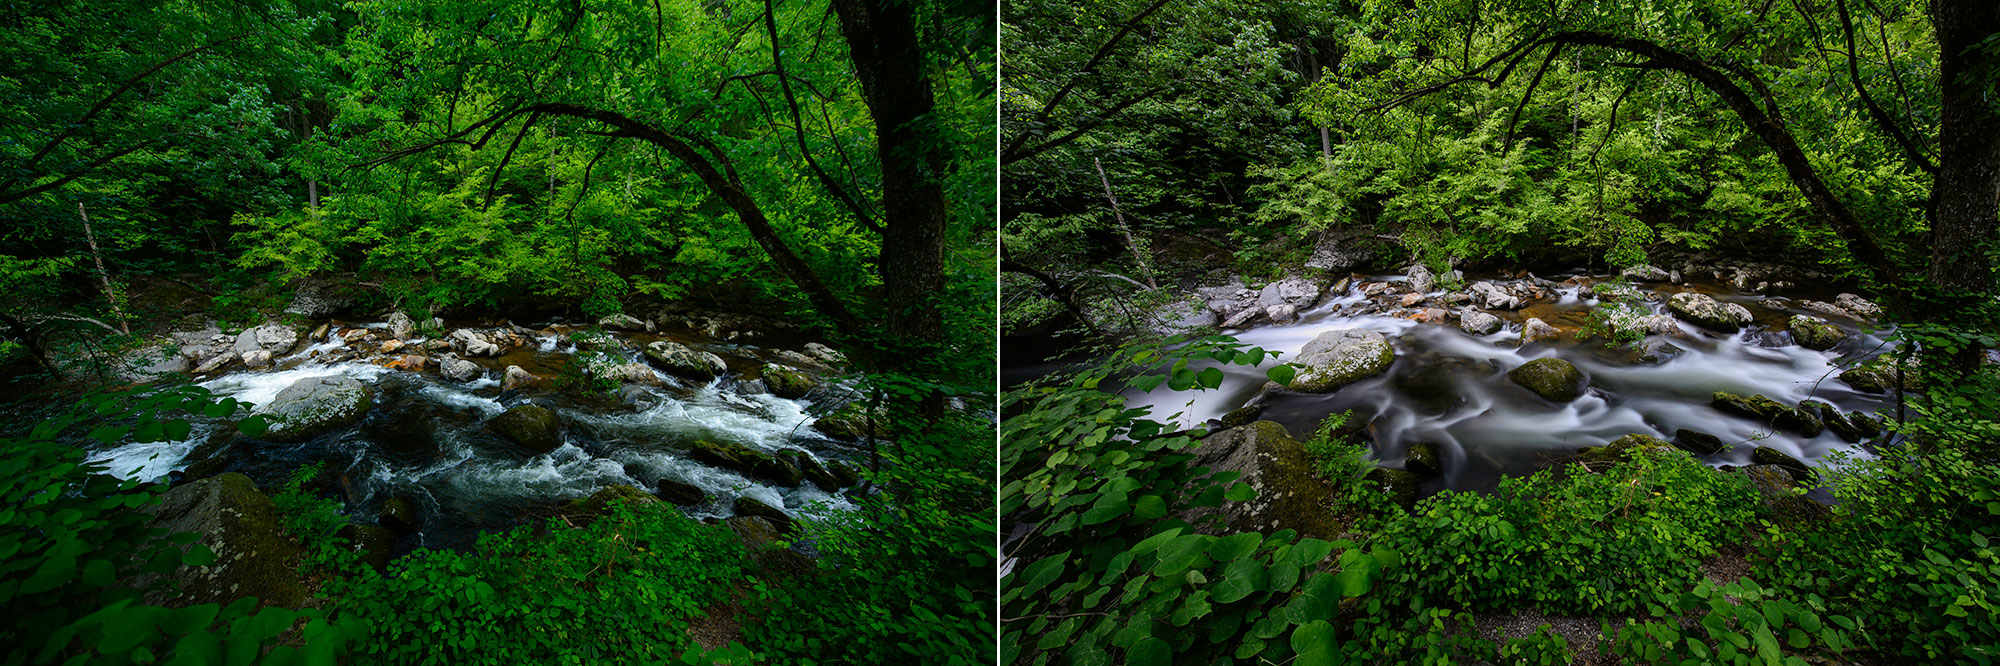
Using the in-camera Multiple Exposure function, a long exposure look can be achieved quickly without the need to resort to ND filters. On the left, a single photo taken with the Nikon Df using the normal photo taking process. On the right, the same scene captured with the Multiple Exposure function (several photos combined instantly in camera), yielding a long exposure look.
Putting Multiple Exposure to Work
The Multiple Exposure function (located in the Shooting Menu) has a couple of sub-settings to know about. The first one is the number of exposures. In cameras like the Nikon D4s, Df and D810, you can select up to 10 exposures. In cameras like the Nikon D750, you can obtain three exposures. I like to use the biggest number that the camera offers.
When setting the exposure count you will see an option for Auto Gain. Keep that on. That’s the key to the camera being able to combine all the exposures and then produce the right exposure for this technique. Lastly, you will see options for Series or Single. I like Series the best. This is because when I shoot “blurs” I want to take a lot of them as no two are alike. I select my favorite one back at the computer. I like this technique so much that I have created a customized setting for it in My Menu.
Setting the camera to Aperture mode, and choosing a small aperture (f/22), along with a low ISO of 100, a photo that has the flowing water look can be created even under extremely bright conditions that prevent using a slow enough shutter speed, by using the Multiple Exposure function.
Putting this technique to use is simple. Start by taking a test shot so that you can get a starting point for fine tuning camera settings. Frame up your scene. In this example I show a creek in the Great Smokies that I created using the Nikon Df and AF-S NIKKOR 14-24mm f/2.8G ED placed onto a tripod. The ISO is 100 (no need to lower it). I set f/22 (to preserve depth of field) and used Aperture Priority. I then relied on the camera to focus on the scene—pressing down the shutter halfway for the camera to lock-on my focus.
Without moving the camera, I carefully turned off the Auto Focus (AF). I dialed in some exposure compensation. The amount to dial-in depends on you and your subject matter. I generally start at -2/3 and may go all the way up to 2 f/stops.
The cool thing is that I was shooting in full sun. You will not need to find shade for this technique to work. I then took my test shot to check out the pattern of the blur in the water. I fine-tuned composition and exposure, then lock down the tripod head to turn on Multiple Exposure. Once I hit the shutter, the camera takes 10 photos in rapid succession, then combines all image files into one exposure. Bam—you have your blurred water shot neat and clean.
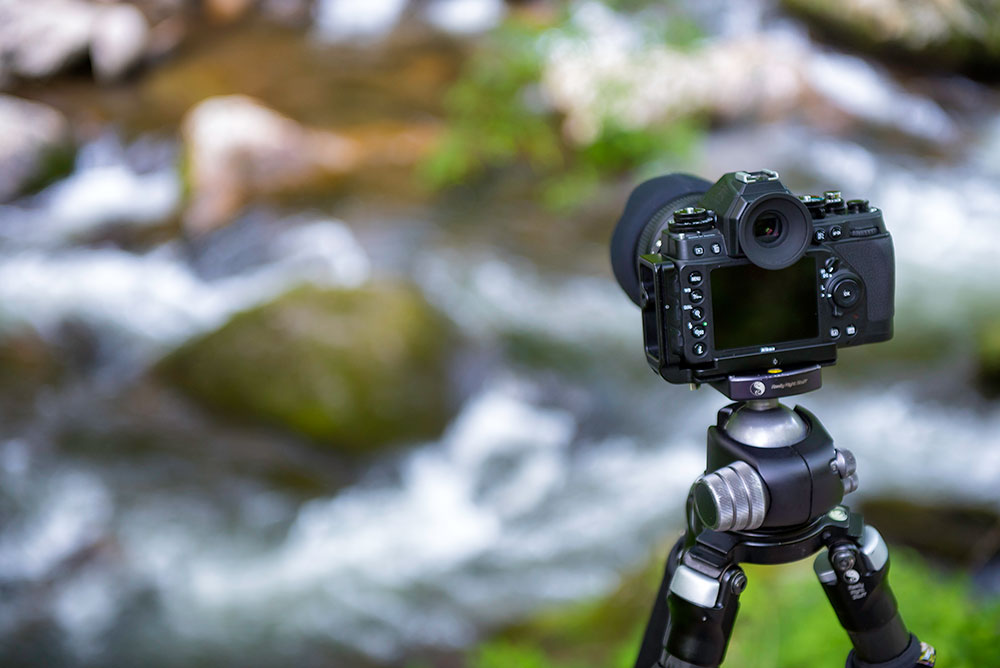
Nikon Df on a tripod set to capture and combine multiple photos with the Multiple Exposure function.
Waterfall Mechanics
How well does this all work? The camera will produce better colors this way, compared to combining all the individual images in post. But how the camera actually combines all the single photo file “blurs” to create a gorgeous “blur” in one photo is a bit of a mystery to me. You could systematically and individually photograph the same number of photos then combine these in software, but the Multiple Exposure method works well every time, plus it’s far faster and easier.
Here’s an extra tip to this really, really simple technique for making such dynamic photos. Earlier on I suggested selecting the Series option in the Menu. Place the camera into Continuous High (CH) shutter speed and use a remote firing device like the Nikon WR-T10. You want no movement of the camera while shooting, plus you want to take multiple photos as no two water blur photos are ever the same.
You will hear the camera fire off 10 times, but with the Multiple Exposure turned ON, what’s delivered is only one photo. Ensuring no camera movement between those ten shots is essential. When you’re all done you have one gorgeous .NEF file of your scene. I simply love this technique because it frees us from needing filters, plus it permits us to shoot big time blurs even in full sunlight.


