Tips for Photographing the Yosemite Firefall
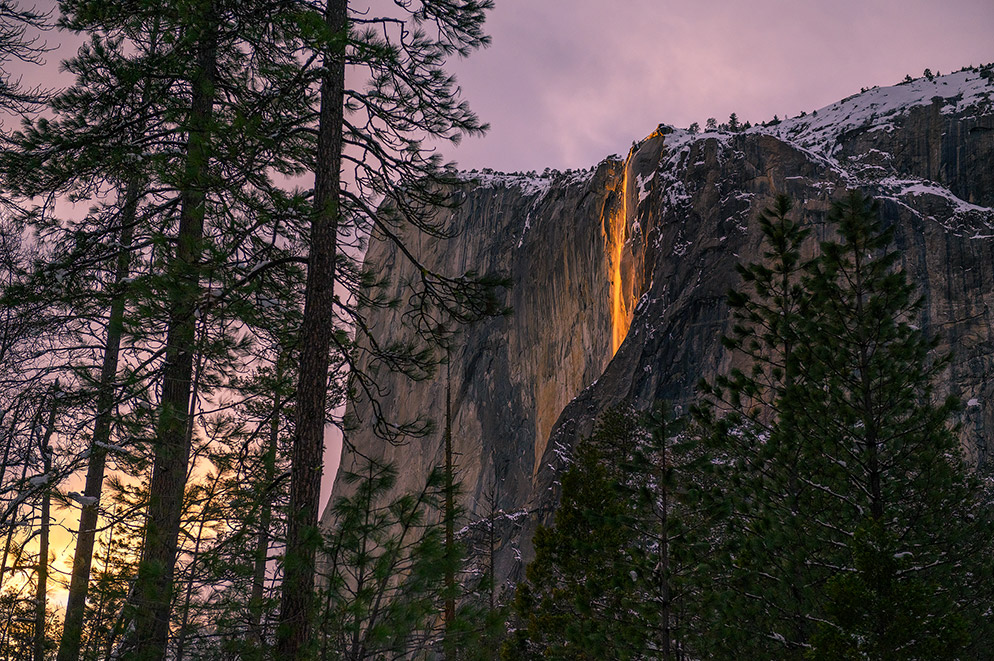
The Firefall from just east of the El Capitan picnic area on Northside Drive. Z 6, Mount Adapter FTZ, AF-S NIKKOR 24-70mm f/2.8G ED, 1/2000 second, f/4, ISO 400, manual exposure, center weighted metering.
I’ve been fortunate enough to witness events around the world that could be described as mesmerizing, unforgettable, and moving. From seeing the Aurora Borealis dancing above my head in the Arctic Circle to watching the Kilauea Volcano erupt just a few hundred feet in front of me, the Firefall in Yosemite National Park certainly rises to the top of that list. It is an event that I highly encourage my fellow photographers to add to their calendars in hopes of capturing.
But, you may be asking yourself, ‘What exactly is the Firefall?’ Let me explain.
The Firefall
In the summer of 1872, the owners of Glacier Point Hotel in Yosemite Valley started a near-century long tradition of tossing burning embers off the top of Glacier Point. As the embers fell nearly 3,000 feet to the valley floor below—and from a distance—they appeared as a glowing waterfall. The fall of fire attracted visitors from across the nation and quickly became a tourist attraction. However, in January of 1968, the National Park Service terminated the practice.
Nature’s Firefall
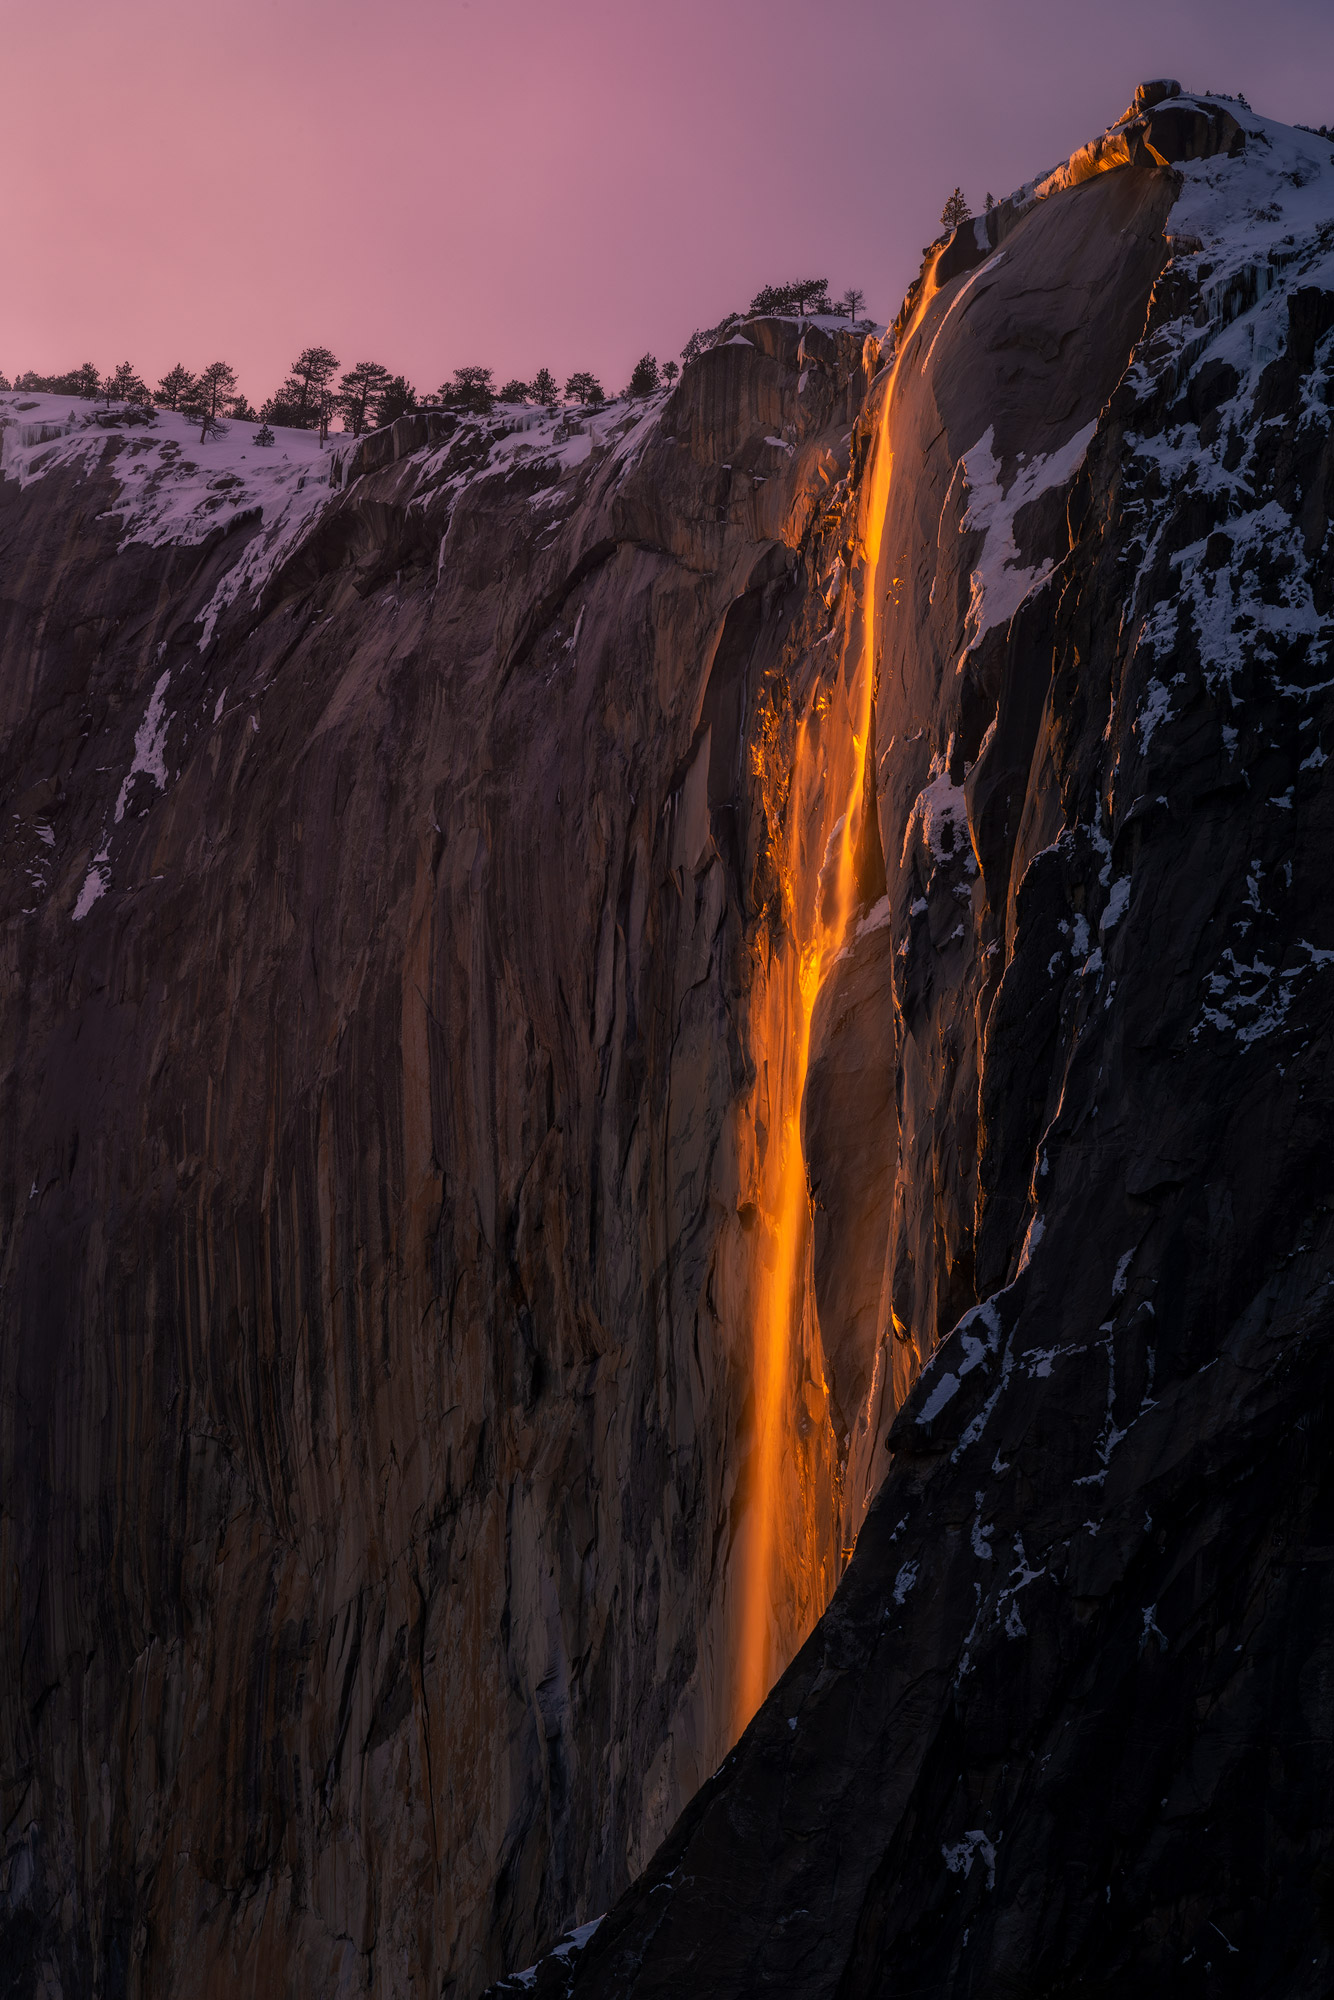
Each February, thousands of tourists flock to Yosemite to witness the return of the Firefall, but this one occurs naturally. For a brief two-week window, the last fleeting rays of sunset fall perfectly upon Horsetail Fall, located on the east side of El Capitan. The sunlight ignites the fall in a vibrant red and orange glow, reminiscent of the original Firefall. The colors are so impressive that the waterfall appears to be on fire as the rest of the valley fades into darkness. Although the timeframe in which the event occurs is quite easy to predict, actually witnessing it involves various natural elements coming together in perfect unison.
How does the Firefall happen?
It takes four key ingredients to cooperate perfectly prior to sunset for the Firefall to come to life. The first is that the Yosemite Valley needs to have received a decent amount of snowfall throughout the winter. This snowfall provides the water necessary to create Horsetail Fall, which is fed directly by snowmelt. Next, during the last two weeks of February when the sun perfectly aligns, temperatures must be above freezing to help with the melting of the snow. If temperatures remain below freezing, any small amount of water flowing will simply freeze and the fall will remain dry. Even with water flowing, the clouds need to cooperate as well. The Firefall typically occurs within the last 10-15 minutes prior to sunset, so light needs to be able to come into the valley. And, even with a small cloud in the western sky, the event could be a dud. Finally, if strong winds are prevalent, the little bit of water that is falling can be sprayed away, resulting in a glowing mist, and not a distinct waterfall.
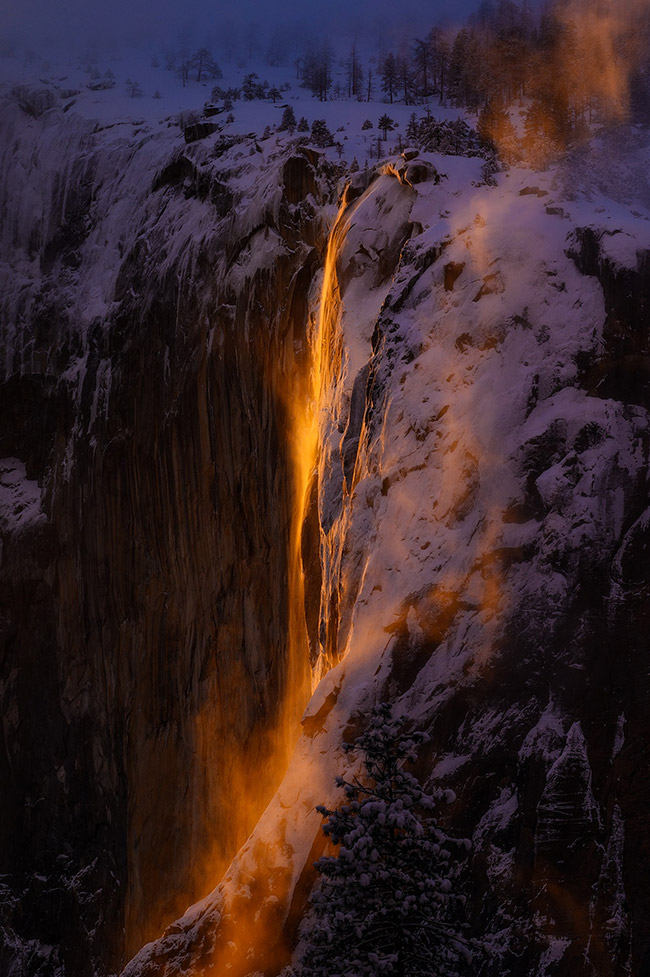
The Firefall from just east of the Cathedral Beach picnic area on Southside Drive. Z 6, Mount Adapter FTZ, AF-S NIKKOR 200-500mm f/5.6E ED VR, 1/800 second, f/5.6, ISO 500, manual exposure, center weighted metering.
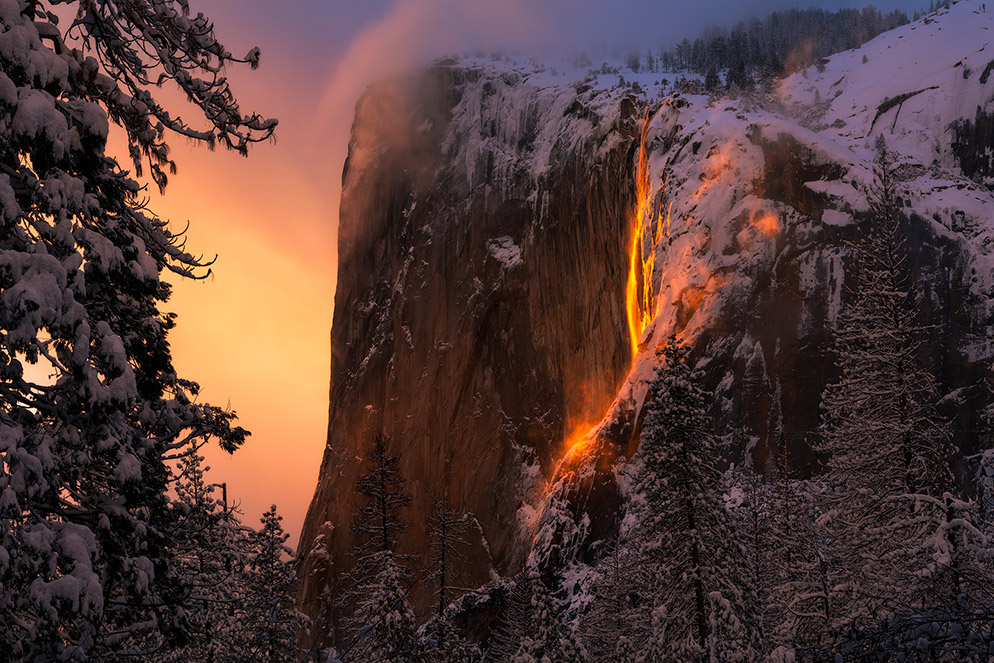
The Firefall from just east of the Cathedral Beach picnic area on Southside Drive. D850, AF-S NIKKOR 70-200mm f/2.8E FL ED VR, 1/15 second, f/18, ISO 100, manual exposure, center weighted metering.
When Should I Go?
The Firefall begins right after Valentine’s Day and typically lasts until about the 28th of February. If you plan on coming out for the event, I suggest targeting around the 21st as the duration of light reaching the fall at that time will be the longest, therefore increasing your odds of witnessing the phenomena. You can utilize apps like PhotoPills or The Photographer’s Ephemeris® to accurately time the event.
Where Should I Shoot From?
There are several vantage points within the valley that offer great angles to shoot from. Make sure to scout these locations beforehand and get there early, as you can easily find yourself joined by a few hundred fellow photographers.
There are three popular locations on the Northside Drive. The first is probably the most popular, located at the El Capitan picnic area. The second and third locations are the two parking pull-offs located just to the east of the picnic area.
On Southside Drive, there are two areas with great vantage points. The first is approximately one mile east of the Cathedral Beach picnic area, near where the Merced River bends to the north. The second point requires hiking up Four Mile Trail just above the tree line. During heavy snowfall, this trail will most likely require snowshoes to get to.
There are numerous other areas along the Merced River to see the Firefall in action, but those locations can only fit a few tripods.
What Gear Should I Bring?
With only a few minutes to capture the Firefall, knowing which camera body and lens you’re going to use beforehand will allow you to have a much more enjoyable and stress-free time shooting. During my experience this year, I relied on three main lenses: AF-S NIKKOR 24-70mm f/2.8E ED VR, AF-S NIKKOR 70-200mm f/2.8E FL ED VR, and AF-S NIKKOR 200-500mm f/5.6E ED VR. Each lens presented a unique frame for the Firefall.
The 24-70mm provided a nice wide view of the entire scene and allowed me to see the entire environment from the valley floor all the way up to the top of El Capitan.
The 70-200mm allowed for a tighter view, but still enough room in the frame to establish the mountainside and some visible clouds.
The 200-500mm offered a wonderful detailed view of the Firefall with each edge of the wall face being tack sharp.
I’d recommend using the 24-70mm or 70-200mm when there’s a bit more atmosphere around the Firefall. In the instances when there were clouds or mist lingering in the air, I opted for these two lenses. With an empty or flat sky, I’d utilize a longer focal length like the 200-500mm to eliminate negative space.
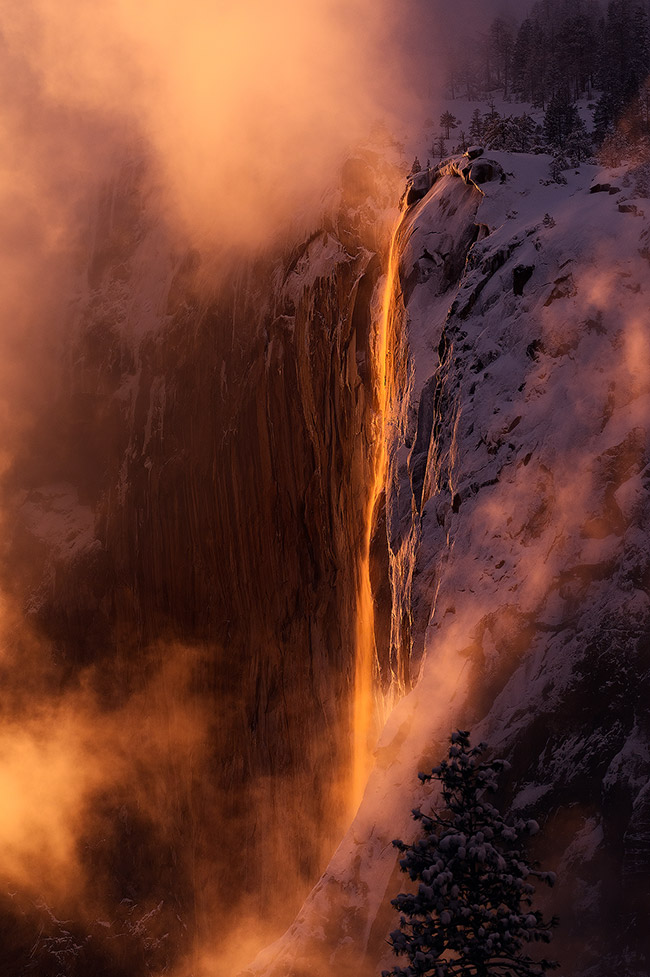
The Firefall from just east of the Cathedral Beach picnic area on Southside Drive. Z 6, Mount Adapter FTZ, AF-S NIKKOR 200-500mm f/5.6E ED VR, 1/2400 second, f/5.6, ISO 400, manual exposure, center weighted metering.
The Firefall from just east of the El Capitan picnic area on Northside Drive. D850, AF-S NIKKOR 70-200mm f/2.8E FL ED VR, 1/10 second, f/18, ISO 64, manual exposure, center weighted metering.
Shooting Tips $
A few quick tips to help you achieve that perfect Firefall image:
-
Utilize a tripod to take advantage of low ISO’s for a cleaner image. I typically shoot at ISO 100, f/18 and adjust my shutter accordingly
-
Horsetail Fall is a weak flowing waterfall, so don’t prioritize your shutter speed. Whether you shoot at 1/1000 second or 1 second, the fall will have the same look and texture
-
If you’re shooting with a telephoto lens that features Vibration Reduction on a tripod, turn VR to OFF
-
Use either manual focus or single point autofocus
-
Meter off of the fall using center weighted metering
-
Shoot in RAW so you can non-destructively edit your image in post and bring a bit of life to it by raising your shadows and lowering your highlights. The dynamic range in this scene is quite large
-
Try shooting both vertical and horizontal compositions
-
If shooting a bit wider, say 24-70mm, try to incorporate the trees around you for a unique framing of the fall
-
A cable release [or remote] can help reduce any unwanted camera shake
-
Set your White Balance to 5600° Kelvin for a really nice warm and vibrant glow of the Firefall
-
Be patient. The closer to sunset, the narrower the light gets on Horsetail Fall and the Firefall will only get even more dramatic. Clouds can move in and obscure the fall, but they can also move out and reveal it
-
Take some time during the day to scout locations, the further east, the better. If you’re too far west, you’ll be able to see the fall but the light will be quite flat. Just 100 feet in positioning can make all the difference. Bring a pair of binoculars with you, as it is quite difficult to see Horsetail during the day (it really is a very small and narrow waterfall)
-
If there are clouds, embrace them. All it takes is a brief moment of clearing to illuminate and view the fall!
With that said, nature is in control and there’s no way to know whether or not you’ll see the Firefall until you’re in the park. But don’t let that uncertainty deter you! Yosemite is a wonderland for photography, especially in the winter, from the towering falls to Half Dome, El Capitan, Cathedral Peaks and more.
Yosemite in Winter
Tunnel View Lookout. D850, AF-S NIKKOR 70-200mm f/2.8E FL ED VR, 1/80 second, f/14, ISO 31, manual exposure, center weighted metering.
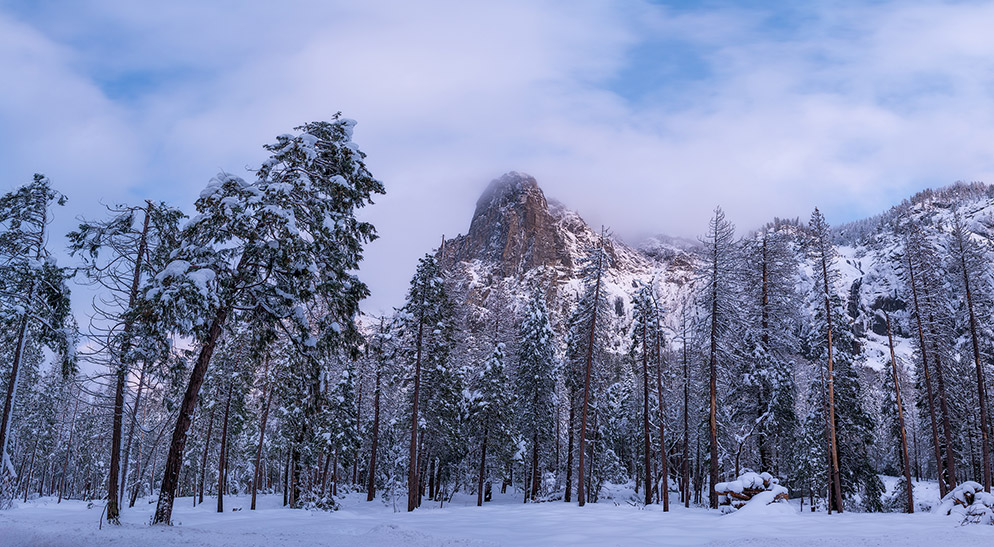
A six-image panorama of Sentinel Peak from Southside Drive in Yosemite Valley. D850, AF-S NIKKOR 24-70mm f/2.8E ED VR, 5 seconds, f/9, ISO 100, manual exposure, center weighted metering.
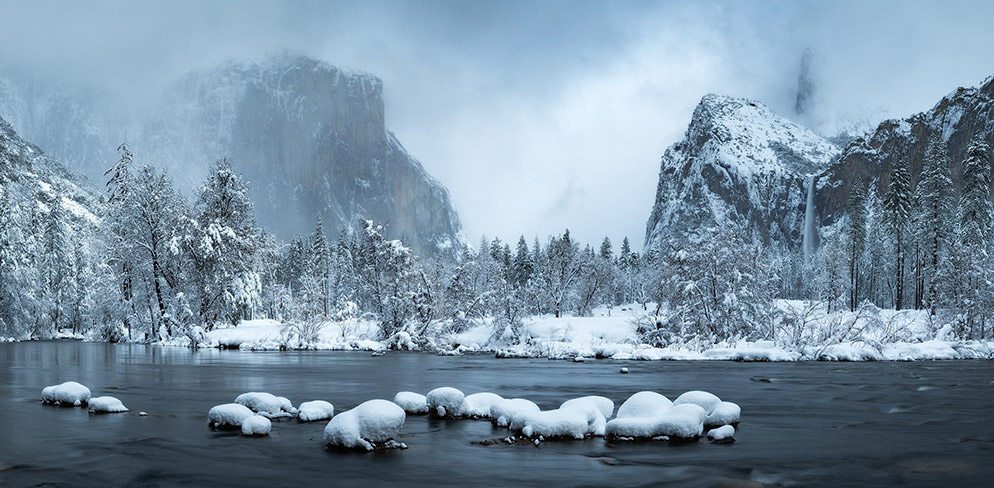
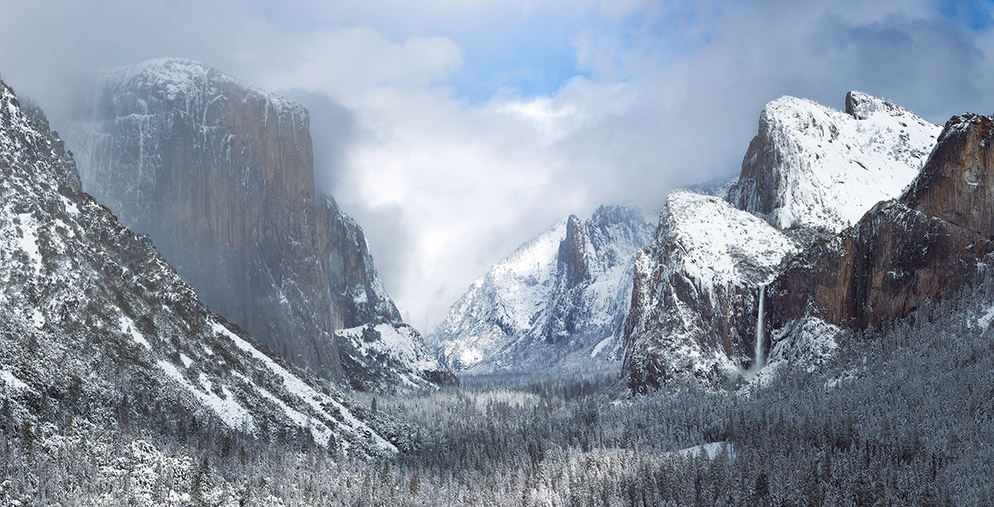
A seven-image panorama of the Yosemite Valley from Valley View. D850, AF-S NIKKOR 24-70mm f/2.8E ED VR, 2.5 seconds, f/13, ISO 100, manual exposure, center weighted metering.
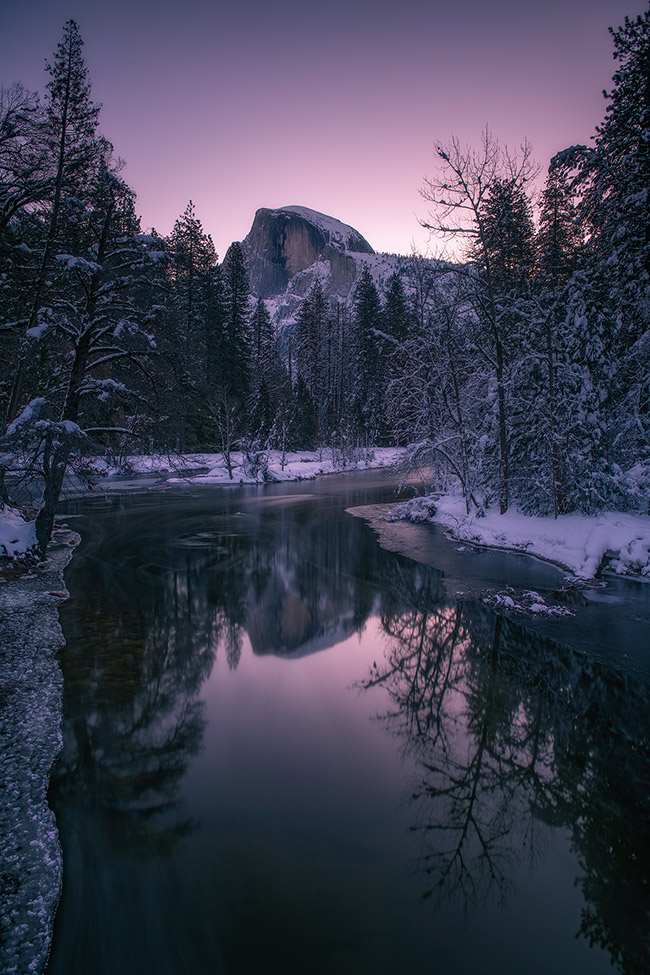
Half Dome at sunrise as seen from Sentinel Bridge. D850, AF-S NIKKOR 24-70mm f/2.8E ED VR, 30 seconds, f/6.3, ISO 200, manual exposure, center weighted metering.
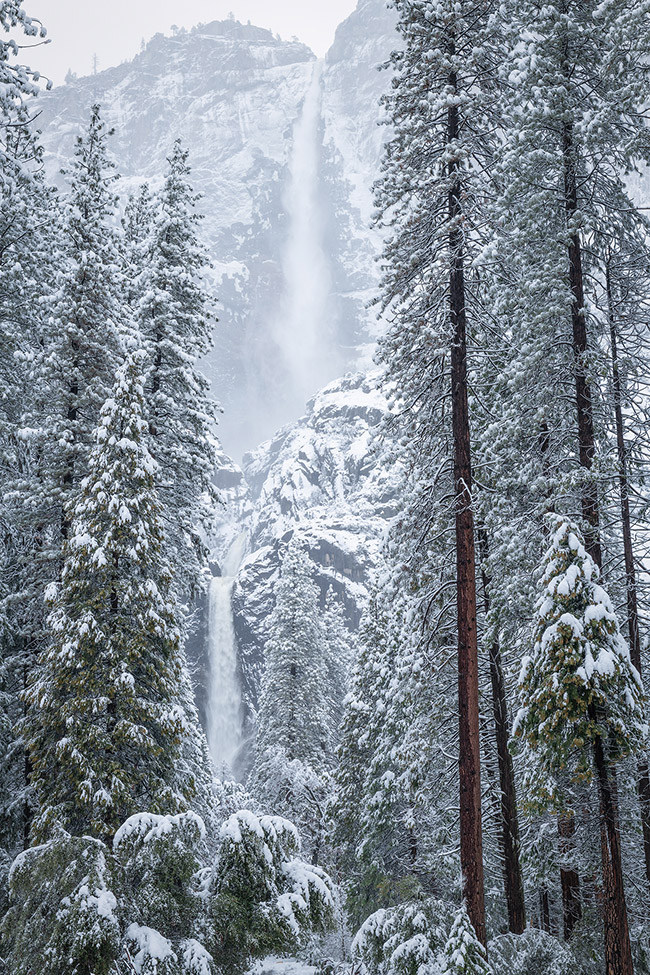
Upper and Lower Yosemite Falls from the Lower Yosemite Falls trailhead. D850, AF-S NIKKOR 24-70mm f/2.8E ED VR, 1/30, f/13, ISO 100, manual exposure, center weighted metering.
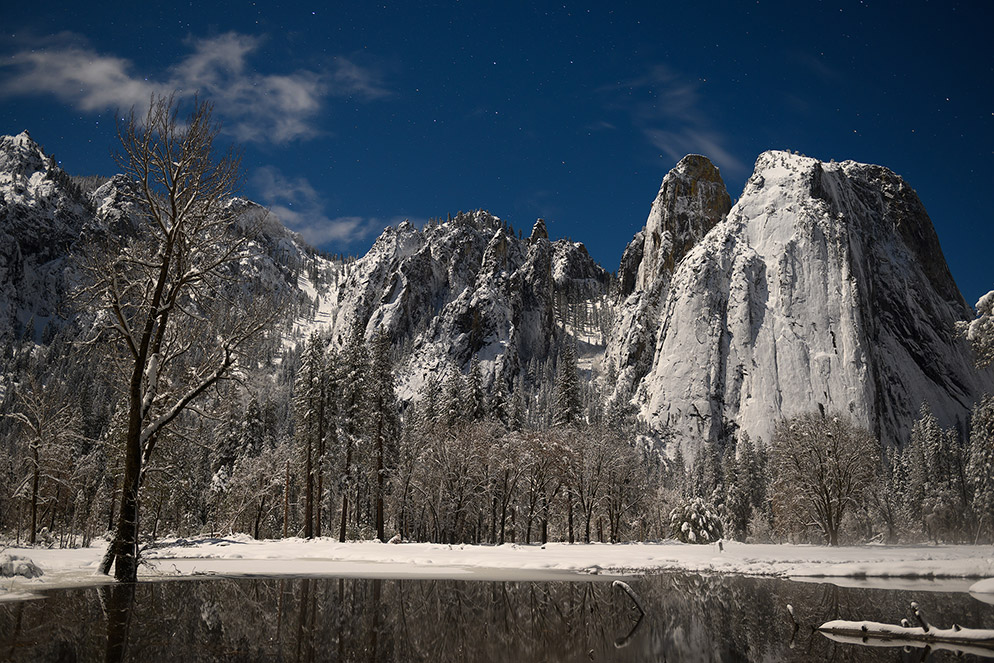
Cathedral Spires shot from Northside Drive in Yosemite Valley. Z 6, Mount Adapter FTZ, AF-S NIKKOR 24-70mm f/2.8G ED, 30 seconds, f/2.8, ISO 250, manual exposure, center weighted metering.
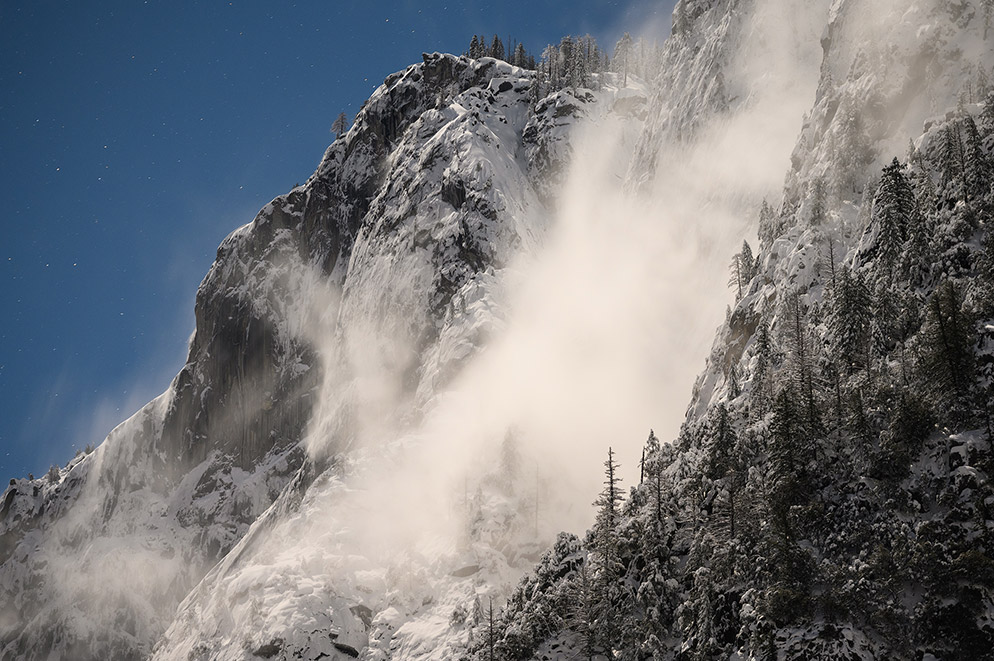
Glacier Point as photographed from Cook's Meadow in Yosemite Valley. Z 6, Mount Adapter FTZ, AF-S NIKKOR 70-200mm f/2.8E FL ED VR, 8 seconds, f/2.8, ISO 800, manual exposure, center weighted metering.
Mike Mezeul II is a photographer and photojournalist addicted to storytelling and adventure. He's photographed landscapes, professional sports, natural disasters, concerts, air-to-air aerial photography and more.
More articles by this contributor


