“I’m With The Band”: How To Shoot a Music Video with DSLRs
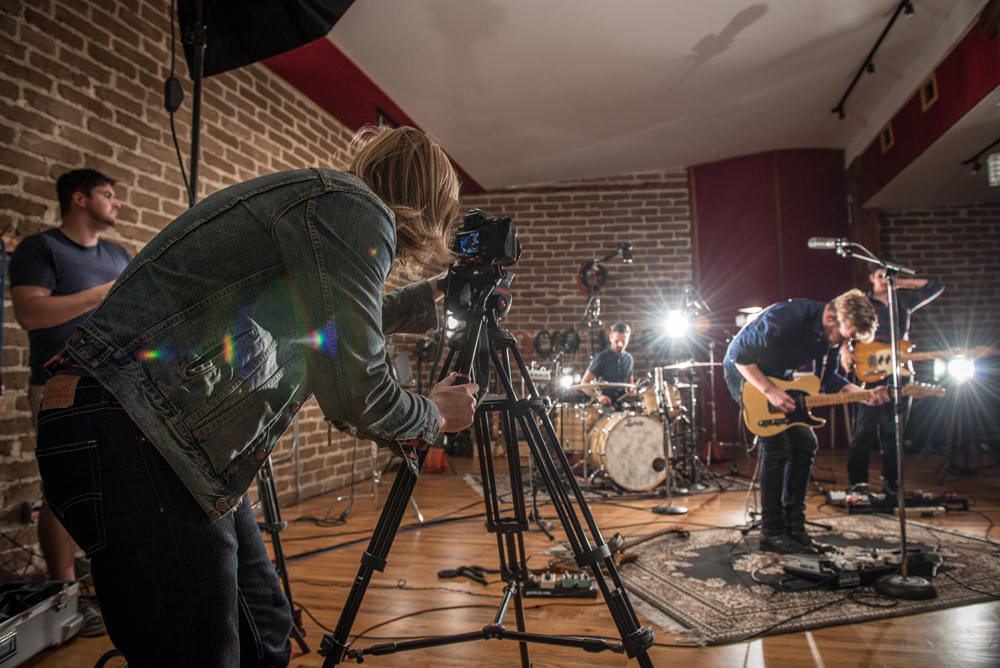
Filming a Music Video - Behind The Scenes with Chris Hershman—"Running Fast" performed by the band Tall Walker.
Filmmaking, Photography and Music—in the arts there is often overlap, and there are a lot of musicians who are passionate about filmmaking who have this burning question in mind—how to shoot a music video?
Picture this: you’re a budding musician who plays in a band now and then. You also take photos of bands. One day you ask some friends if they wouldn’t mind if you grabbed some footage during a performance using the new video feature on your DSLR—next thing you know, you are editing your first ever music video.
Chicago-based filmmaker, photographer and musician Chris Hershman is the guy we’re talking about. He shot plenty of footage, working from as many different vantages as possible.
Once home, Chris spends 10 straight hours editing the footage. He makes sure the visuals sync to the audio, he works around the glare of stage lights, he cuts and intersperses to tell a story in the span of one song. His first try result: a super high energy live rock ‘n roll music video.
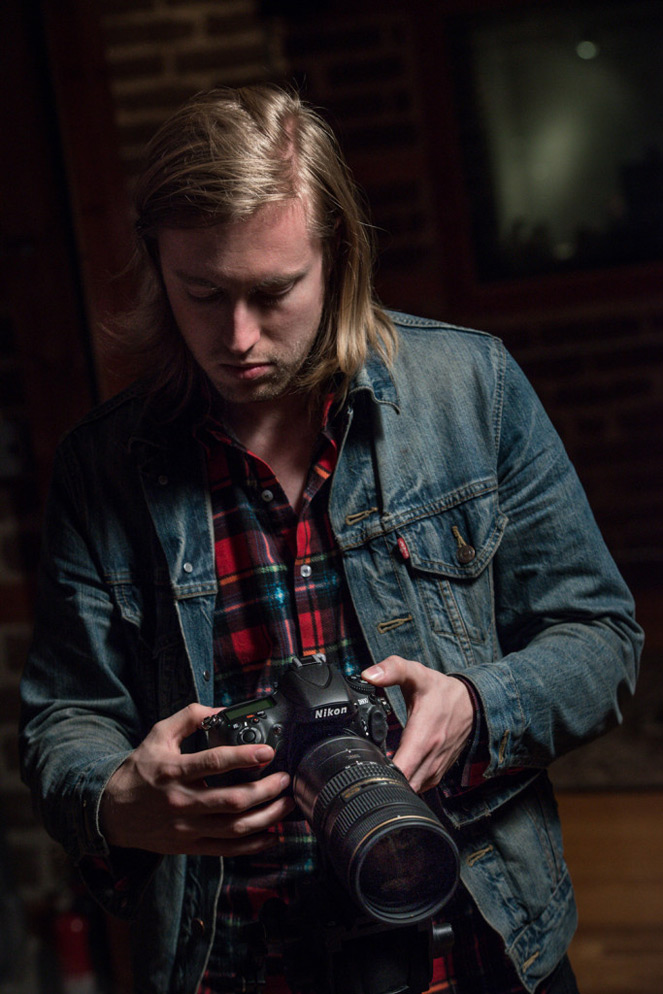
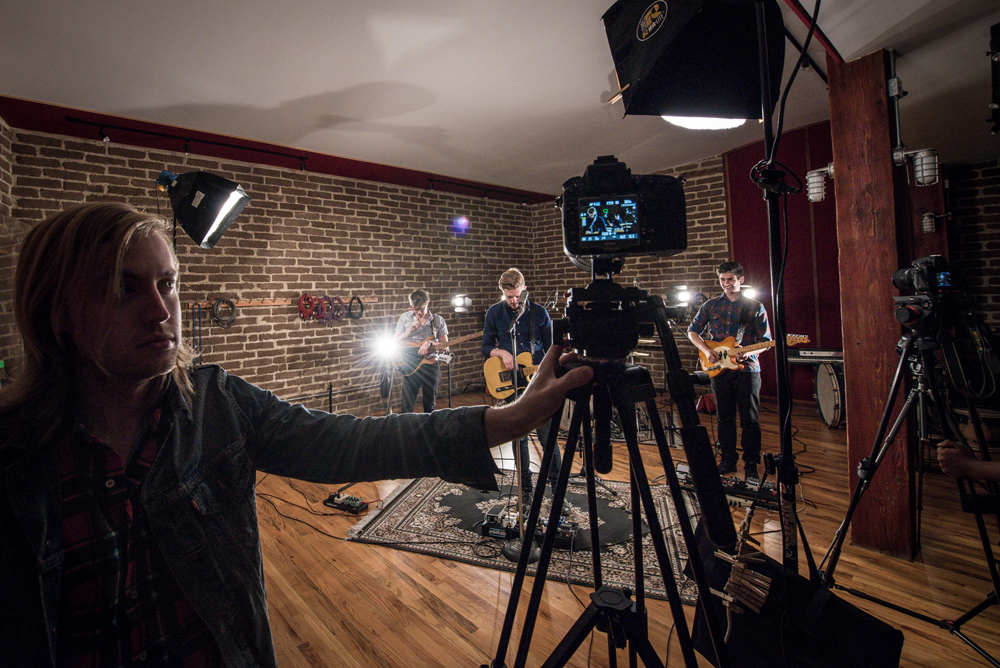
Chris Hershman on set of “Running Fast” music video from Tall Walker
Rocking and Rolling Forward
“Floored after watching the footage, the band immediately requested it become their official music video,” shares Chris. That group went on to compete in a contest and ended up featured in the Rolling Stone magazine. The video was placed on Rollingstone.com. “My first video—straight to a top music magazine!”
Over the past few years Chris has been filming live performances and capturing everything music-related using a bevy of cameras, the Nikon D4, D300s, D600, D800 and D7100. A musician himself (having played drums, bass and guitar since childhood), Chris brings a performer’s sensibilities—which invariably influences how he produces. He ponders: What would the artist like to see captured? What does he have to share? “For instance,” he explains, “the instrument is very important so I pan in on each, then move out to show how it’s played. I capture how band members communicate with one another. Live acts are dynamic with a lot going on. If I can grab those interesting spontaneous moments, I know I’ve got great base footage to take my video to the next level. Great video not only complements the music, but adds to bottom line value. It can establish the right vibe, plus build a higher level of respect from the viewer.”
A 1, and a 2 and…Band Practice
To make a top notch music video, start with a great band. Then add great gear. Nowadays, Chris captures video using the D800 and D7100. “Nikon has several camera choices for HD video capture and even more options for lenses. The beautiful thing about the NIKKOR selection is that lenses are entirely interchangeable and pair to all the latest camera bodies.”
Chris incorporates a wide variety of glass into his work, but quickly smiles when admitting to one mistake he’d make early on—trying to use too many prime lenses. His misstep became evident when lenses were cropping out too much line of vision, or were not properly framing both the musician and instrument. “I like to capture the scene versus capturing solely the musician. Back then, my solution was to step back and choose a wider lens.” He favors a view that grabs a sense of the environment, plus frames the musicians and how they interact within the space. “Give the viewer more scene to explore, don’t direct their eye to a certain place.”
Chris shares an additional early-on gaffe: setting prime lenses to extremely wide apertures in order to yield shallow depth of field. “Of course the subject would move and go out of frame or out of focus!” Word to the wise: size up your most likely shoot scenarios then invest in lenses that meet your min-to-max (top-to-bottom) frame parameters.
Shooting HDSLR video requires a new view when it comes to lenses. Selection may differ from what you’d normally use shooting stills. Chris relies on the AF-S NIKKOR 70-200mm f/2.8G ED VR II lens, citing its good mid-to-close up capability. The lens has VR (Vibration Reduction) image stabilization to aid in producing a steady look—important when grabbing footage obtained with the help of a dolly. “A little too large to use as a handheld, I add this lens to a main camera that’s been mounted onto a ball head tripod. It captures beautiful color and works superbly with up-close skin tones. Aside from ensuring steady framing, the VR keeps my subject extremely sharp and in-focus with everything else softly out of focus. And it adds a beautiful depth to the film.”
Chris Hershman on set of “Running Fast” music video from Tall Walker
For wide-angle shots Chris taps an AF-S NIKKOR 14-24mm f/2.8G ED lens. “I get super sharp focus, plus this one covers all wide-angle needs. I like to put this lens above a drummer so I can share what he sees. I also use it for establishing shots that originate low to the ground, then shoot upward and make the space seem much larger. This yields shot diversity and keeps the viewer engaged.” He adds: “Plus, the obscure angle is great to offset the straight-on shots. I like to have at least one or two of these angle shots ready for production.” Since the subject matter isn’t moving around in these shots, he can cut to the footage when other cameras haven’t captured something interesting.
Light Right
Working in-studio Chris can control lighting precisely. Rising to the occasion, he incorporates novel camera angles and points of view. If he uses rails or dolly tracks to position a camera out of arm’s reach, he carefully considers where the rig’s shadows may fall during panning—in addition to the quality of light at each end of the track. His cutaway shots direct attention onto the instrument, his lighting may make a drum set, guitar or piano glow.
“I must consider all possible movements—what will the musicians do, how do they perform?” Chris emphasizes. “The slightest movement can keep the viewer engaged longer, helping that person connect on a deeper level. The point is to lock your viewer into something so engaging they can’t look away.”
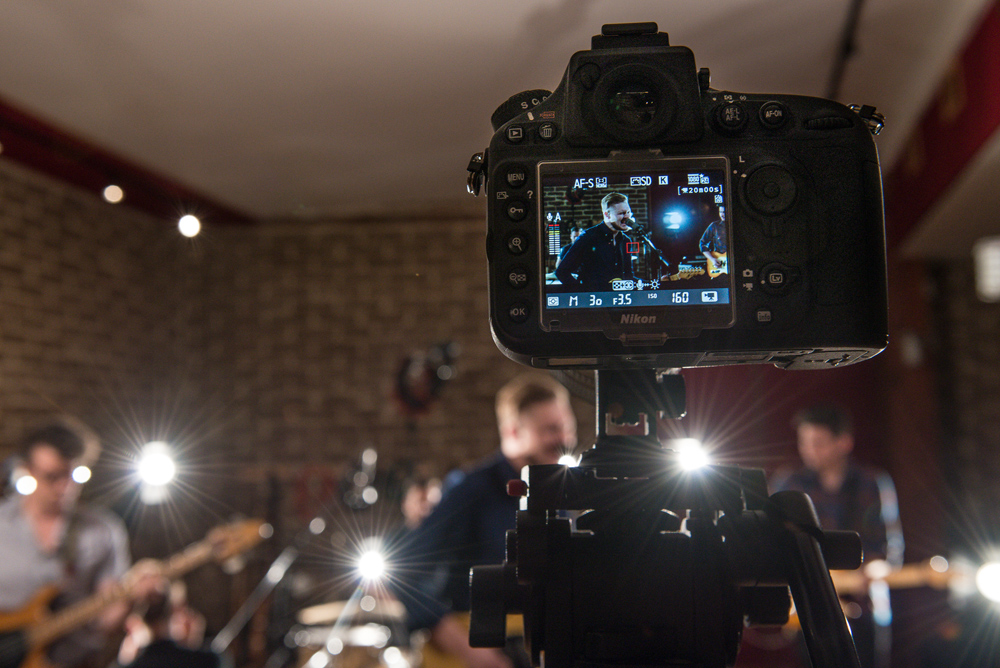
When capturing a live performance, Chris says, “I use a lot of intentional backlighting to create silhouetted looks that create more of a mystery. I also like to play off the light and the flare as if it’s another moving subject in the scene.” Motion remains a theme. He plays up the camera’s interaction here too. “A sense of movement can occur even if the subject is stationary when keying off of lighting. Movement adds energy to your video.”
Getting Exposure
Whether working in a dark concert hall or a well-lit studio, Chris knows to keeps an accurate check on exposure—improperly exposed areas equal loss of information. Unfortunately, an oft-cited mistake from HD-SLR cinematographers is over-exposure. To avoid this, Chris tends to set to the opposite end of the lighting spectrum by dialing a stop under. “It’s easier to raise the lighting and get a more natural look on a slightly darker clip, than it is to lower exposure or brightness on an overexposed clip then try to make it look good,” he shares. “Reduce the light on an overexposed video and it can get contrasty, ruining a high quality look.”
As proof, see the video of Tall Walker that Chris produced at the Electrical Audio studio. Color and sharpness came directly from the camera. No correction work was done in post to the exposure, and only minor color correction was required from one camera’s footage. “Getting that beautiful wide range of color and sharpness right out of the box is not difficult. Take the time to accurately set exposure and what you see is what the camera captures.” he smiles. “Get it correct in-camera and save yourself loads of time.”
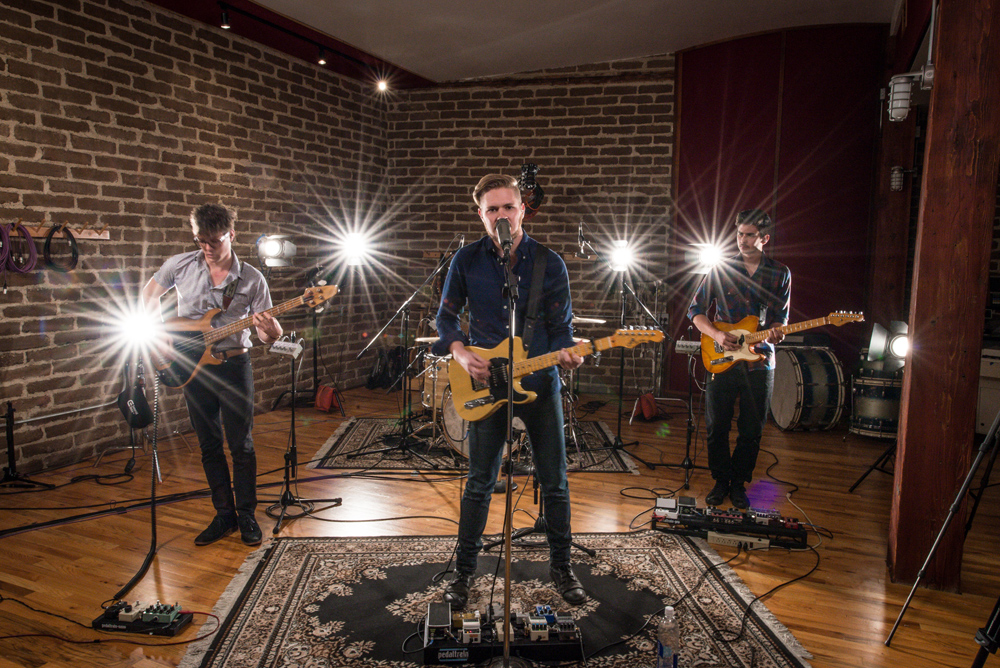
Tall Walker on set of “Running Fast” shoot
Set it, Don’t Forget it
A mate to exposure is white balance. Chris prefers using the Kelvin scale. “Your Kelvin color temperature ranges anywhere from 2,500k to 10,000k.” Before shooting begins, he suggests testing the color that fits the room or location, then set all cameras to the same temperature to ensure a uniform look. He advises to not make the Kelvin setting too warm though—when starting out it’s natural to lean toward a warmer look. “A more natural color temperature adds to an overall professional look, plus helps your work be perceived as more professionally filmed.”
Another technical decision to be made at the start of the project is FPS (frame per second). Leaning toward a cinematic look, Chris applies a 24 FPS setting to all cameras. Laughing, he adds, “The worst mistake I made as a beginner was having several cameras at 24 FPS then forgetting to check the last one; it was left at 60 FPS. The footage was so different from the others that I ended up removing all of it from my final edit. The look was too distracting.”
Cameras, check. Lenses, check. Lights, check. Mic…
Calling the Audio Experts
“It’s also my job to make sure the band sounds good—that means extra attention to audio quality and audio presentation. Nothing’s worse than having a beautiful visual with horrible audio. Bad sound can be more distracting than helpful,” Chris affirms.
But he knows to keep focus on the visual aspects, so Chris generally relies on outside studio and engineer talent to record tracks. His role is to make sure the talent is properly mic’d through small handheld recorders with an XLR input, that capture is coming through, and of course he’s present during post-production to ensure proper audio syncing.
Chris Hershman on set of “Running Fast” music video from Tall Walker
Multiple Personalities
“When I started capturing live performances it was just myself and one camera,” says Chris. Today he sometimes works with a crew and often relies on multiple cameras (up to four); it all depends on the project’s budget. “When solo I use the Nikon WR-R10/T10 wireless transmitter and receiver system so I can operate multiple cameras.” He also relies on it to start and stop capture on cameras that are placed in unreachable locations—such as high above drum sets.
Whether working solo or directing a crew, Chris follows a quick prep guideline:
-
Personally handle the basics
-
Double check everything (lights, exposure, temperature, settings)
-
Make sure multiple cameras are in-sync
-
Pre-plan what lenses will be needed
-
Plot camera position(s)
-
Set the stage
-
“Do all of this before the band arrives. As they get into position you can fine tune things,” he notes.
Preparation is key to bringing a polished look to your films, insists Chris. “In the end, the most important mark of a good film is that the viewer is never distracted by the filmmaker’s techniques. Done well, the viewer connects with your film and easily engages with the band or subject. A well-made film isn’t about showing off great filmmaking techniques. It’s about capturing the special moments that play out in front of the camera.”
Chris also shares with us a few tips to getting a professional looking final edited piece:
-
Give the viewer an experience of what it’s like to be in the room.
-
Have a camera set-up behind the scenes to capture ‘the capture’ of the performance.
-
Use creative looking b-roll, showing objects that relate to the subject. For the Tall Walker video we open with analog tape machines and vintage looking sound equipment. This helps create a greater purpose and wraps the story.
Watch the band Tall Walker play “Running Fast” in the end-result music video below: