How to Photograph Macro Bubbles

Everyone knows that oil and water don't mix—but they do create unique abstract images. Lit from below with colorful lights.
One of the best parts of macro photography is that you can photograph practically anything. That fork sitting on the dinner table takes on a new dimension when photographed at 100% life size. And those small sunflower seeds look like footballs piled into a bowl when photographed close-up. No need to wait on sunrise, weather or wildlife—just grab what’s nearby and create a macro photo of it.
My indoor macro sessions generally involve using items in the kitchen. Food, spices, ice and kitchen implements all work great. But some of my favorite subjects involve dish soap, oil and water. By mixing these items together you can create bubbles, which make great macro subjects. There are two simple macro bubble techniques, and each one offers hours of creative photography.
Equipment needed for photographing bubbles
You don’t need much for these techniques. You’ll need a camera body, macro lens and tripod. I love using my Z 7II or Z 9 with the NIKKOR Z MC 105mm f/2.8 S lens but any macro lens will do. I use my articulating LCD screen a lot during macro photography, which makes it easier to focus. You will also need a flash or continuous light source for the first technique, and an inexpensive EL Wire light kit (EL or electroluminescent wire is a thin, flexible, self-illuminating wire that glows along its length and is meant to be used as a decorative light source.) for the second technique.
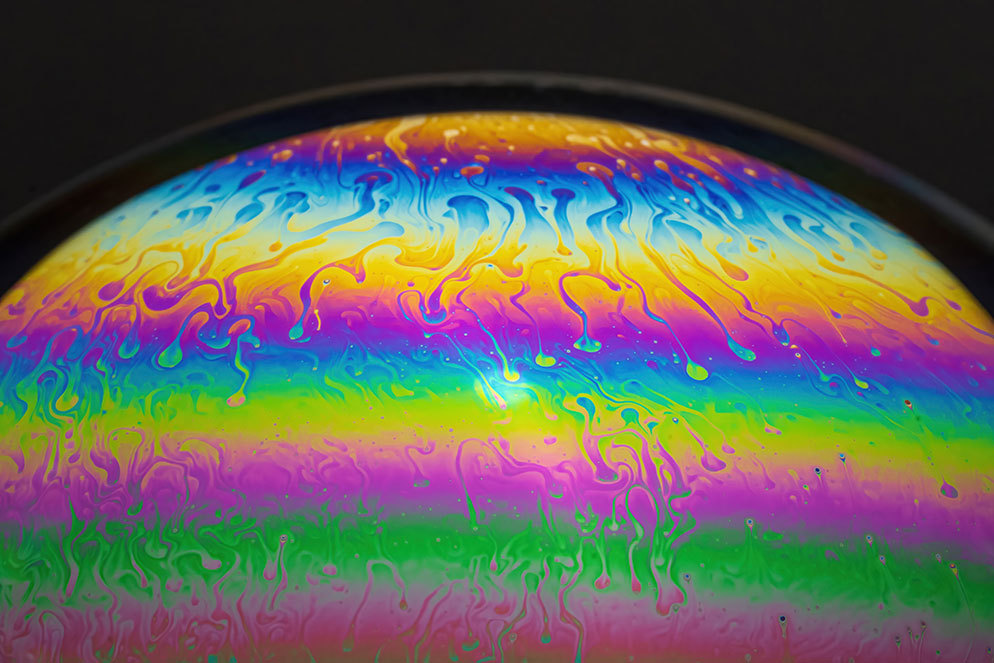
Blowing a bubble from a mixture of water and soap, and illuminating it against a black backdrop gives you a rainbow of colors to photograph.
Sometimes the colors within the water and soap mixture will fill the entire bubble, other times, like in this example, part of the bubble will show off an array of colors, while smaller bubbles will form around the bottom of the larger bubble. Each one is unique.
Bubble photography technique #1
The first set up is easy and can be done using simple household items.
First, find a table that allows you to shoot comfortably while sitting down.
Place black material underneath and behind your subject. Black poster board or fabric will work.
Next, create your bubble mixture. Mix three parts of water with one part dish soap. Add a little glycerin to this mixture. Stir up the mixture well.
Now find a receptacle for your bubble mixture. I like to use a lens cap. I place the lens cap on top of a mug to elevate it off the table for easy eye-level shooting.
Finally, you’ll need an overhead light placed about a foot above the bubble mixture. The larger the light source, the better results you’ll get. I use a small softbox with a continuous video light as my source of illumination. I position this using a light stand with a boom arm to put the light directly above the bubble. You can also use a Speedlight that’s placed so it shoots through a small softbox or other diffusion material to light your bubbles.
Here's where the fun starts. Add your dish soap mixture to the cap filling it to the top. Next, take a straw and slowly blow air into the bubble mixture. Watch as a colorful bubble expands from the solution. Once the bubble is created, focus and shoot on the colorful soap residue. Larger light sources will illuminate more of the soap sheen. The glycerin should help hold the bubble together and prevent it from popping. I like to shoot at f/22 or higher to get as much depth of field as I can. If you don’t get a colorful soap sheen on the bubble, try a different brand of dish soap. Once you have a good bubble, keep shooting. You'll be amazed at how different colors form and swirl on the bubble for quite some time.
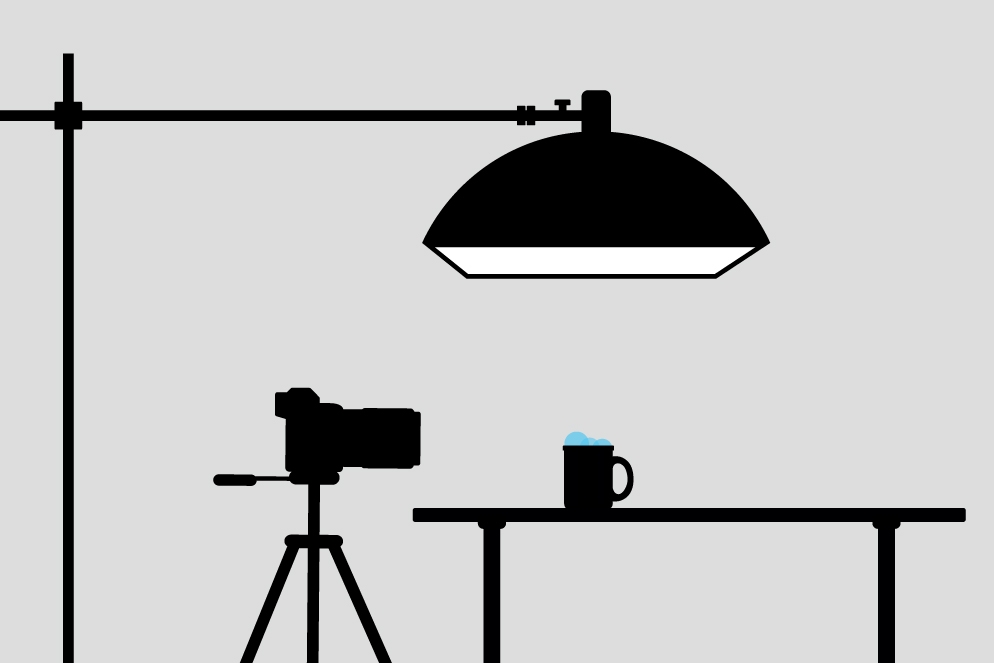
For this technique—photographing a blown bubble straight on to the camera. The small container of liquid is sitting on top of a mug, and faces the camera. The overhead softbox in this situation lights the bubble.
Bubble photography technique #2
This time you’ll want to use cooking oil instead of dish soap to create the bubbles.
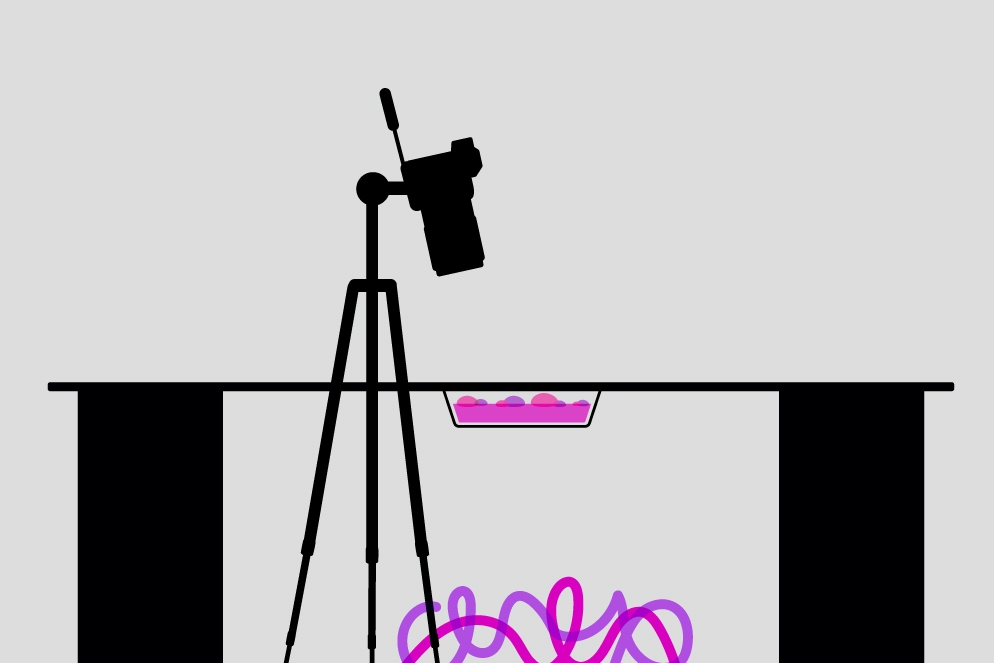
First, find a small clear glass container. I use a small glass food storage container. Ideally the container shouldn’t have any labels on the underside, otherwise it might show up in the final image.
You’ll need a way to suspend the container above the ground. I tape a few tomato stakes on the sides which allows me to place the container above the ground.
Next fill the container a quarter of the way full with water. Add a generous amount of cooking oil. If you like, add a little glycerin to help retain the bubble shapes.
Now you need to add a light source under the bubble mixture. I really like to use EL Wire colored cables (they can easily be found at online retailers). By mixing the color combinations I can create a variety of hues to illuminate the oil bubbles. You can also place an iPad underneath with a colorful screen to create similar effects.
Stir up the bubble mixture to create the bubbles. If you don’t see many bubbles add more oil to the water. Glycerin will help keep the bubbles from popping. Once the bubbles are created, give the mixture a moment to stop moving. I like to shoot at f/11 around ISO 3200 for this type of image. Be careful about photographing moving bubbles and using too slow of a shutter speed. Ideally you can shoot around 1/15 or faster, just wait for the bubbles to stop moving. If your bubbles are large, try shooting at f/22 for better depth of field.
Make sure to position your camera on a tripod pointing straight down into the oil/water mixture to get the most depth of field. If the front of the lens is parallel to the bubbles, you’ll be able to maximize the depth of field. Experiment with different color combinations to create a variety of abstract images.
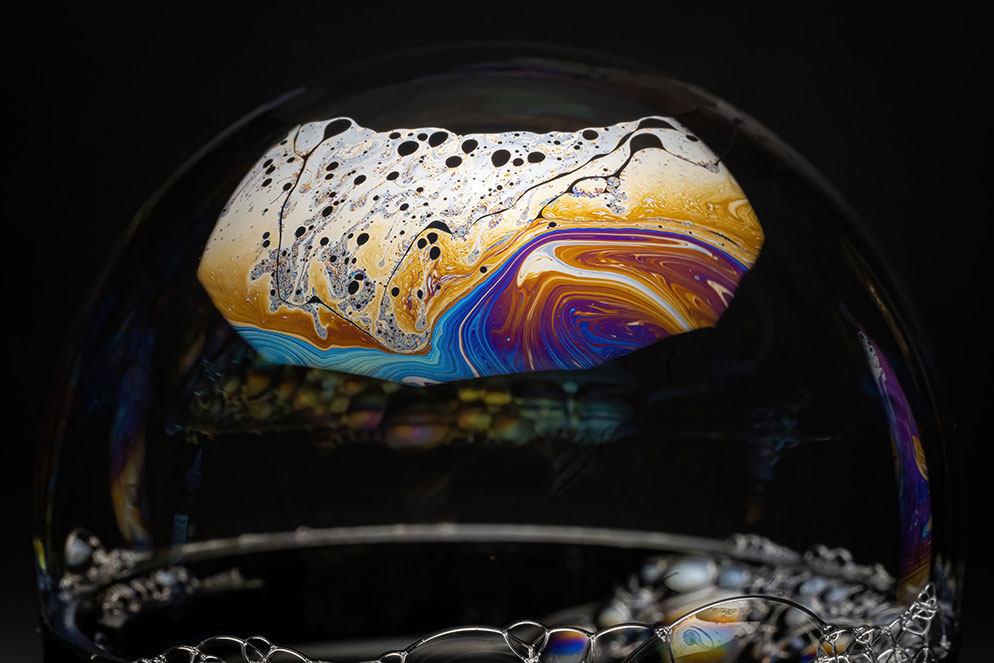
For this technique—photographing bubbles in a container of water with colored lighting below, the camera is positioned straight over a container of water that has had a mixture of oil and glycerin added to it. The colorful lights beneath the container show through as diffused colors.

Photographed from overhead, with colorful lights below, the oil and water mixture lets you create an array of unique images.
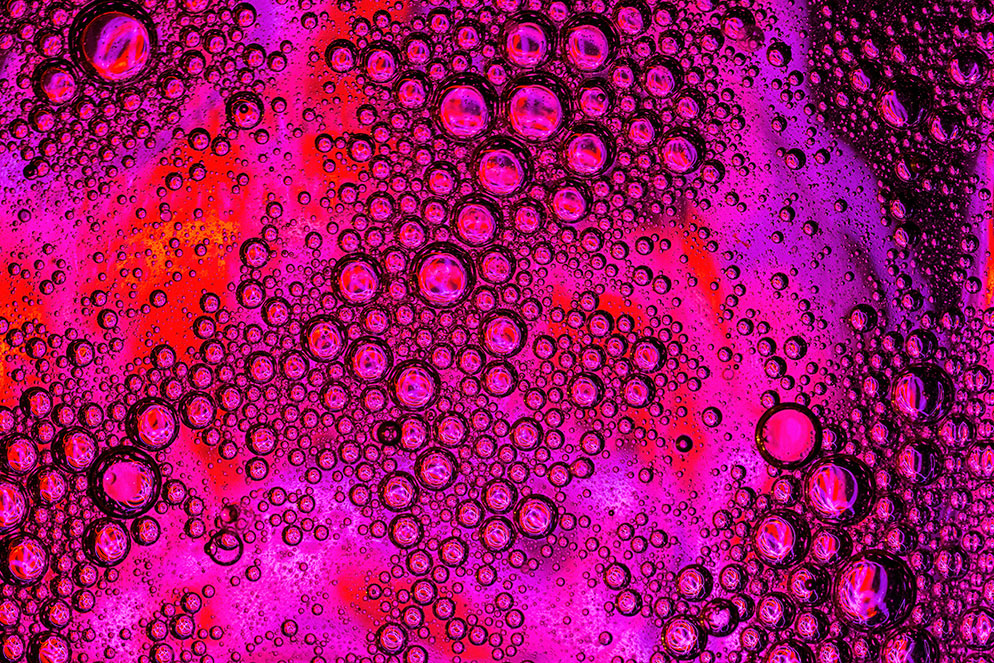
Change the color of the lights below the container of water and oil mixture or focusing on a different area of bubbles you to create yet more abstract imagery.
Macro bubble photography is simple to do, and the results might surprise you. The next time you’re home on a rainy day, grab your camera, macro lens, tripod and head to the kitchen. Whip up some dish soap and water, and the let the macro photography begin!


