Five Z 9 Features That Aid in Night Photography
The Z 9 has an impressive list of features that makes it wildly attractive no matter the genre of photography that you shoot, but one group of photographers that probably didn’t expect to see such a large number of improvements were astrophotography or Night Landscape photographers.
In this article I want to focus on five of the features that have impressed me the most while shooting at night.
Illuminated buttons
As familiar as you are with your camera, finding all of the buttons just by feel can be difficult to accomplish, especially if it’s cold outside and you’re wearing gloves. Many of the buttons of the Z 9 are illuminated so it doesn’t matter how dark your environment is, you will still be able to easily navigate all of the buttons and dials.
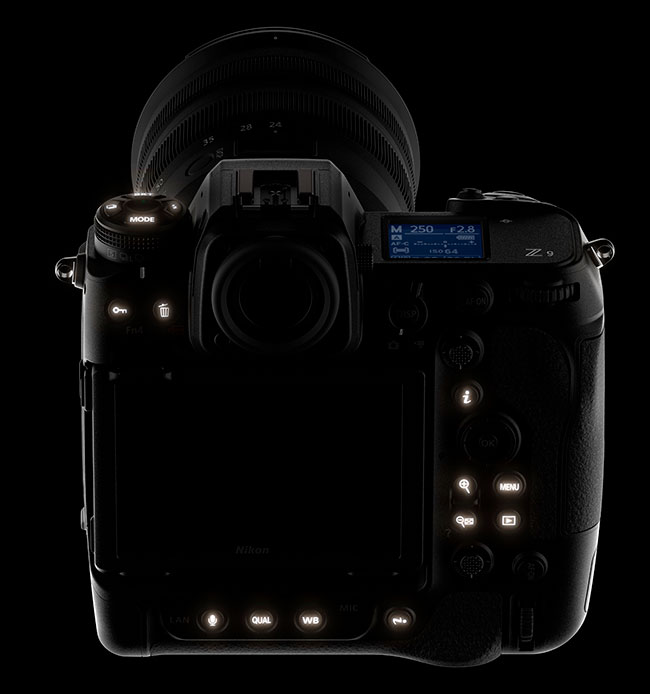
Illuminated buttons on the rear of the Z 9 mirrorless camera.
Starlight View
You will find the Starlight View option in the Custom Setting Menu, under Shooting Display, D9. When activated, Starlight View does a few different things:
Brighten the display: The most recognizable difference when Starlight View is turned on is that the display is significantly brightened. This change in brightness will not have an impact on the final image, it is done purely to help photographers more easily compose images. A nice added benefit is that even when zooming in to confirm focus, the display maintains the increased brightness value.
Improved low-light autofocus: The Z 9 can normally autofocus down to -6.5EV* but with Starlight View on, it goes down to an even more impressive -8.5EV*, meaning that the camera is now able to focus in scenes that otherwise would require complete manual focusing by the photographer.
* Measured in photo mode at ISO 100, f/1.2 lens, at a temperature of 20 °C/68 °F
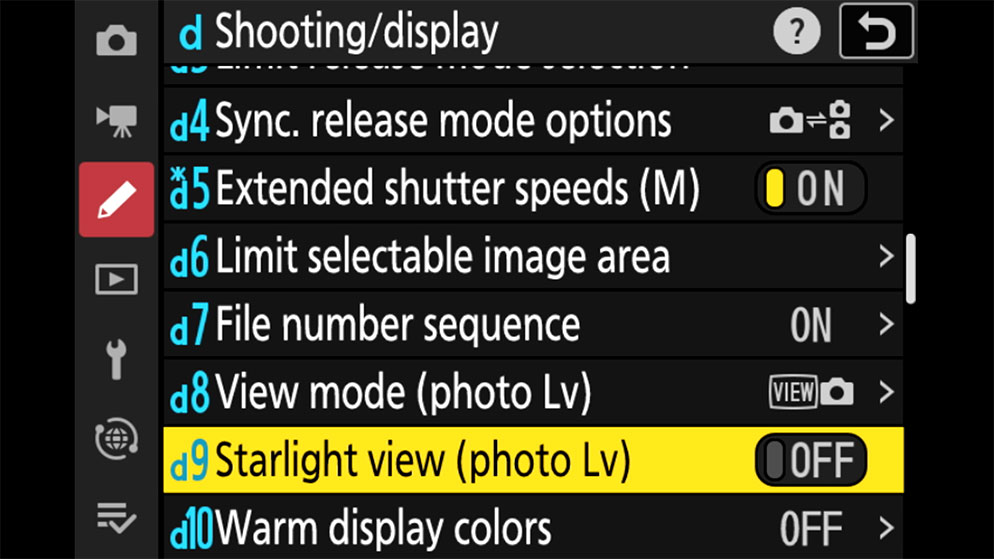
The Starlight view menu item (D9) can be found in the Custom Setting Menu, under Shooting Display. When activated, it will brighten the display and improve the low-light autofocus capabilities of the Z 9, down to an impressive -8.5EV. (Measured in photo mode at ISO 100, f/1.2 lens, at a temperature of 20 °C/68 °F).
Warm Display Colors
At night, many experienced photographers will carry a red headlamp or flashlight with them so as to not ruin their night vision. All that hard work will usually go out the window as soon as you look at the camera’s menu or EVF display, as the harsh light will quickly force your eyes to adapt to it, instead of your environment. That’s where Warm Display Colors comes in, as it’s designed specifically to preserve the adaptation your eyes have made to the dark.
Mode 1: Menus, the icons surrounding the EVF display, playback of images and the display itself are all shown in red tones.
Mode 2: The difference here is that the playback of images and the display of your scene is shown normally so you can get a better feel for your image, but all of the menus and icons are still shown in red tones.
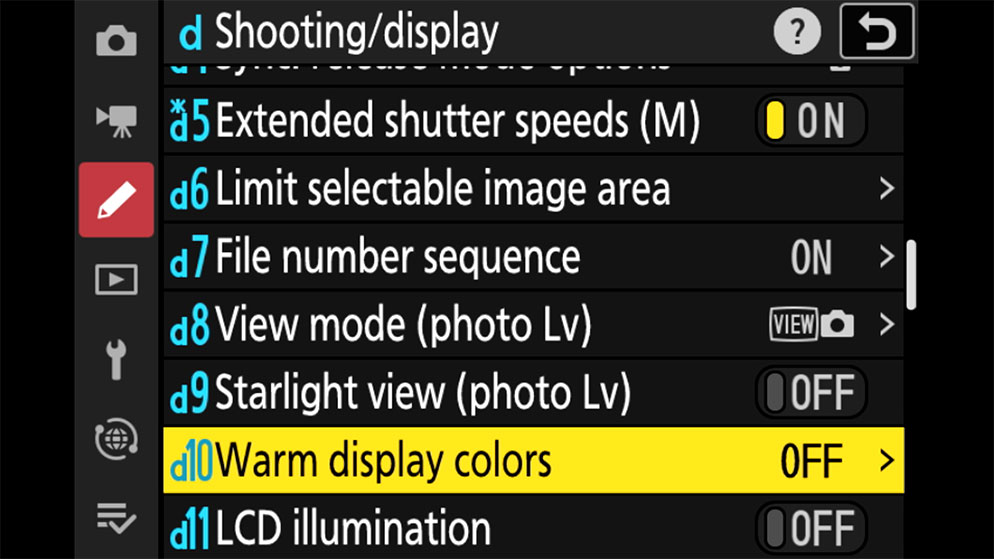
The Warm Display Colors menu item (D10) can be found in the Custom Setting Menu, under Shooting Display. Choose one of the two available mode options.
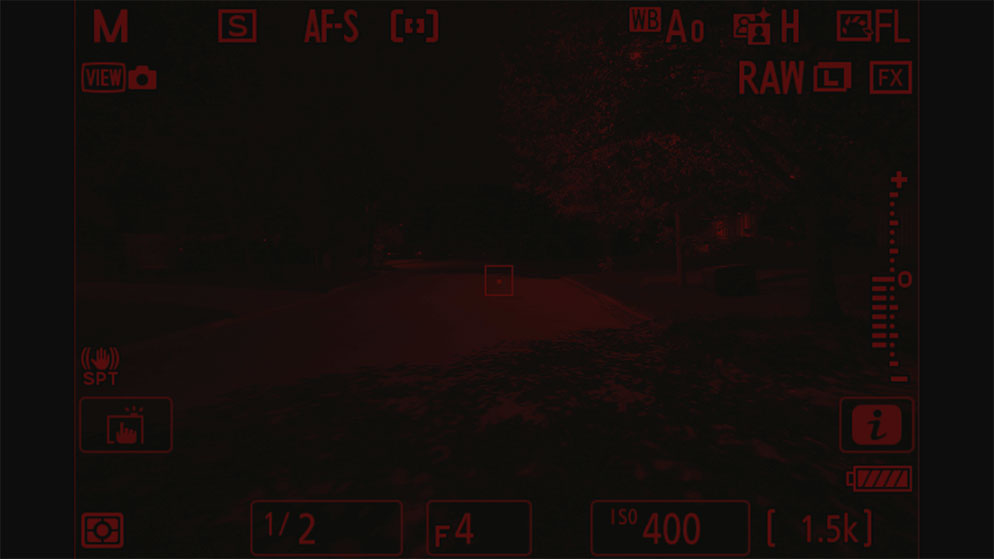
With the Warm Display Colors Mode 1 selected, the menus and icons surrounding the EVF display, playback of images and the display itself are all shown in red tones.
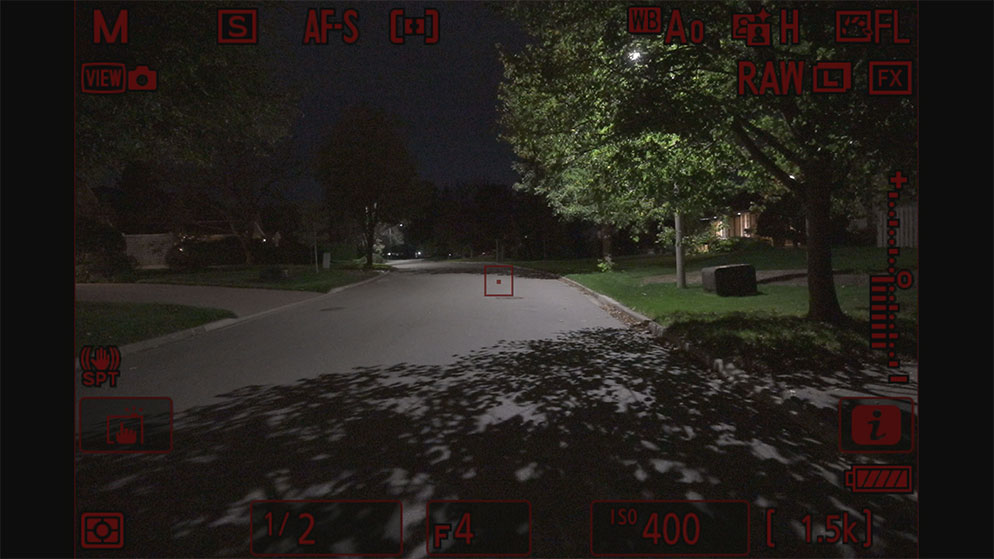
With the Warm Display Colors Mode 2 selected, the playback of images and the display of your scene is shown normally, but the menus and icons are shown in red tones.
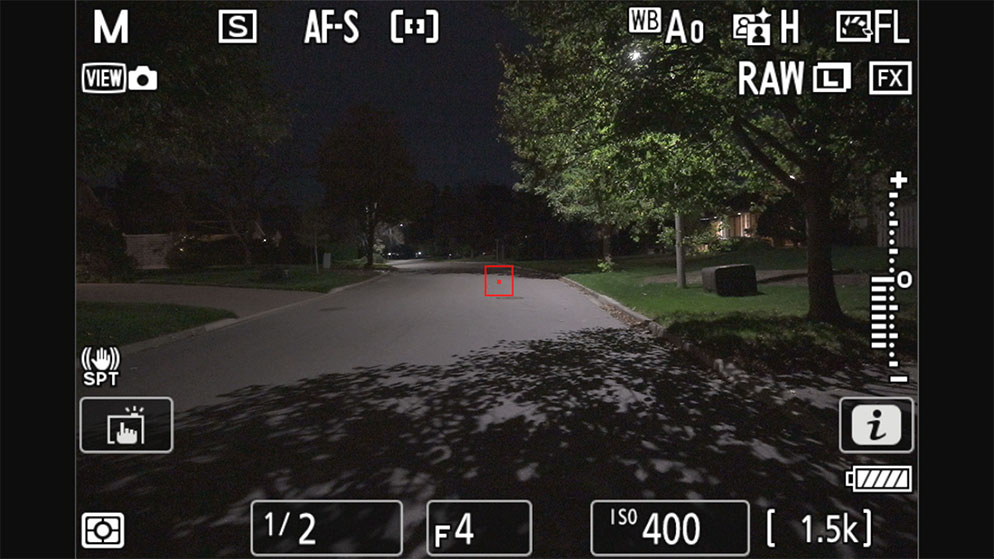
Image Frame
This last feature is simple in nature but can be quite beneficial when composing dark subjects when you want to know precisely where the edge of the image is against the black of the EVF.
By turning on the Image Frame, a thin border is highlighted, showing you the limits of your image.
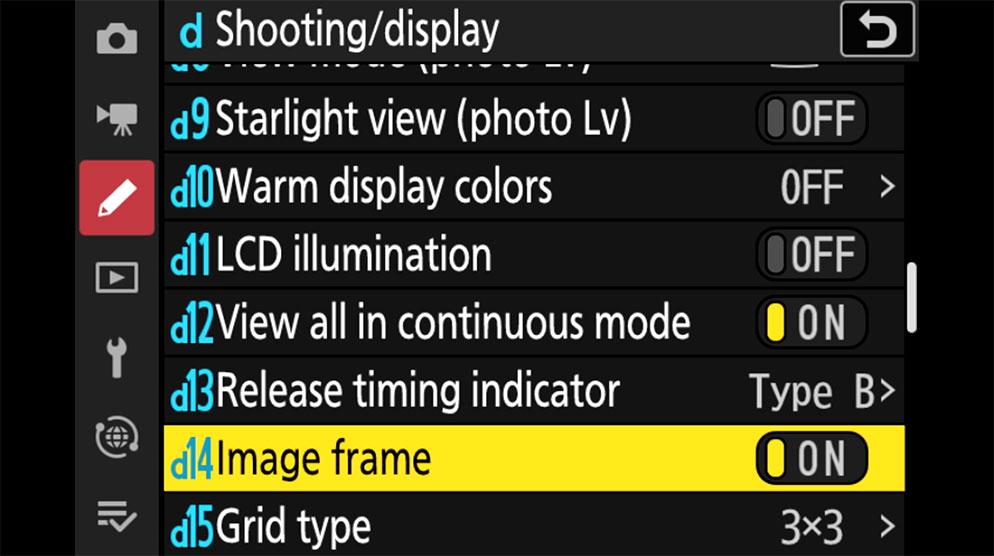
The Image Frame menu item (D14) can be found in the Custom Setting Menu, under Shooting Display. When turned on, a thin border around your image is highlighted.
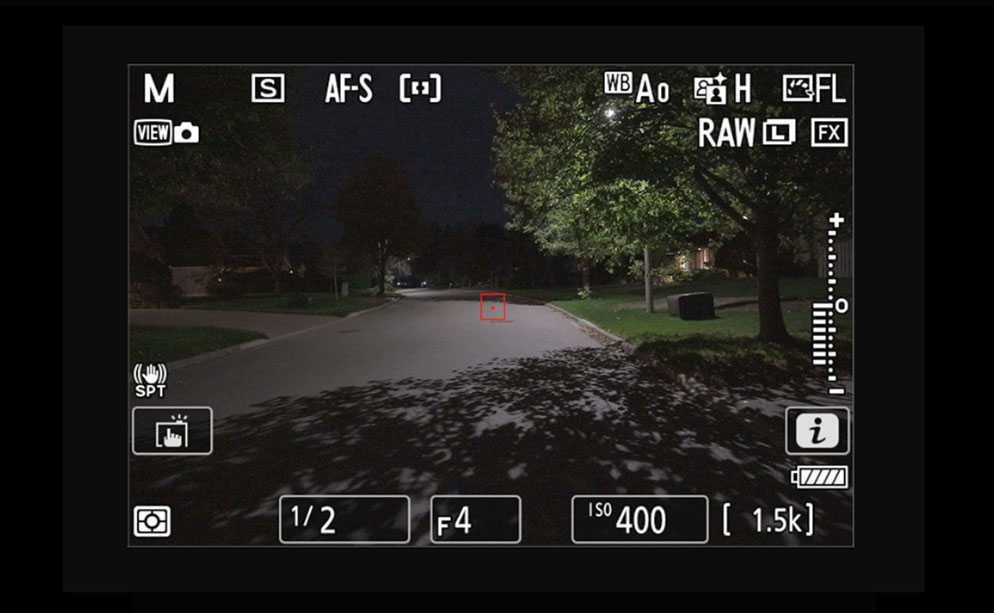
Example of an image in the EVF, with the Image Frame menu item turned on, showing the thin border around the image.
While the Z 9 is being lauded by photographers who want it for its high speed or advanced autofocus capabilities, it was designed for a much larger audience and great care was taken to ensure that even astrophotography and night photographers will find major benefits in the new flagship mirrorless camera.


