Create Your Light: Food Photography at Home
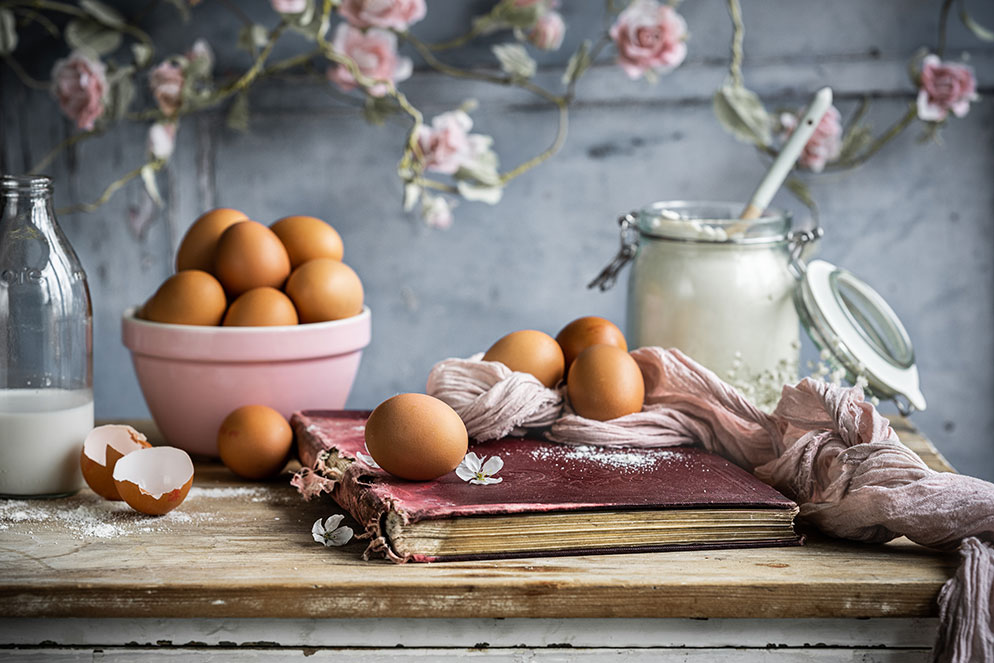
Styling the table with flowers, fabric and the large book along with ingredients for baking creates a bright and airy kitchen scene.
Now more than ever, shooting food in your home has become a popular photographic genre. However, our fascination with food is nothing new. Artwork in history even dating back to the 15th century shows that food was a primary source of inspiration, where painters tried to freeze a point in time in the most realistic perspective. These artworks depicted everything from lavish feasts and banquets to the simplest family meals at a table. The latter often highlighting frugality and poverty in those times.
I have always been a foodie, and love anything to do with food from shopping to prepping, so food photography was a natural progression. Capturing your food is about making it look delicious and lip-smacking. That being said, you don't need to be a top-end chef with extraordinary plating skills, no, it’s more about seeing the image. Simple ingredients found around the kitchen can make beautiful mouth-watering images. Think of a boiled egg with dripping yolk, melting ice-cream in a scoop, fresh berries or tomatoes with a spritz of water or a fizzy drink/champagne being poured into a glass.
Simple ingredients found around the kitchen can make beautiful mouth-watering images.
Hints and tips when shooting food using natural light
The sun is an ideal source of light for shooting your food, but it is also incredibly unpredictable and changes in both color and strength throughout the day. For this reason, many professional food photographers prefer to shoot using artificial light to ensure a uniform look throughout their images. There are, however, many professional food photographers who have forged great careers using just the sun. Learning to master it and work with it can be immensely rewarding, and actually really easy. The secret lies in the direction of the light for the particular food or drink you are shooting.
Food is almost always shot using directional light either from the side or the back. Never shoot food straight on as it will lack depth and dimension and look, well, just unappetizing.
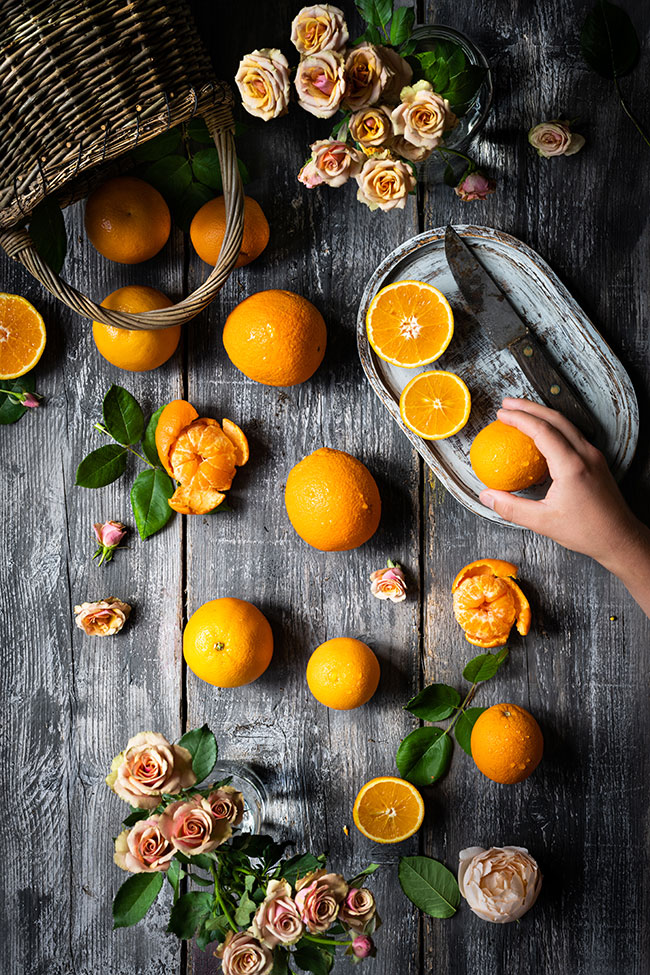
Style your shot carefully but don't overdo it. The flowers and basket add to the arrangement of oranges. The hand adds interest.

An overhead view creates an easy background—the table or surface your subject is placed on.
Finding your light
The best way to find the perfect set-up spot in your home is to take an egg and walk around to your various windows. Standing with the egg side on, you’ll want to see a beautiful sombre feathered shadow falling across it, starting lighter closer to the window and falling off into shadow. Ideally, soft filtered light, using either a diffuser or in overcast weather, is perfect; thankfully here in the UK, we're not short of overcast days.
On days when the weather is grim and dark, it may be best to bounce the light by positioning a reflector (you can use a piece of tinfoil or a white card if you don't have an actual reflector panel) on the opposite side of the food. This reflects the light back onto the dish, thereby bringing down a heavier shadow. Shadows are your friends, but too much shadow can make it heavy, so finding a happy balance is key.
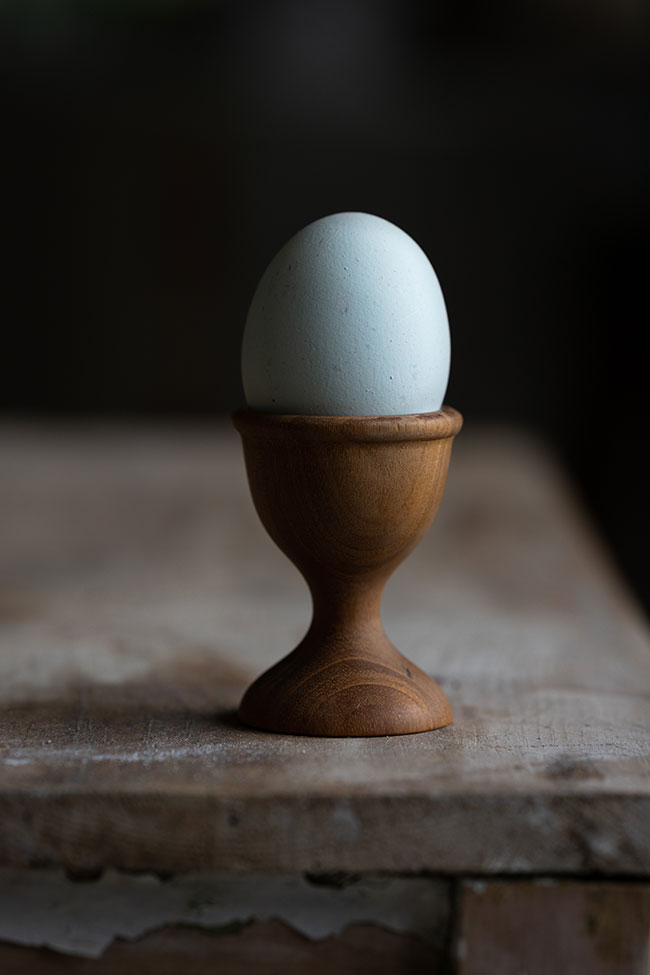
Egg with side lighting, choose the direction of light carefully.
Choosing your direction
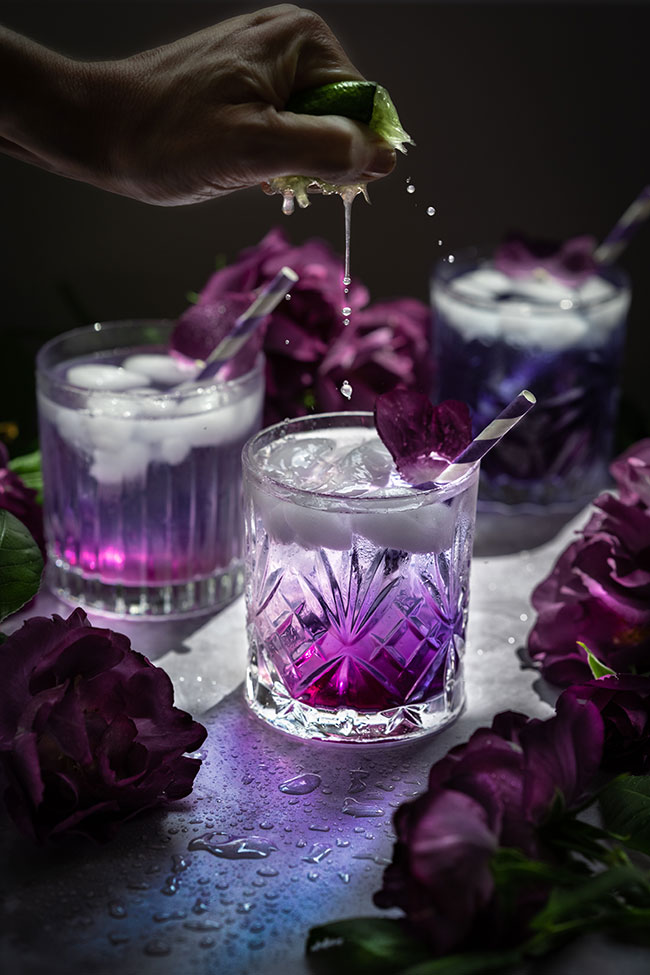
Your light direction is entirely based on the dish or drink that you're shooting and your preferred style. The general rule of thumb is one-directional sidelight. Backlighting for clear drinks like cocktails, low food like tarts with a shiny glaze or waffles with honey works beautifully. The beauty of digital is if you're unsure, shoot in both directions and see which look you prefer.
Choose the direction of light carefully. Sidelighting adds interest, shadows add depth.
Use hands in a creative way for great food photography.
Understanding your camera
The best starting lens to use for shooting your food is a 50mm f/1.8. This is the perfect go-to lens for us foodies and being reasonably priced; you'll definitely get your money's worth from it. At a later stage adding an 85mm f/1.8 and a macro lens to your kit also make for a great variation. While lenses are important, understanding and knowing how to use your camera in manual mode is key.
ISO
Many food photography blogs recommend that all food should be shot at an ISO of 100. This, I feel, is unnecessary and makes learning the other functions in the exposure triangle that much harder. I always recommend a higher ISO when starting out, especially if you don't have access to a sturdy tripod. That being said, the lower the ISO the less digital noise in the image, so do try to keep it as low as possible; but don't sacrifice your shutter speed if you're not using a tripod.
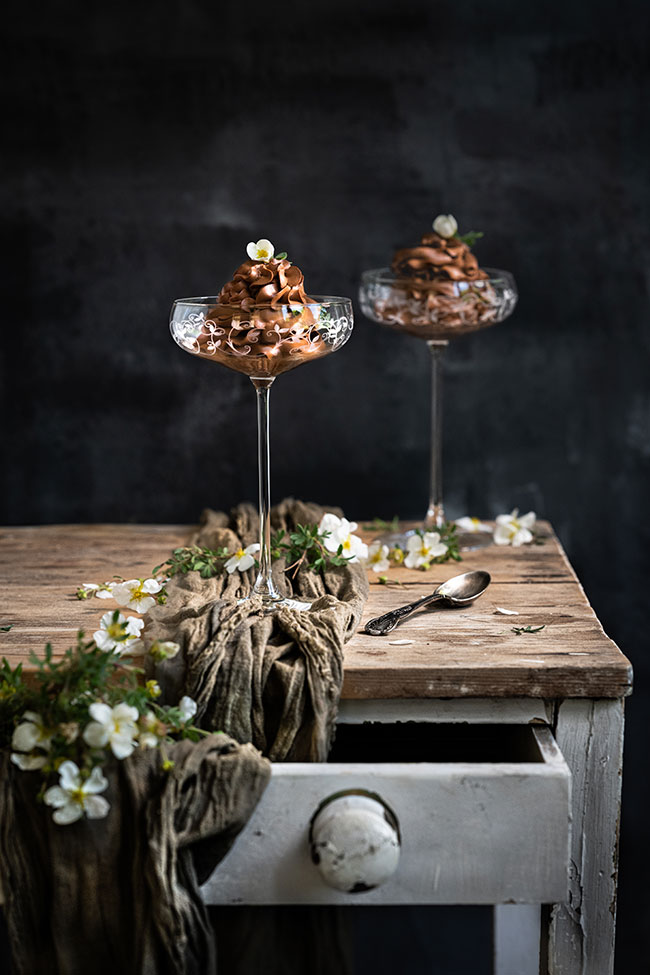
Choosing the right vessel is just as important to set the mood of an image. These glasses are ideal for the chocolate mousse desserts.
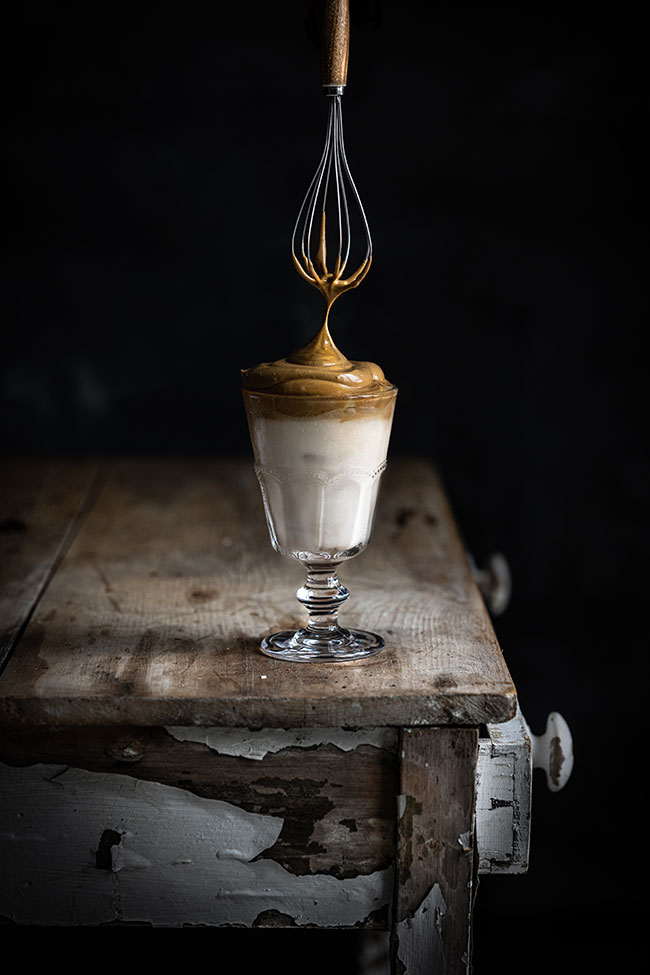
The addition of the wisk adds action to an otherwise static image.
Shutter speed
Shutter speed for food photography is an essential element in your exposure triangle, especially if you are trying to capture the perfect shot of something dripping. Try to keep the shutter speed to at least 1/125 of a second or higher when shooting handheld, anything lower than 1/125 of a second could mean you will end up with camera shake and an out-of-focus image. Using the light meter in your camera should ensure a perfectly exposed image.
Aperture
There is no set rule for aperture as it depends on the message you want to convey in the scene. I prefer to shoot a straight on scene with a wider aperture which creates a shallow depth of field. Using an f/stop of around f/3.5 and choosing a hero or a prominent element as a focal point will help to draw attention to the area that you want to feature. For an overhead or flat lay shot, you’ll want the whole image to be in focus, so a smaller aperture starting around f/5.6 is ideal.
White balance
These days Nikon’s digital cameras are really advanced with white balance temperature settings, making it easier than ever to achieve a good color balance. Leaving your camera set to auto white balance and shooting in RAW format gives you room to correct any white balance issues in post-production.
Styling your scene
Before you ask, yes, all my food is real and totally edible. I feel that food photographers have a bad rep for fake food. Granted, in bigger commercial shoots, many substitutions are used due to time constraints or food spoiling fast. Still, when shooting at home in natural light, there is no need to fake it. If you're concerned about food spoiling, use a stand-in ingredient while you set up your scene or camera settings, before adding the dish.
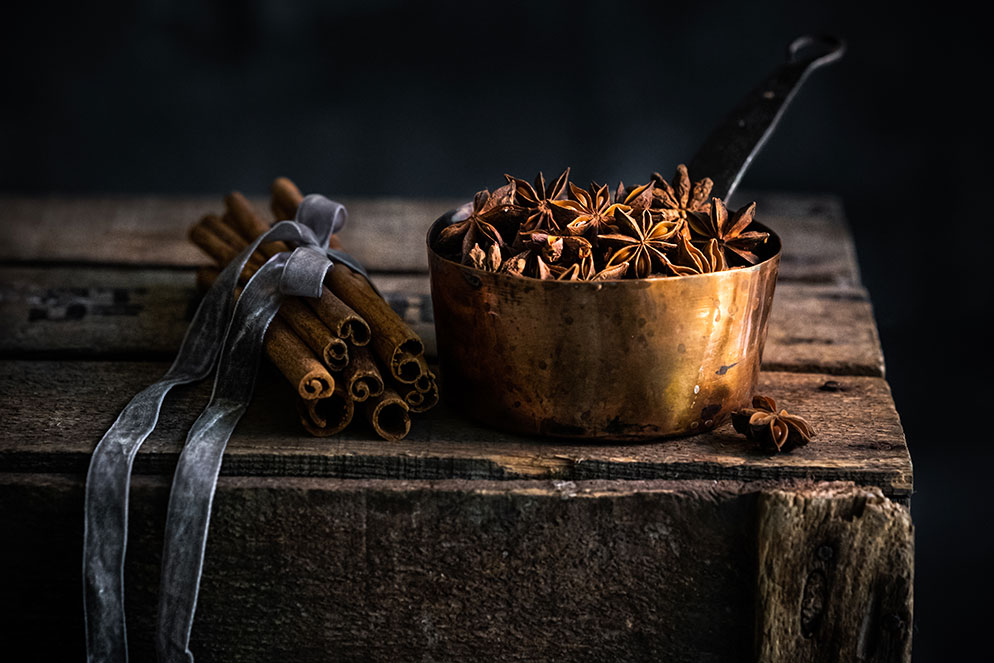
A bowl of star anise spice and cinnamon sticks wrapped in a ribbon look delicate and inviting.
Tips to help with styling food photography
-
Keep your ingredients fresh and hydrated—the camera never lies!
-
Plate up on smaller plates, fill your scene with pinch bowls of fresh herbs, spices or fruit.
-
Neutral props make the food really stand out.
-
Fabrics add a great visual aspect by adding texture and a leading line.
-
Be aware of reflections, particularly with shiny cutlery.
-
Find interesting backgrounds that add drama. Vinyl surfaces are great to wipe clean after spills. Also, wooden planks, newspaper, parchment paper, sheet music, wallpaper samples, ceramic tiles make fantastic and unique surfaces. Try and avoid pine table tops, they can end up being very yellow/orange and somewhat overbearing.
-
Don't feel the need to fill space; negative space can be very powerful.
-
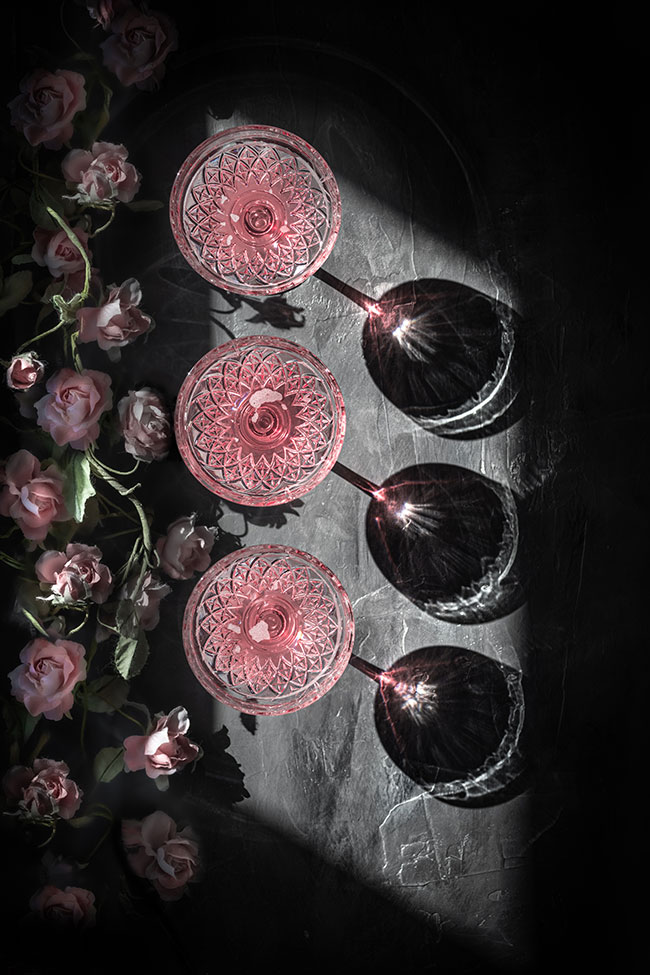
Odd numbers create better composition: one, three, five (cupcakes, glasses, plates) are visually more appealing.
-
When in doubt, style in a triangle either placing three dishes/glasses or piling popcorn.
-
Always make sure that your props are relevant to the dish, adding a teapot in the background of a curry dish is not ideal.
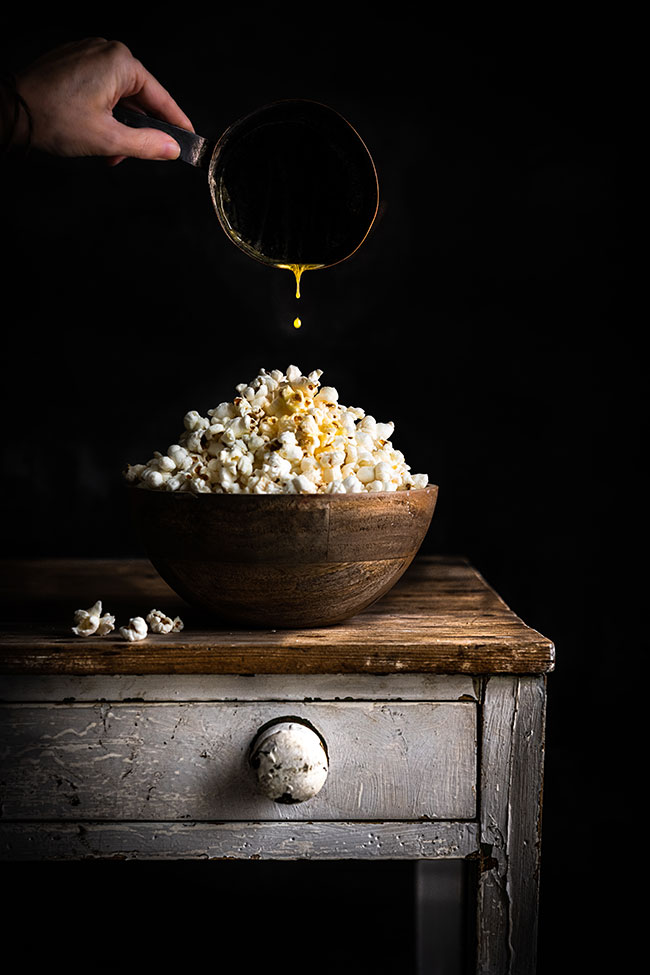
The hand pouring butter over the popcorn adds action to the image, and makes the popcorn more mouthwatering.
Using the self-timer, you can become "model" as well as photographer.
Adding variety to your shots
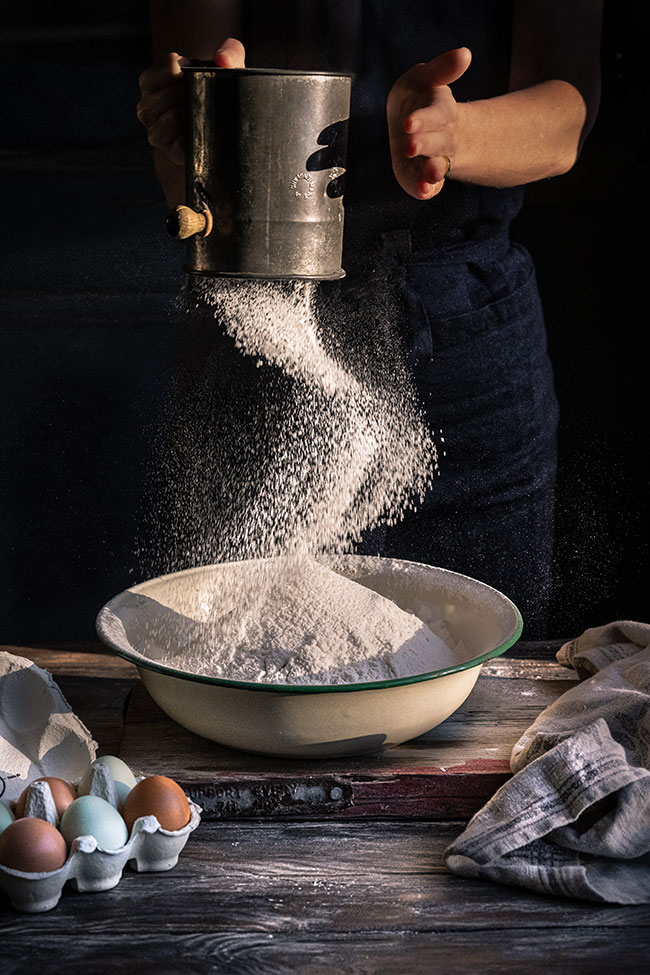
When shooting a number of different dishes, one can start to feel that they look the same after a while. This is when you need to grab a family member and put them to work either by adding their hands in the shot, holding a dish or for camera-shy ones, just in the background. Having a person in the shot really helps the viewer connect with the image. If you are on your own or don't have a willing family member, then using a tripod and setting your camera's self-timer is the way to go. I have programmed my camera to take ten images per self-timer session, allowing me to capture a perfect drip or sprinkling scene without too much back and forth.
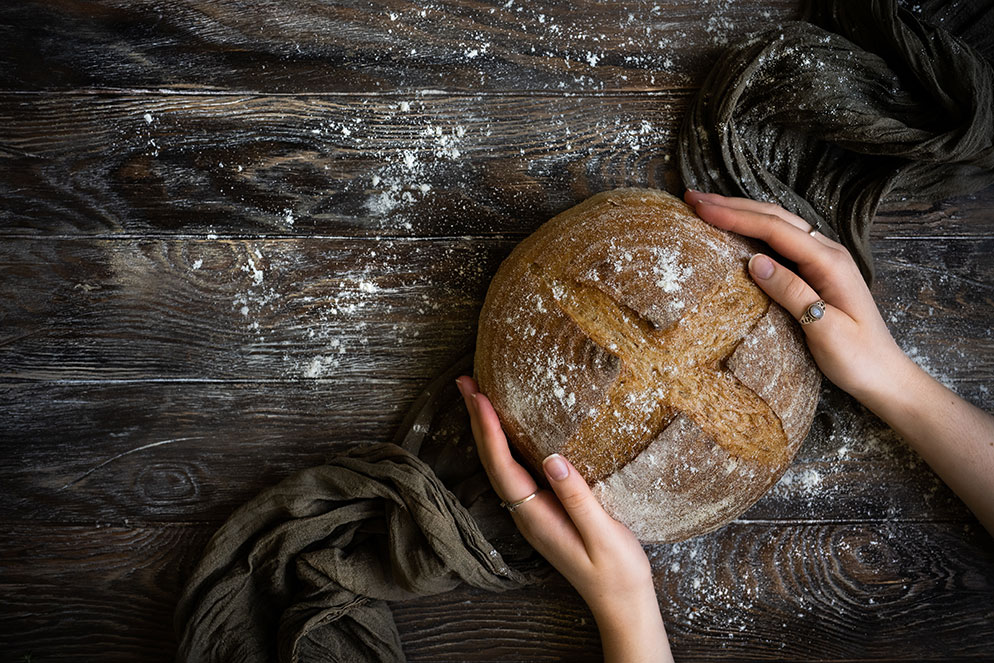
The fabric, hands and light spray of flour all add to the appetizing appeal of the loaf of home-baked bread.
What started out as a hobby has turned into a full-time profession for me, just by playing around and working on a distinctive and unique style. I so love to see other photographers and cooks create show stopping images by finding ingredients and props around the house, and using the tips above. Bon appétit!


