Bright Ideas: Tips and Techniques for Photographing Jewelry
Whatever reason you have for photographing jewelry, the shiny little treasures will present particular challenges. They're shiny, for one thing, and they're small and can feature complex, detailed designs. Their silver, gold and bright, clear surfaces and variety of colors can be tough to light. Tougher still is preventing flare, reflection, hot spots and...well, you get the picture. Or you don't.
The good news is that none of the above really matters, as there's a basic approach to jewelry photography that, with a little preparation, produces sparkling results.
To prove the point, we asked commercial photographer extraordinaire Jody Dole to turn his talents—and a Nikon D810 DSLR, an SB-900 Speedlight or two, a couple of lenses and a few essential accessories—to the task of turning gems into charming images, and doing it without fuss or bother.
Of course we took notes.
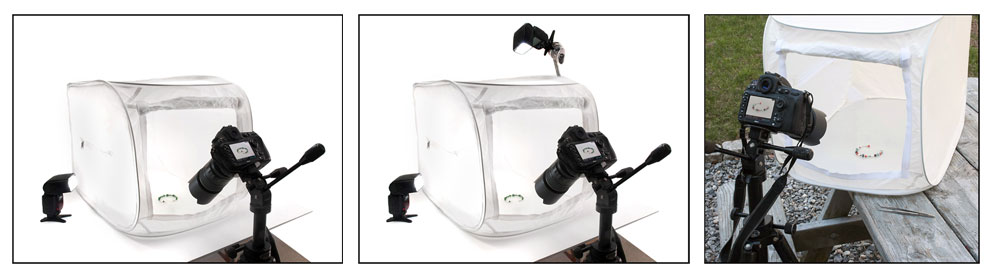
Jody used his light tent most often with one SB-900 Speedlight, sometimes with two, and also photographed outdoors without flash. The Speedlights were fired wirelessly in Commander mode by his D810's pop-up flash. (Check your Nikon DSLR and Speedlight manuals for information about Speedlight firing modes and to verify compatibility and use of Commander mode.) For most of the images the SB-900s were set to manual mode at half power. For all the images he tripped the camera's shutter by hand.
A Smaller Room. The key to getting great results is to control the light you'll need to illuminate your subjects, and the simplest way to control it is to confine it to a small space. The best way to do that is to get a light tent. It'll soften and diffuse the light and provide consistent results. A Google search will offer up lots of choices for that piece of gear. Jody uses an older model Photek Digital Lighthouse Shooting Tent. Measuring 18x18x27.5 inches, it came with white Plexiglas and black cloth insert bases. "No matter the brand," Jody says, "I suggest a light tent that has a large opening so it's easy to position your camera and lens."
Jody placed the necklace on an 11x17 sheet of double weight, bright white inkjet paper that he used in the light tent for many of the shots, then went in with tweezers and smoothed out the circular shapes to give the piece a sense of smooth movement. D810, AF-S VR Micro-NIKKOR 105mm f/2.8G IF-ED, 1/60 second, f/22, ISO 100, manual exposure, Matrix metering, SB-900 Speedlight.
Keep Things Clean. The jewelry has to be free of dust, dirt, debris, smudges and fingerprints. When you're shooting close to a subject, any stray bit of anything will be immediately evident when you view the images on a monitor or in a print. "Canned air is one of the most important things to have when photographing jewelry," Jody says. "And a soft, lint-free microfiber cloth is good, too. I use the cloth first, then a blast of air. And I still check each image in post production in case it needs a bit of dusting off in Photoshop."

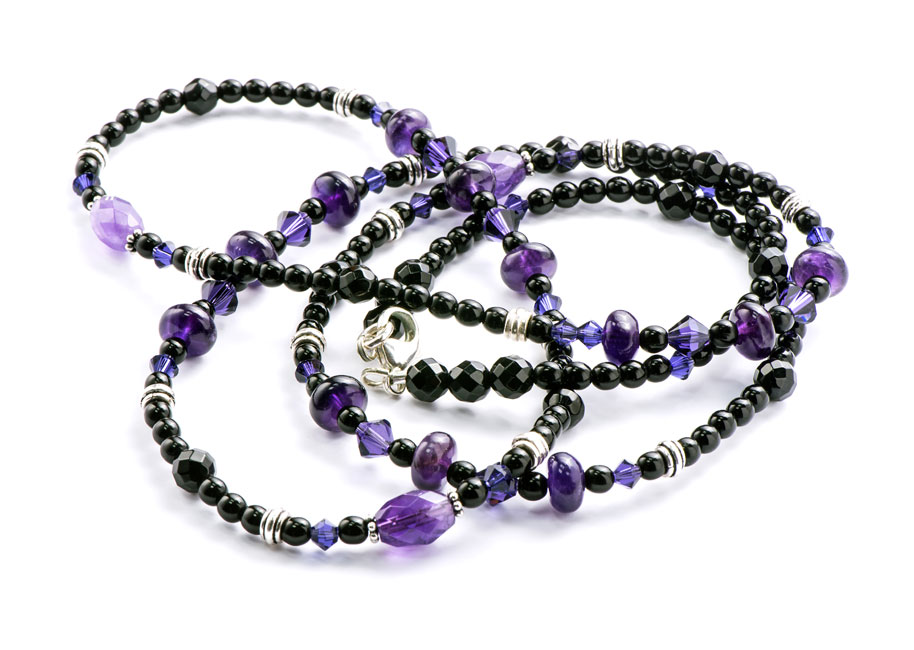
For this photo, Jody once again turned the tent on its back and shot straight down. Using the black cloth that comes with the tent means using a piece of tape or a lint roller, or both, to make sure the cloth's absolutely clean and clear—and still you might need a bit of Photoshop dustbusting. D810, AF-S VR Micro-NIKKOR 105mm f/2.8G IF-ED, 1/60 second, f/29, ISO 100, manual exposure, Matrix metering, SB-900 Speedlight.
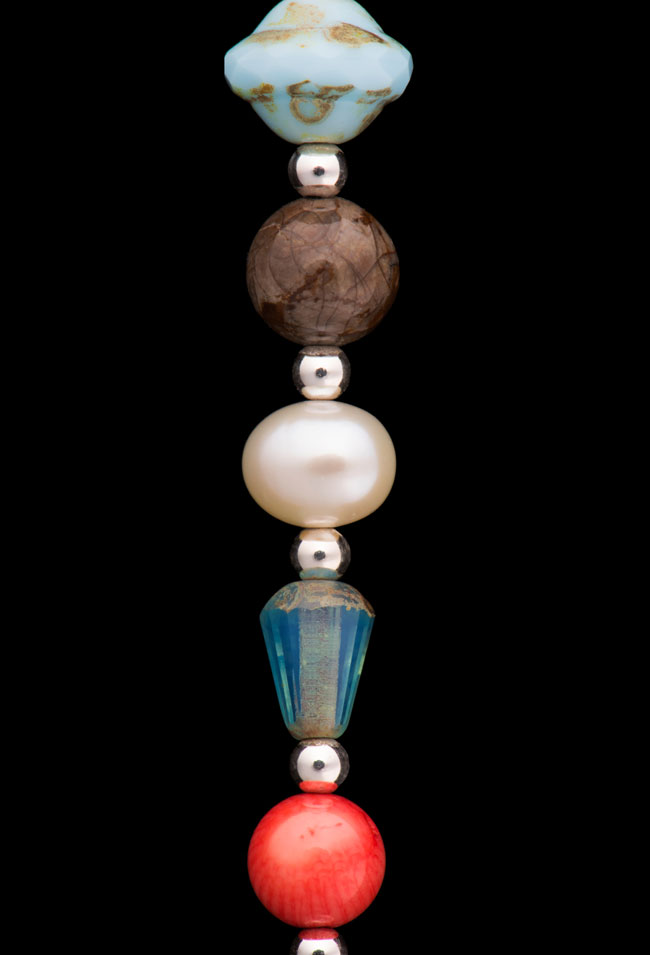
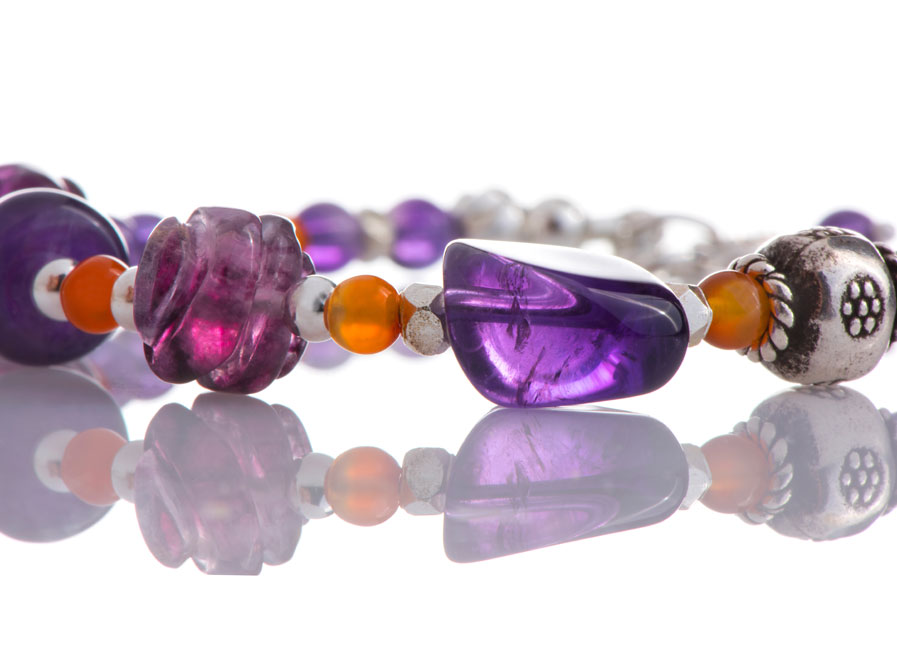
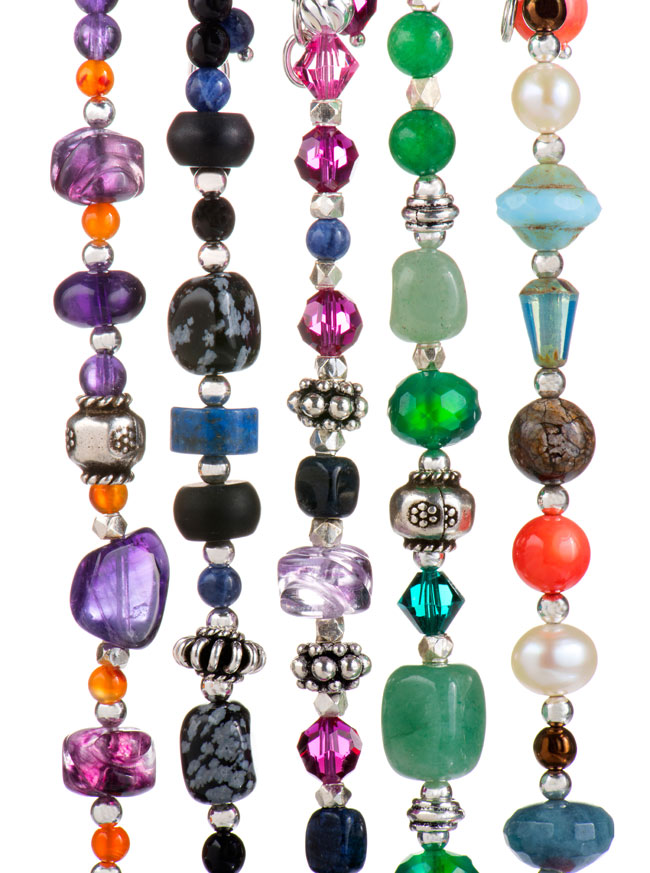
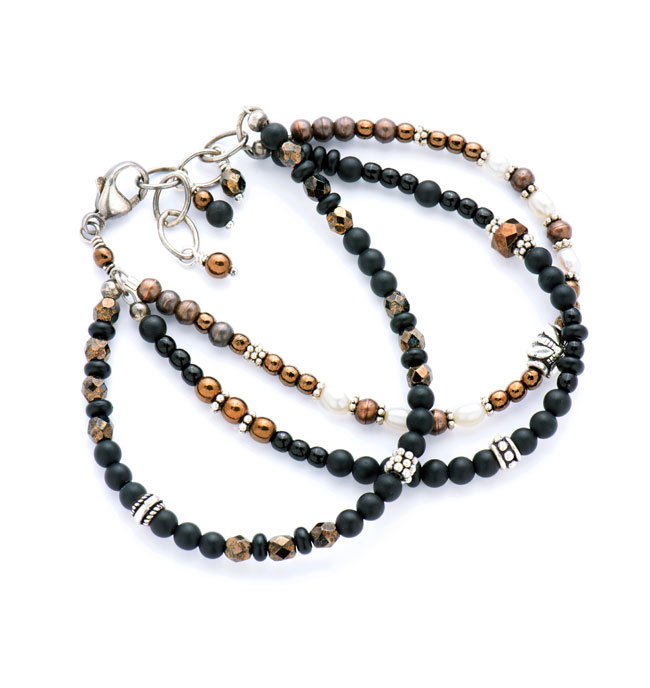
For this detail image, Jody hung the bracelet from a clothes hanger held in place by supports known as third-hand jeweler's tweezers. D810, AF-S VR Micro-NIKKOR 105mm f/2.8G IF-ED, 1/60 second, f/29, ISO 100, manual exposure, Matrix metering, two SB-900 Speedlights.
Position is Everything. Position of the Speedlights, that is. Check the accompanying setup photos for Jody's preferred placement, which was arrived at by equal parts experience and experimentation. "It's logical to have some top light and some sidelight," he says. Test shots will show how the positioning of one or two Speedlights is affecting the image. "Using two lights will increase the dimensionality of the piece of jewelry, and affect how the shadows fall from the shapes and curves of each piece. Basically it's trial and error until you start to get results you like; then you've got a base to work from. It's how the light falling on a section or part of the jewelry, and how it will highlight the piece that will determine what you change or adjust.'
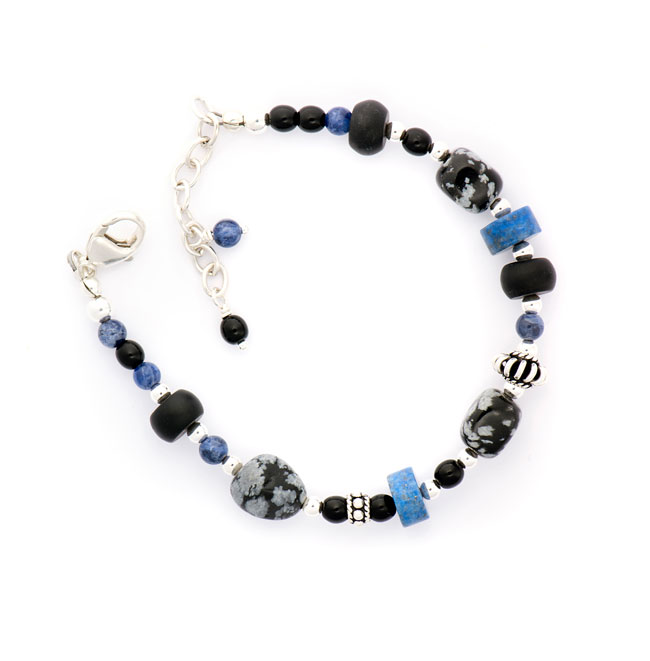
The bracelet was photographed using the left-side Speedlight firing from outside the tent. D810, AF-S VR Micro-NIKKOR 105mm f/2.8G IF-ED, 1/60 second, f/29, ISO 100, manual exposure, Matrix metering, SB-900 Speedlight.
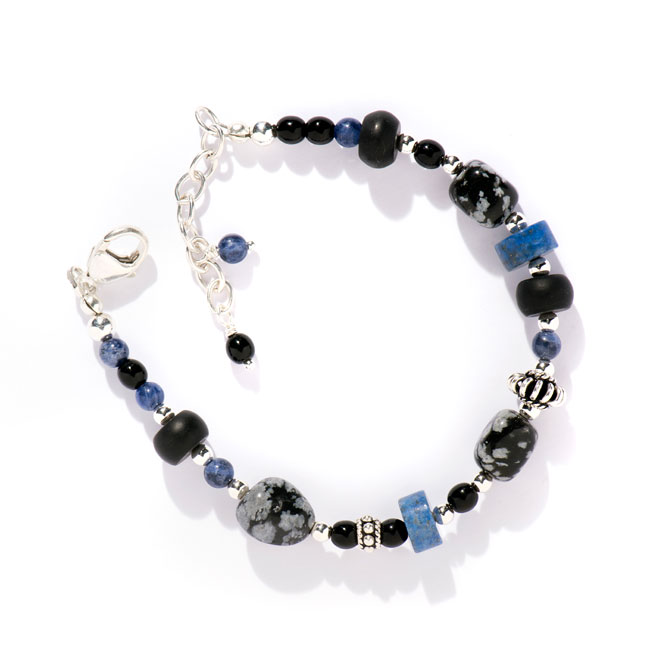
For this photo, Jody opened the side of the tent and fired the flash directly onto the bracelet, with no diffusion of the light. The shadows are the most noticeable difference between this version and the previous image, but note also the highlights on the bracelet in this one. D810, AF-S VR Micro-NIKKOR 105mm f/2.8G IF-ED, 1/60 second, f/32, ISO 100, manual exposure, Matrix metering, SB-900 Speedlight.
This photo was made using two SB-900 Speedlights positioned as shown in the setup shot. "Using two Speedlights gives a wraparound look to the light and more dimension and definition to the jewelry," Jody says. Once again, a clothes hanger and a third-hand jeweler's tweezers played a part in the image. D810, AF-S VR Micro-NIKKOR 105mm f/2.8G IF-ED, 1/60 second, f/29, ISO 100, manual exposure, Matrix metering, two SB-900 Speedlights.
The background for this and the previous image is the back of the tent, rendered bright white by a bit of overexposure. "It's a two-Speedlight setup with the left flash set for half power and the upper right for two-thirds. It's essentially overexposure, and it took some trial and error to figure it out and get it right." It's another picture made with the clothes hanger and third-hand jeweler's tweezers. D810, AF-S VR Micro-NIKKOR 105mm f/2.8G IF-ED, 1/60 second, f/29, ISO 100, manual exposure, Matrix metering, two SB-900 Speedlights.
Make Arrangements. With the jewelry inside the light tent, Jody will move the tripod-mounted camera. "Up a little, down a little, this way or that until I find a position that looks good. Then I'll lock the camera down and use a pair of tweezers to start to arrange and maneuver the jewelry into a symmetrical, attractive pose. I don't try to do both at once—maneuver the camera and the jewelry at the same time. I get the camera position and angle, then adjust the jewelry." That said, there might be a little adjustment of the camera at the end of the jewelry arrangement. In some cases, Jody can leave the camera locked down for the next item, but it's likely each piece is best served by its own camera position and angle. "You do whatever the item requires; you'll see what works best."
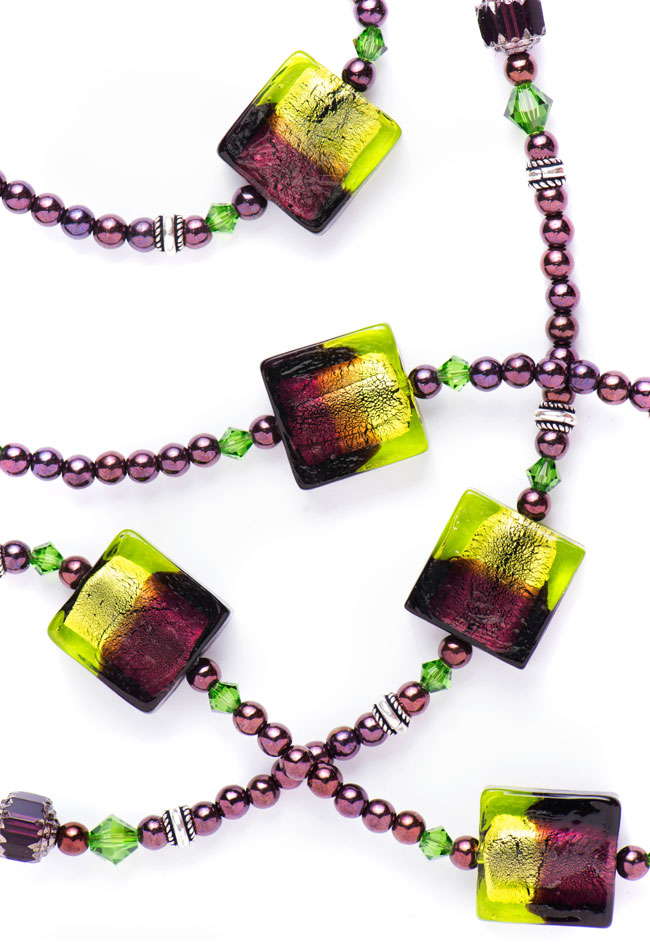
Jody shot straight down into the tent with the necklace placed on the bright white inkjet paper. D810, AF-S VR Micro-NIKKOR 105mm f/2.8G IF-ED, 1/60 second, f/29, ISO 100, manual exposure, Matrix metering, SB-900 Speedlight.
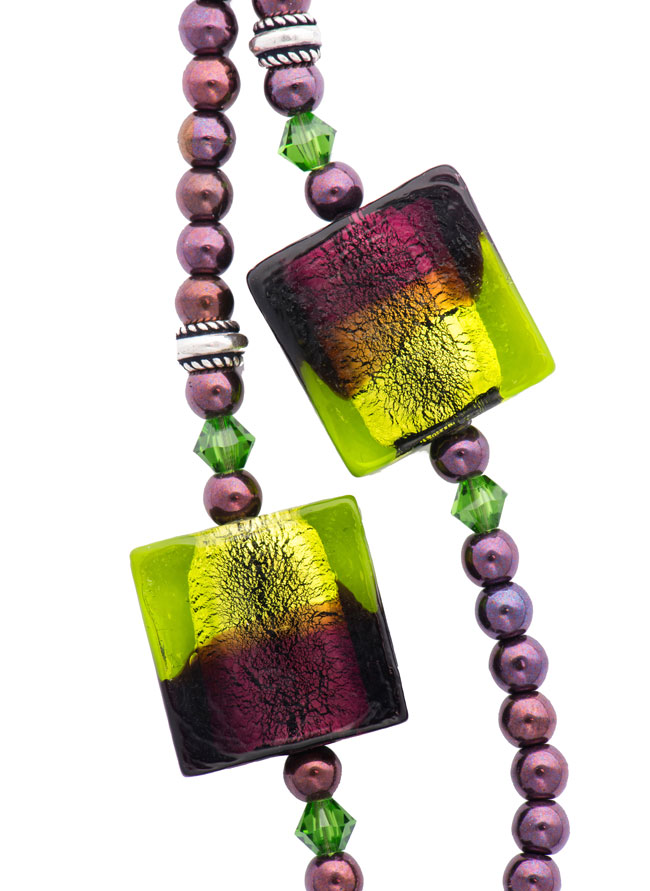
"The difference between this shot and the previous one is emphasis and design," Jody says. "I took the first shot, then moved the camera in closer for the second. I like the way you can have two very different views depending on how you frame and compose." D810, AF-S VR Micro-NIKKOR 105mm f/2.8G IF-ED, 1/60 second, f/29, ISO 100, manual exposure, Matrix metering, SB-800 Speedlight.
Lens Choice. Jody prefers Micro-NIKKORs for close-up work, and used his AF-S Micro NIKKOR 60mm f/2.8G ED and AF-S VR Micro-NIKKOR 105mm f/2.8G IF-ED for these photos. They provide a good working distance (the distance between the front of the lens and the subject you're photographing) and a 1:1 (life-size) reproduction ratio. He used both manual and autofocus modes. "I tended to manually focus on the real close-ups and the smaller single pieces, like earrings. They're larger in the frame and it's easier to achieve critical focus. For the somewhat wider views where I can pick the focus point, I relied on autofocus—it's usually more accurate than manual, especially when I'm concentrating on composition and arrangement of the piece."
Options and Choices
If a 60mm or 105mm Micro-NIKKOR isn't among your lenses or on your wish list, the AF-S DX Micro-NIKKOR 40mm f/2.8G or the AF-S DX Micro NIKKOR 85mm f/3.5G ED VR offer the working distances necessary to photograph with a setup similar to Jody's. You can also check the close-focusing distance of the NIKKOR you have and work within that distance. You may be able to zoom in tight enough to get the shot you want. Nikon also offers a DSLR close-up lens that when attached to NIKKOR lenses that have a 52mm filter thread will shorten the minimum focusing distance of the lens.
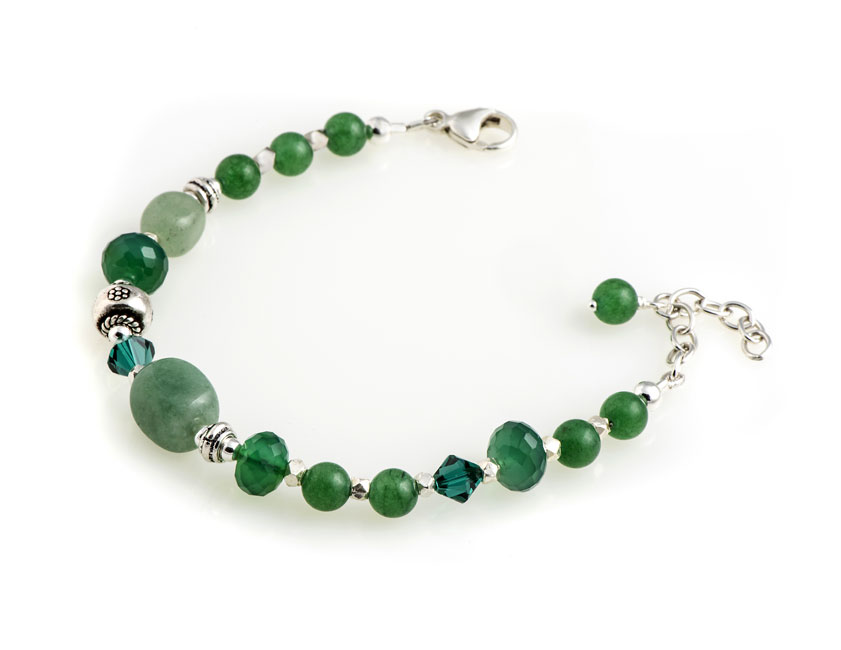
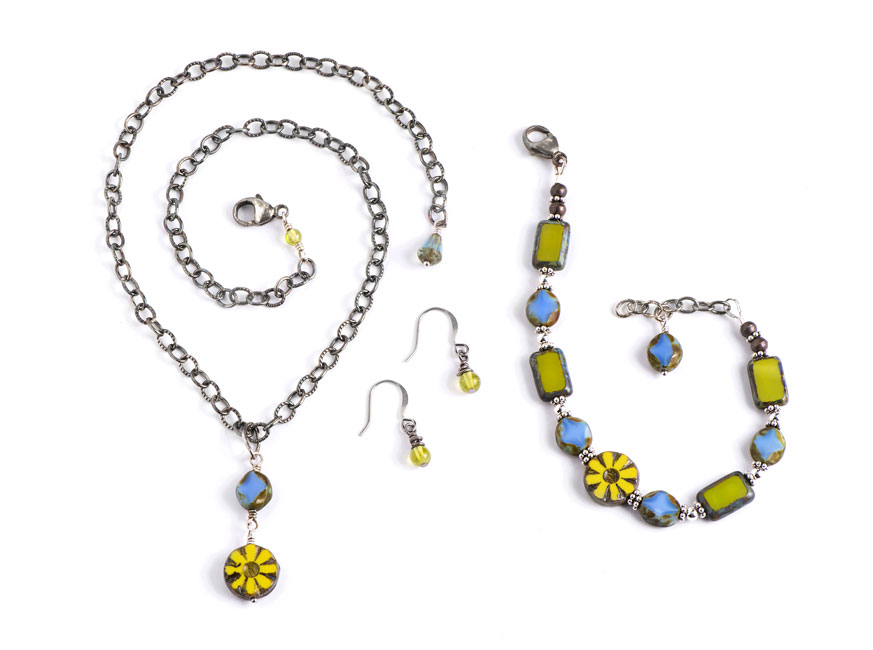
Jody made this image outdoors with the light tent set up on a picnic table. No flash, just bright sunshine coming in from the upper right. "The trick is to position the light tent in relation to the direction of the sunlight. For this shot the sun was just grazing the top of the tent. Again, it's trial and error." D810, AF-S VR Micro-NIKKOR 105mm f/2.8G IF-ED, 1/125 second, f/11, ISO 100, manual exposure, Matrix metering.
Keep It Simple. At least at first. Placing jewelry on wood, metal or glass blocks or other props can make for really interesting photos, but adding anything to your jewelry setups adds complexity. It's best to start with and master the basics before moving on. "Introducing props makes for more complex lighting," Jody says. "Jewelry has a surface that you light for; if you introduce another surface, you've added another texture, and you'll most likely need to change the position of the lights or even add additional Speedlights to the setup."
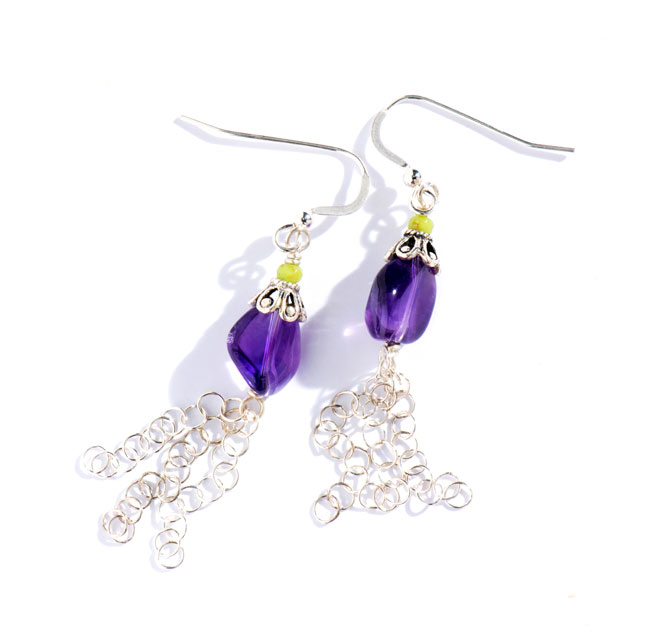
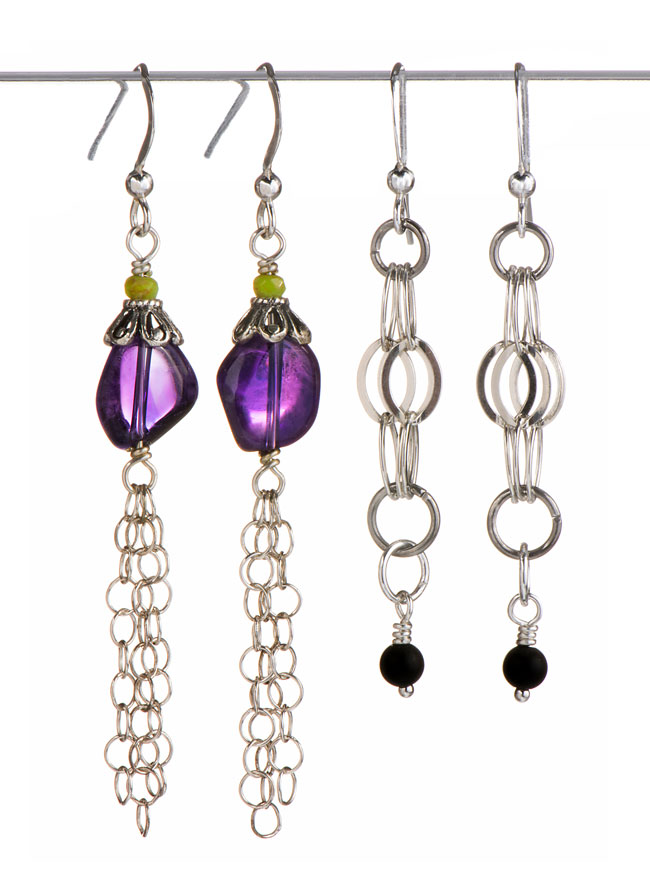
Another raw flash image for which the tent side was opened and one SB-900 fired directly onto the earrings with no diffusion. D810, AF-S VR Micro-NIKKOR 105mm f/2.8G IF-ED, 1/60 second, f/29, ISO 100, manual exposure, Matrix metering, SB-900 Speedlight.


