5 Easy Composition Guidelines
You may not realize it, but every time you bring your camera up to your eye you're making decisions about composition. Simply put, composition is how you choose to frame the picture you're about to make. Many books have been written about composition, and while no two people are likely to frame the same scene the same way, there are some general guidelines that can help you improve your photos and make them more interesting and engaging.
The Rule of Thirds
One of the first questions to ask yourself when composing your picture is: "What is my subject?" Of all the things you see in front of you, which one is the reason for taking the photo? Once you've answered that question you can begin to work on how best to show that subject. The rule of thirds is a guide to help you do just that.
When you look through your viewfinder or at the LCD screen, imagine a tic-tac-toe grid over the scene. Some Nikon cameras even have a menu item that allows you to turn on gridlines in the viewfinder. These gridlines are a guide to help you frame your image and won’t show up in your final picture.
Notice where the lines intersect. The rule of thirds suggests that these points are the best places to position your subject. Doing so will generally result in a pleasant and balanced composition.
Try moving your camera so your subject appears where two of the lines meet. The subject doesn’t have to be directly on the intersection but somewhere close to it. Try a couple of different compositions to find the one you like best.
These same gridlines can help you to keep your horizons level and the vertical elements in your photo straight.
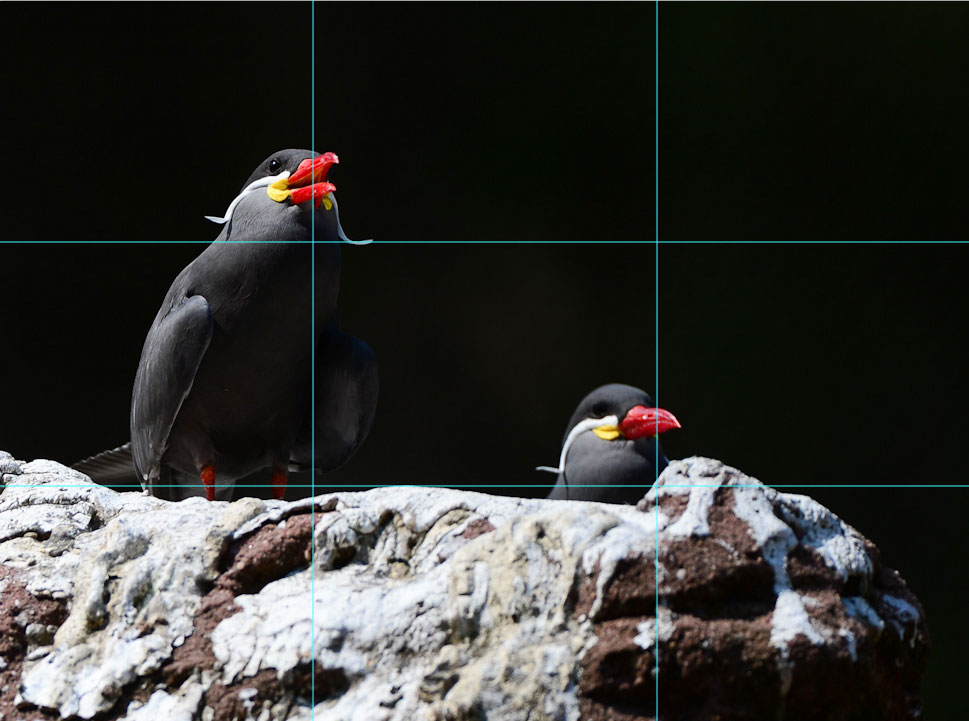
Here you can see the grid overlay on the image of the two Inca Terns, with their heads placed at the intersection of the lines, according to the rule of thirds.
This image of a two Inca Terns at the zoo is an example of the rule of thirds.

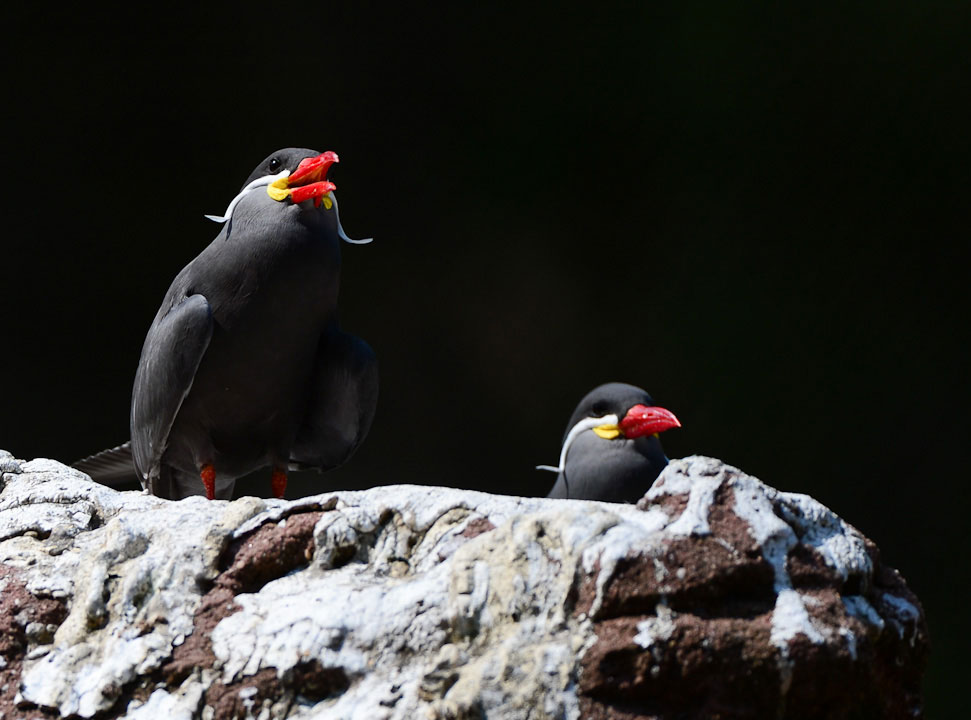
Here you can see the gridlines showing placement of a subject according to the rule of thirds.
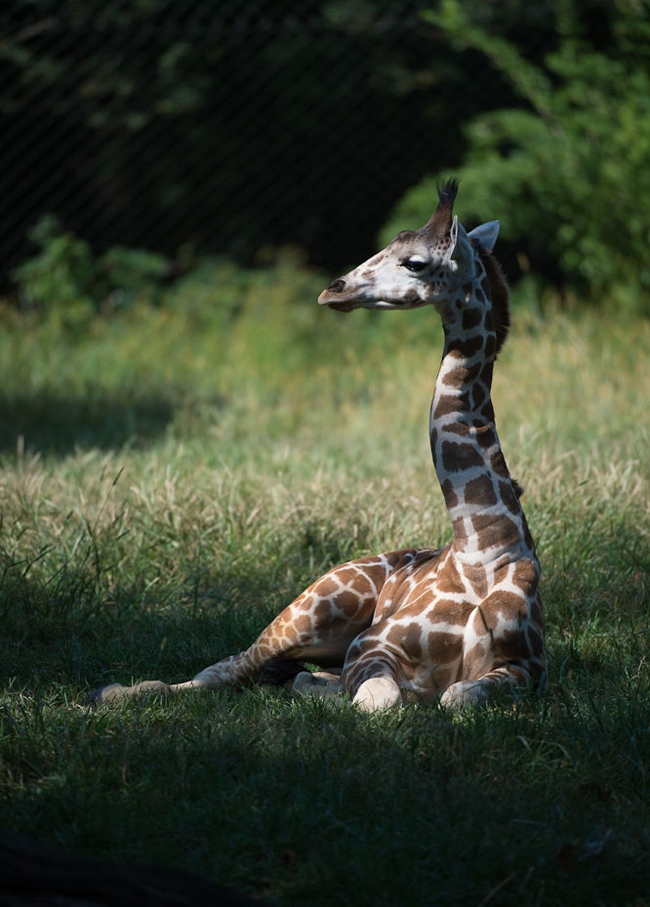
This image of a giraffe sitting in the grass at the zoo is a great example of the rule of thirds creating a pleasing composition.
Where to place the horizon line
Most pictures look better if the horizon is positioned above or below the middle of the frame, not directly in the center of the image. The exception is when shooting a reflection. In this case having the horizon in the center can work well because it creates equal elements at top and bottom—the scene above and the reflection below.

When photographing a landscape, place the horizon closer to the top or in this case, the bottom of the frame, not right in the middle.
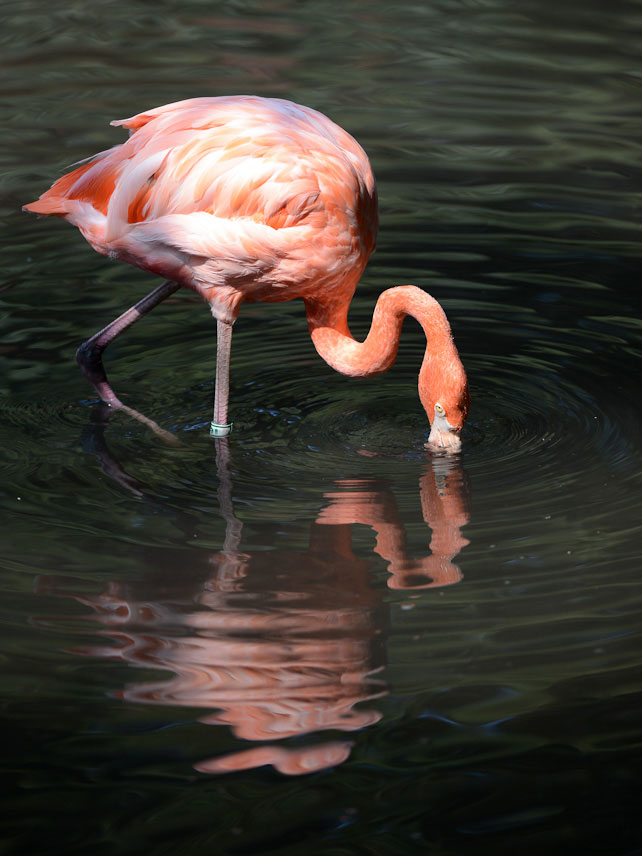
Normally you want to place the horizon line closer to the top or bottom, not right in the middle of the frame; however when you're photographing subjects and their reflections, it is ok to break this rule.
Lean Into the Frame
When photographing people and animals it's best to have them looking into the frame. If there’s action in your picture, leave more space on the side of the frame where the action is headed. It looks more natural that way and lets the viewer have a feel for where the subject is going.
Place your subject so more open space is in the direction it is facing.
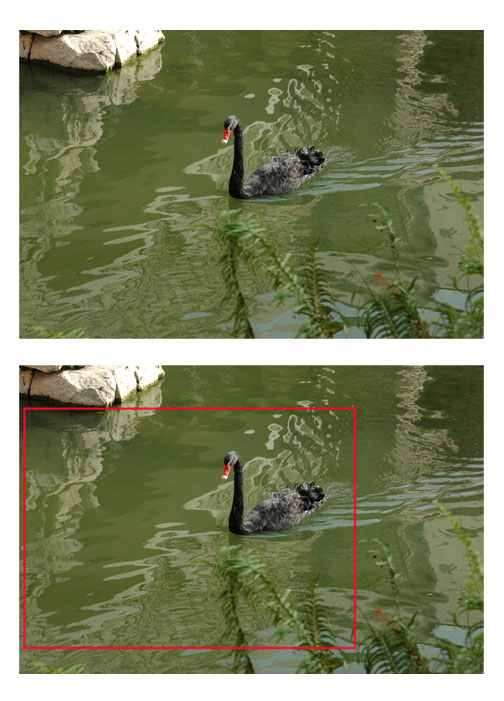
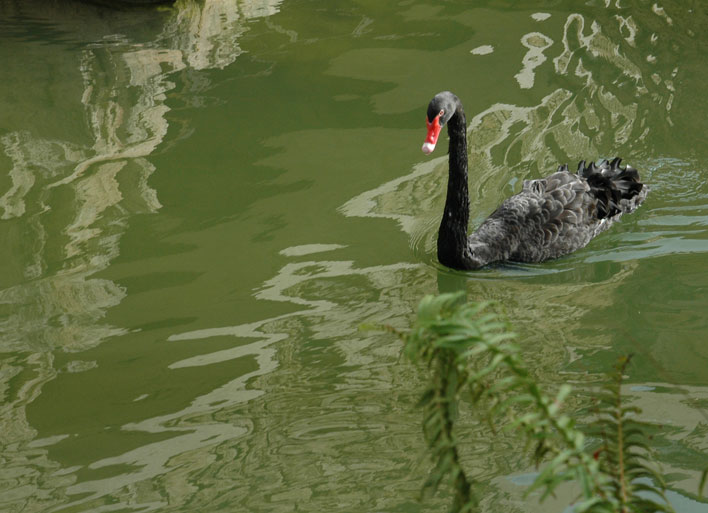
(top left) In this image of a black swan gliding on the water, the bird is centered and the composition not very interesting. (bottom left) By cropping the image, we can move the subject to the top right of the frame, for a more interesting composition. (above) In the final image, the subject is directing the viewers eye through the frame; following the rule of placing more empty space in front of a subject.
Leading lines
When photographing buildings or other strong linear subjects, compose your image so that the architectural elements lead the viewer’s eye through the photograph. These “leading lines” lead your eyes through the image—sometimes even out of the image. These lines can be the main subjects of the image, or they can be used to lead your viewer to a specific area within the photo that is an important focal point.
In addition to straight lines, curves also make interesting compositions. They serve a purpose in bringing the viewer's eye throughout an image. Curves can be the main subject, or as with leading lines, they can be a means of leading the viewer to different subjects within an image.
This image is an example of how curved lines of a subject can lead the viewer's eye around the frame, following the curving lines.
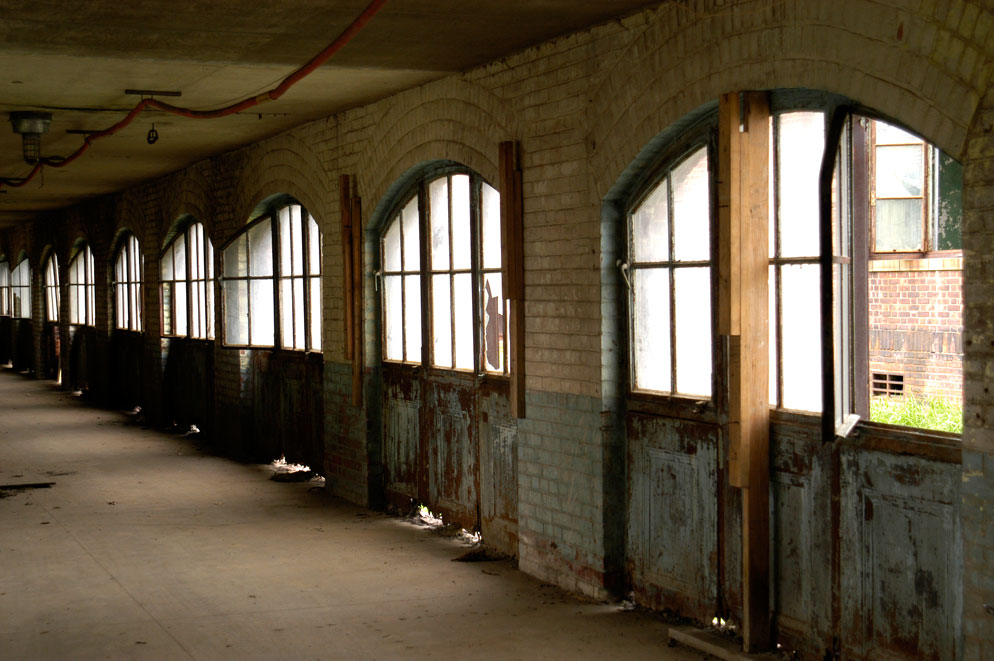
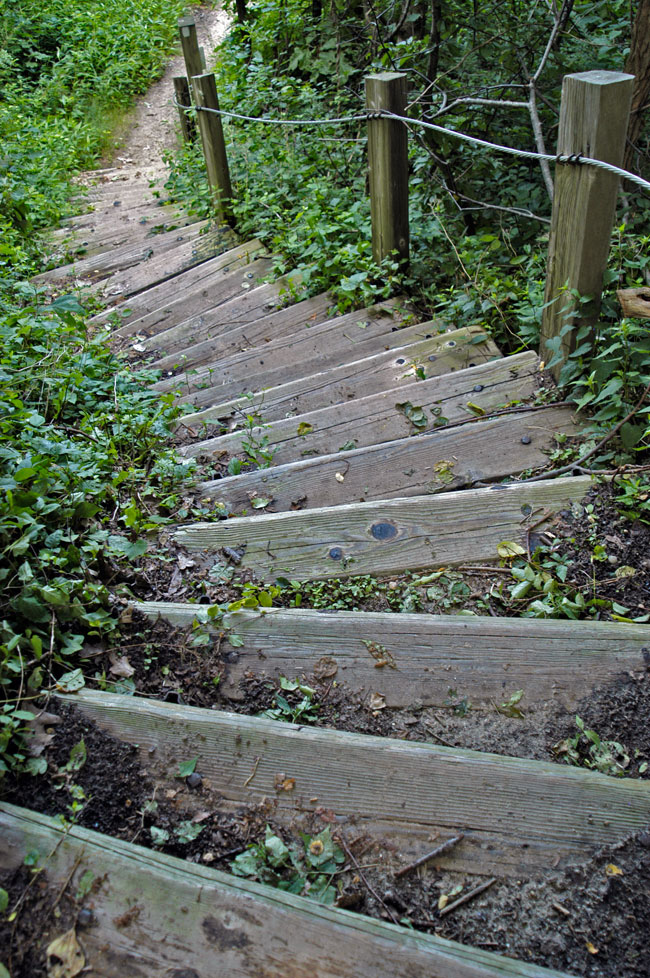
This image has strong leading lines that bring the viewers eye from the right of the image, to the left, down the hallway.
Patterns & Textures
Subjects with repetitive patterns can make for interesting photographs as well. Patterns that are found in nature, or are man-made can give your image a strong composition. Look within subjects in a scene to find patterns.
For instance, you may see a crate full of apples and think nothing more of it, but with a tight composition on just the fruit, you’ve created a repeating pattern of color and shape. Also look for deviations in patterns. For example, what if that crate of apples were all red, but someone placed one yellow apple in the box. Now you’ve got a repetitive pattern with a break in the pattern that creates a strong point of focus (the yellow apple).
Textures can also work to your advantage in creating images with strong compositions. Get in close, either by zooming in or even by using a macro lens, and look for the textures in a subject. When shooting patterns or textures, you don’t need to capture the entire subject, just a portion of it. Textures can be soft, like the feathers on a bird, or harsh like peeling paint, or wood grain.
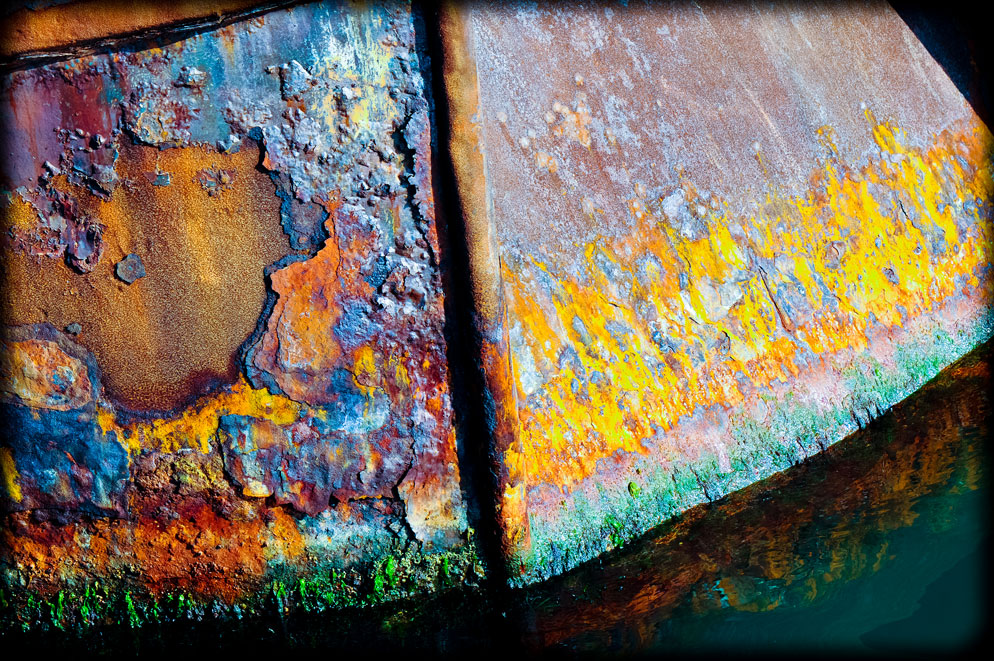
The rusting and chipped paint on this fishing boat lends itself to a study in texture. The bright sunlight hitting the boat shows off the texture of multiple layers of chipping paint and rust.
Look Carefully
Most people aren't thinking about composition when they look at photos, but they do know when a photo is pleasing to look at even if they don't know why. To improve your composition skills spend some time looking at the photos taken by people whose work you admire. Pay attention to how they've positioned their subjects within the frame, what their backgrounds look like and what was included in the image and what might have been left out. Now, review some of your own photos and ask yourself how you might have made the picture better by changing the composition.
These guidelines are just a starting point. Remember, for every rule there is an exception. Don't be afraid to step outside the box if it makes for a better photo.


