Underwater Whale Photography Using Nikon Mirrorless Cameras
Below the water with the humpback whales

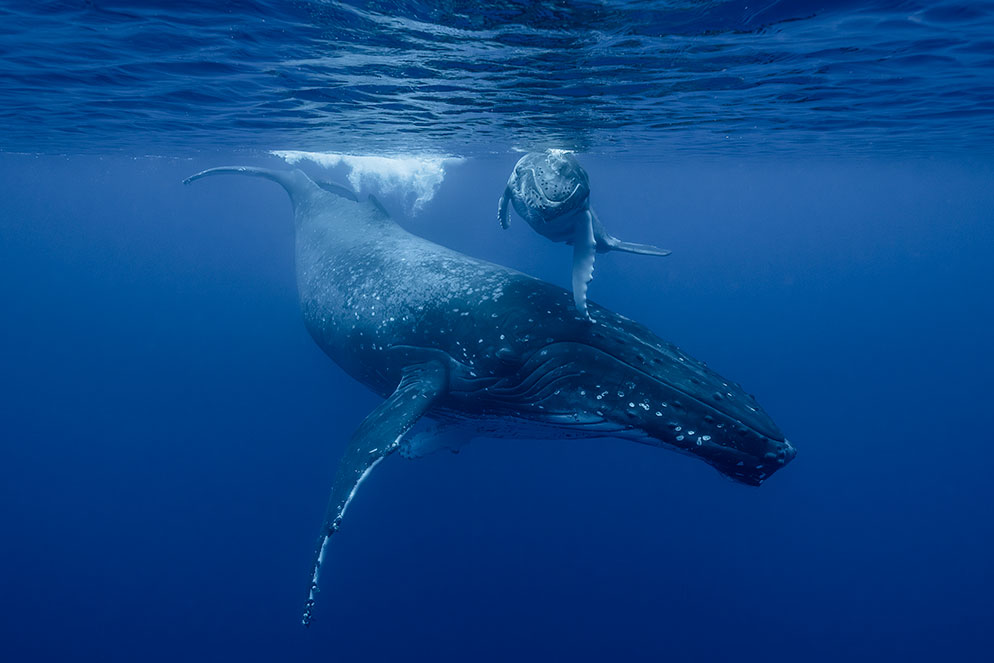
A mother humpback whale and its calf gracefully swim through the coastal waters of Tonga. Z 8, NIKKOR Z 14-24mm f/2.8 S at 15mm focal length, 1/1250 second, f/8, ISO 4000, manual exposure, spot metering.
From watching Capuchin monkeys swing through the jungles of Costa Rica, to admiring the delicate steps taken by African elephants in Masai Mara, experiencing any sort of wildlife as they share this beautiful blue planet we call home with us is quite humbling. To get to witness these creatures out in their natural habitat is truly an incredible experience, but with the surplus of wildlife found on land, an entire world that resides below the water can easily be overlooked.
With approximately 90 different species of whales inhabiting the ocean, there is a surplus of incredible imagery to be captured and stories to be told. But just jumping into the water with your camera isn’t as simple as it sounds. There are quite a few things that need to be prepared for on land, and mental notes to be taken as you get ready to enter the water for photographing these gentle giants.
Underwater Housings
It is important to note immediately that as much as we love and live by the incredible weather sealing on the Nikon camera bodies, they won’t hold up submerged under the water. With that being said, I recommend taking some time and researching what underwater housing will work best for you, your subject matter, and your camera. AquaTech, Nauticam and Ikelite are all great starting points. You will want a housing that allows you to easily and comfortably change your shutter speed, aperture and ISO, as well as allow you to zoom in or out on your lens. Your dome and port should be for a wide-angle lens like a 14-24mm f/2.8 or 14-30mm. Your images will always be fantastic shooting through Nikon glass, so make sure you go with a quality dome as well to maintain that high quality of imagery.
Choosing the Right Lens
Once under the water, you’re fully committed to the lens that you have chosen to attach to your camera, so it’s important to choose wisely while you are on the surface. For the majority of my whale photography, I choose to go with the 14-24mm on my Z 8. If you weren’t already aware, humpbacks are quite big, so having a super-wide focal length with the capability to zoom in a bit tighter is the perfect combo. My mentality is always that it is easier to crop in if need be, rather than crop out. If I do come across a scene where say a mother and calf are having a playful interaction, I may choose to go with my 24-70mm lens for a tighter and more intimate look into that moment. It is important to remember that salt water magnifies subjects underwater approximately 34%, so that wide-angle focal length is a bit tighter than you think.
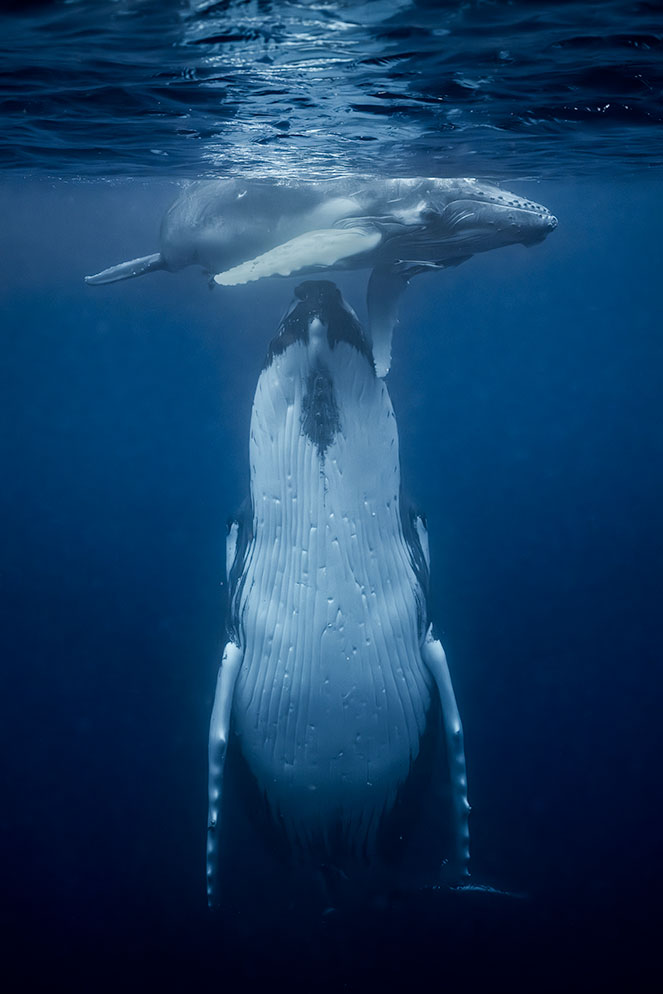
A magical moment as a mother humpback helps nudge its calf to the surface for a breath of air. Z 8, NIKKOR Z 24-70mm f/2.8 S at 44mm focal length, 1/2500 second, f/9, ISO 3200, manual exposure, spot metering.
A mother humpback whale begins her dive down to deep blue water as her calf looks on. Z 8, NIKKOR Z 14-24mm f/2.8 S at 24mm focal length, 1/800 second, f/8, ISO 1600, manual exposure, Center-weighted metering.
Settings
Getting in the water and witnessing a whale swim right past you is an amazing experience, and the last thing you want to do is have your settings incorrect to capture it. Although most underwater housings give you the ability to change your settings while submerged, I recommend having a few settings ready to go before you leave the boat. Some encounters with whales only last a few seconds before they swim away, so having a good foundation for baseline settings can help you be rather close with your settings once you’re in the water. For shutter speeds, I recommend being at around 1/500 seconds or higher and for your aperture, around f/8. You want to make sure your shutter speed is fast enough to freeze any motion. Your ISO will be relatively high with these settings, but noise should not be an issue. I would rather have a sharp image with a bit of noise, than nothing at all. When shooting through a dome, you may notice the corners of your frame a bit distorted with smaller apertures, so that is why I settle around f/8. It is also important to shoot on “continuous high” to be able to take bursts with as many frames as possible and “continuous focus” to will help you capture that perfect moment. In regards to metering, center-weighted will get the job done.
Composition
It’s really hard to try and direct whales to pose for you, especially if you don’t speak whale. Coming up with compositions while in the water with the whales really comes down to studying their behavior and anticipating what they may do next. Watch for those special moments as calves interact with their mothers or look down as the whales start to surface for their breath and rise up below you. Don’t be afraid to shoot vertically as well. If the whales are having a moment on the surface, try raising your camera halfway out of the water, to shoot an “under/over” image, showing the sky above the water, and the whales below. Also, don’t be afraid to continue to shoot as the whales swim away, these are some of my favorite storytelling images.

Looking under and over the ocean as a mother and calf innocently play below the water.
Under / Over Images
As just mentioned, a unique composition to create is the “under/over” image. This is a great way to tie two stories together: what is happening above the water, and what is happening below the water. It is also a challenging frame to achieve as swells move you around quite a bit, water drops can be on the dome, and focus can be missed. The best tip here is to shoot more than you think. I will move my focus point to the bottom of my frame and as I raise the camera up, use that focus point to catch focus on the whales. I’m definitely utilizing all 20 fps on my Z 8 here, as I’m hoping to catch a tack sharp focus, while having the water perfectly split the frame.
Respecting Wildlife
One of the quickest ways to ruin your photo is by disrespecting the wildlife you’re trying to photograph. First off, please note that there are areas in the world where it is prohibited to swim with whales, so make sure to know the local regulations. Always use a “soft approach” to whales. Take a moment before entering the water to see how they are behaving, and once in the water with them, give them ample space and time to acknowledge your presence. It is absolutely exciting to share the water with a whale, but you can scare them off very quickly by swimming towards them like a torpedo. It’s also important to know when enough is enough. If you feel that a whale is starting to become agitated by your presence, remove yourself from the environment and respect what it is you’re photographing. It’s not always easy, but it’s the right thing to do.
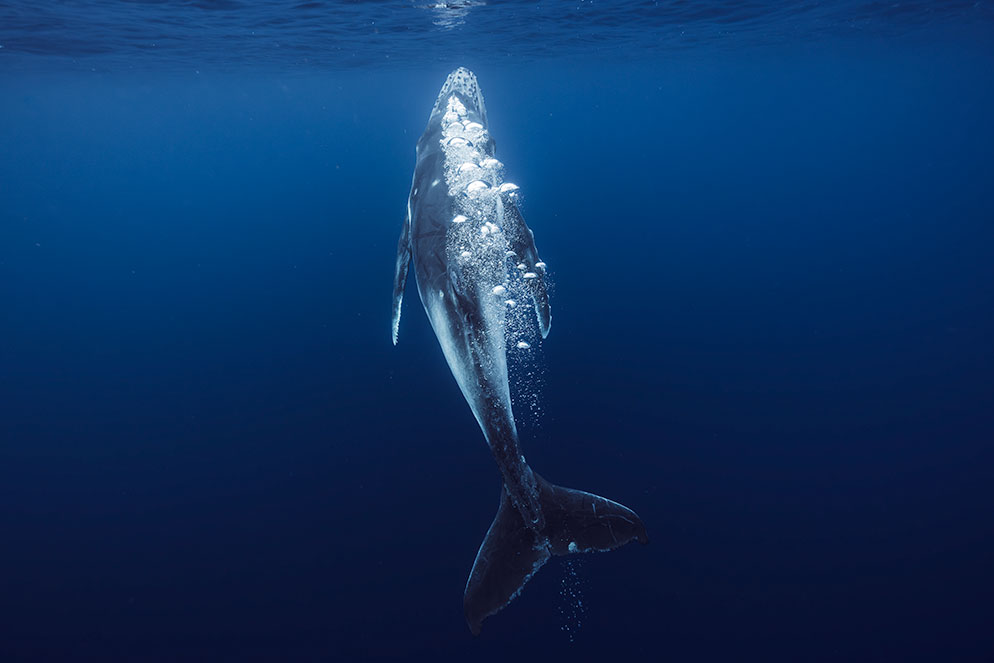
A young humpback whale blows bubbles as it rises to the surface for a breach. Z 8, NIKKOR Z 14-24mm f/2.8 S at 14mm focal length, 1/1000 second, f/6.3, ISO 2500, manual exposure, spot metering.
Video underwater
Utilizing video within the Nikon systems is another fantastic way to document your interaction. Lens choices will remain the same, but when shooting in video, I recommend utilizing 4K 120 fps. The ocean can be full of motion, and most encounters with whales are often quick, so being able to slow down your video will allow you to stretch out the time of that scene, as well as make it feel more stable. Make sure to keep your shutter speed around 1/250 seconds for 120 fps.
Color correcting in post
Whether you’re shooting in auto white balance or Kelvin, you’re going to notice that your content comes out with a rather blue hue to it. This is simply because shorter wavelengths of light like the colors blue and green can penetrate the water to deeper levels. You can easily correct for this by utilizing your H/S/L sliders in post-processing. Personally, I like to correct a bit of the blue hue but keep some of it to convey the sense of “deep blue” ocean water.
Bonus: Tips for above the water
Your journey to photographing whales doesn’t just have to be confined to below the water. While you wait to find that perfect whale to drop in with, have your long lens with a fast shutter speed ready to go. Keep a keen eye on the horizon and watch for actions like breaching, fin slaps, and lunge feeding. Simple scenes as well like the mist from a blowhole catching the sunlight and creating a rainbow are reasons to have your camera at hand. All in all, always remember to take the moment in as whale (well).

Mike Mezeul II is a photographer and photojournalist addicted to storytelling and adventure. He's photographed landscapes, professional sports, natural disasters, concerts, air-to-air aerial photography and more.
More articles by this contributor