Tiny Bubbles: Photographing Water Droplets
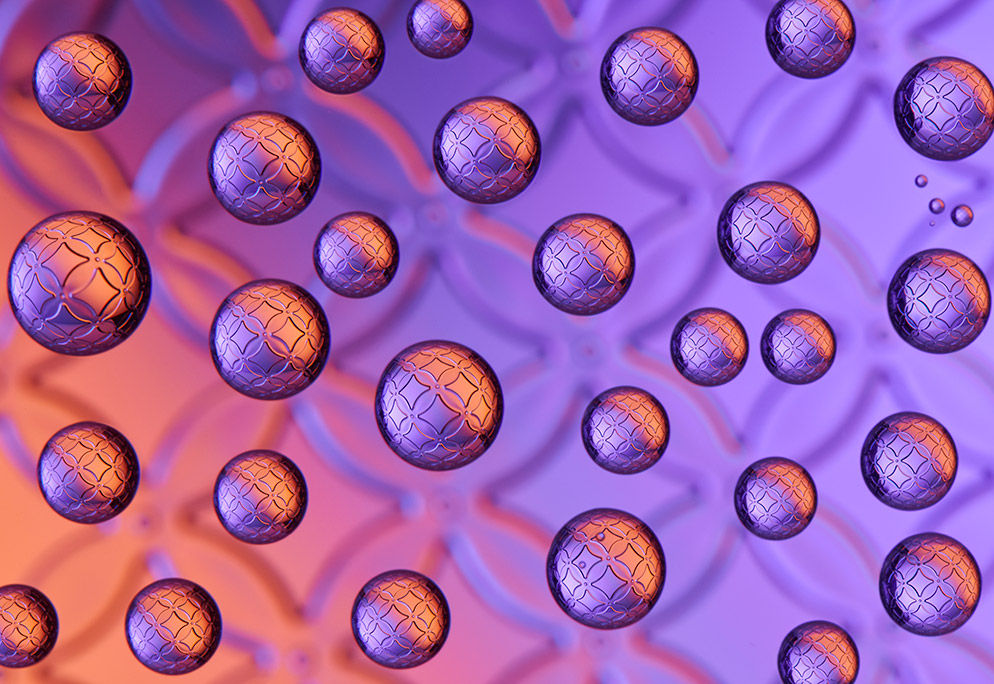
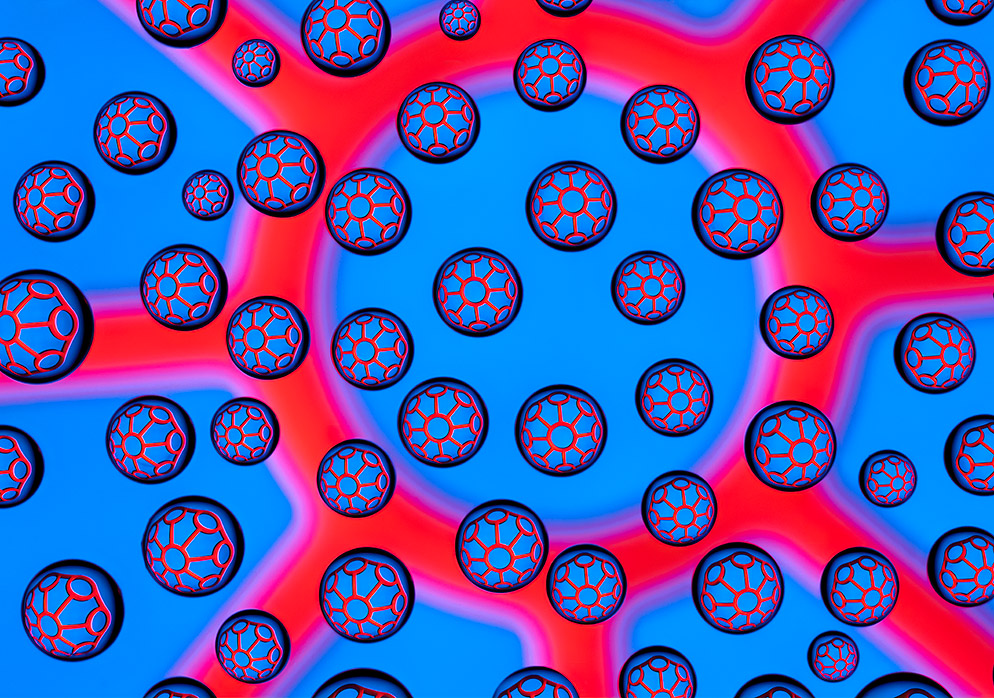
Subject: Plastic kitchen sink mat. This is a subject that offers many possibilities because it’s both transparent and translucent. To create the image, I placed a plastic kitchen sink mat on a sheet of glass 6 inches below the glass surface that’s holding the water droplets. I illuminated the mat from the side with orange-colored light to create shape to the opening in the mat. I then added a second orange-colored light to the background on the opposite side of the first orange light. The purple-colored light was also aimed at the background on the same side as the first orange-colored light. I arranged the lights this way so that the colors would be layered and make each a compliment to one another in hue and density. Exposure: Nikon D850, AF-S VR Micro-NIKKOR 105mm f/2.8G IF-ED, 1/3 second, f/45, ISO 400, manual exposure, Matrix metering, 5250°K White Balance. Lighting: Two continuous daylight-balanced LED light sources.
The ways to explore photography are nearly endless, but an often overlooked corner of photography is the macro world. Not only is macro incredibly fun, but it can be done nearly anywhere. This is a significant advantage when subjects like an exotic animal, a professional model or a spectacular landscape are out of reach.
A few years back, I decided to get serious about indoor macro photography. So, I constructed a shooting table that would allow me to make pictures rain or shine, winter or summer, day or night. It’s simply a level surface with a small area in the center that allows me to be physically within the shooting space. This was an important consideration because I wanted to be able to reach into the set and adjust the lights or the subject without climbing onto the table surface and possibly disturbing a delicate setup.
My initial macro photographs were of traditional subjects like flowers, feathers, and other objects. The images were really fun to create, but I knew that I needed to challenge myself. I felt like the flowers were so beautiful that they were giving me a head start toward a nice photograph. What I wanted was to try was something a bit more abstract and technically challenging. So, I began photographing kitchen gadgets, office supplies, and random objects in ways that would make them look interesting.
I was deeply inspired by an assignment I received while in art school. The task was to photograph a commonplace, household subject in a deeply compelling way. But, the subject also had to be unidentifiable to the viewer of the final image. In other words, if the viewer could identify the subject, you failed the assignment. It really made you look at the most ordinary subjects and then transform them photographically into interesting images. This was a great pathway to better images because all of the obvious, easy, commonplace solutions were immediately discarded, and in their place, innovative and insightful pictures began to emerge.
And that’s how I one day found myself immersed in water droplets. I’d seen examples of water droplet images before, but I wanted to push the technique and really see how far I could take it—and what I could learn along the way.
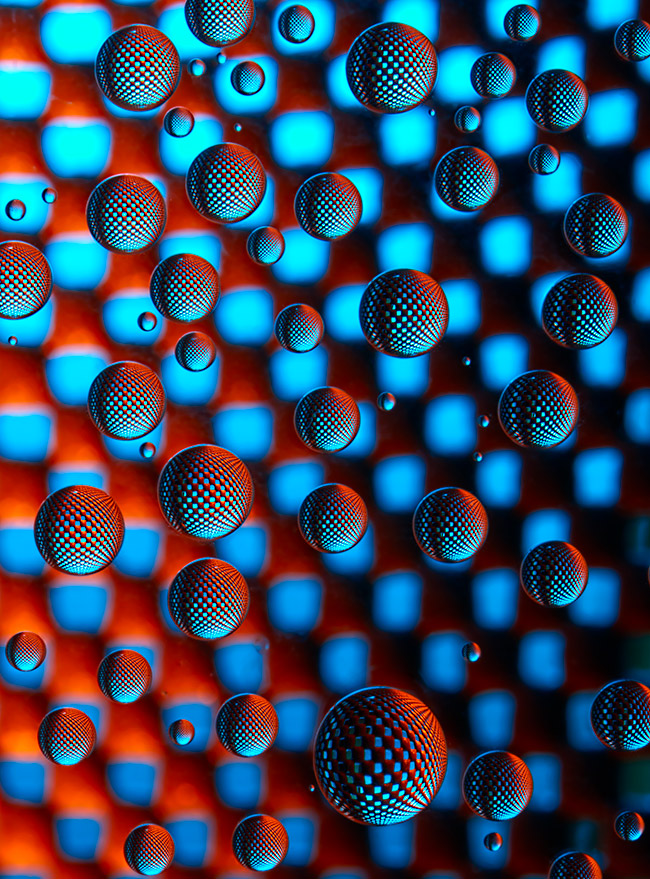
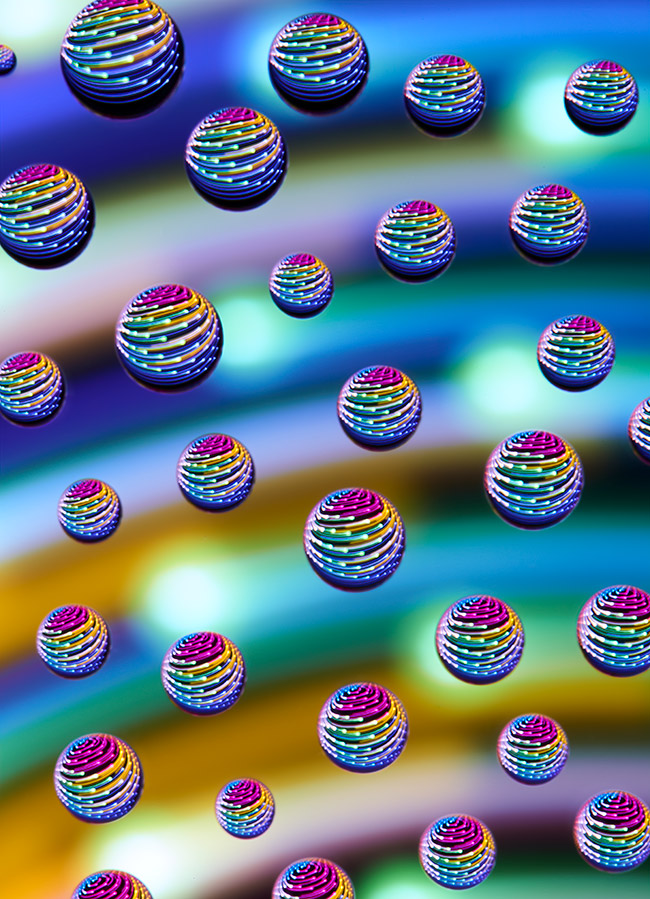
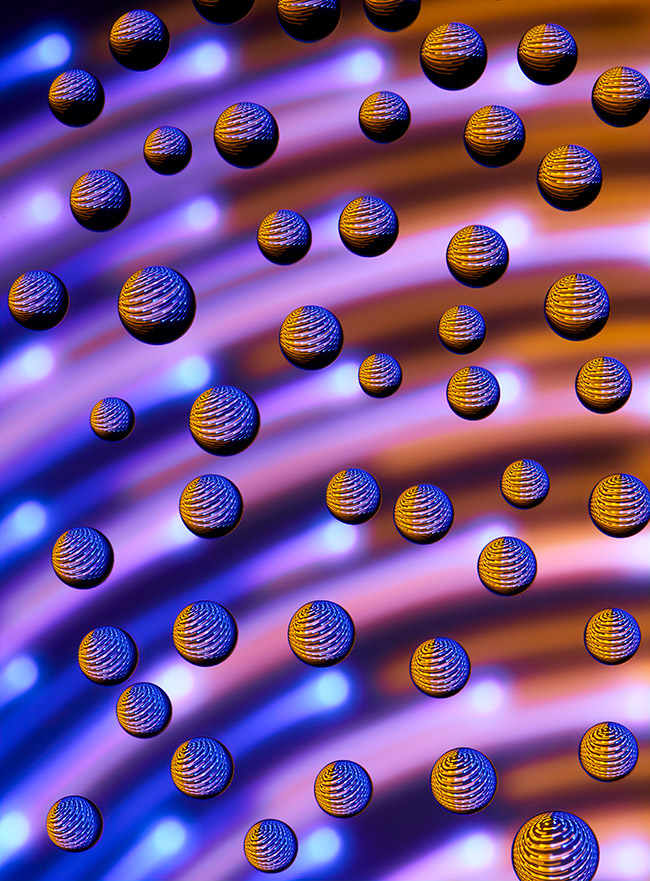
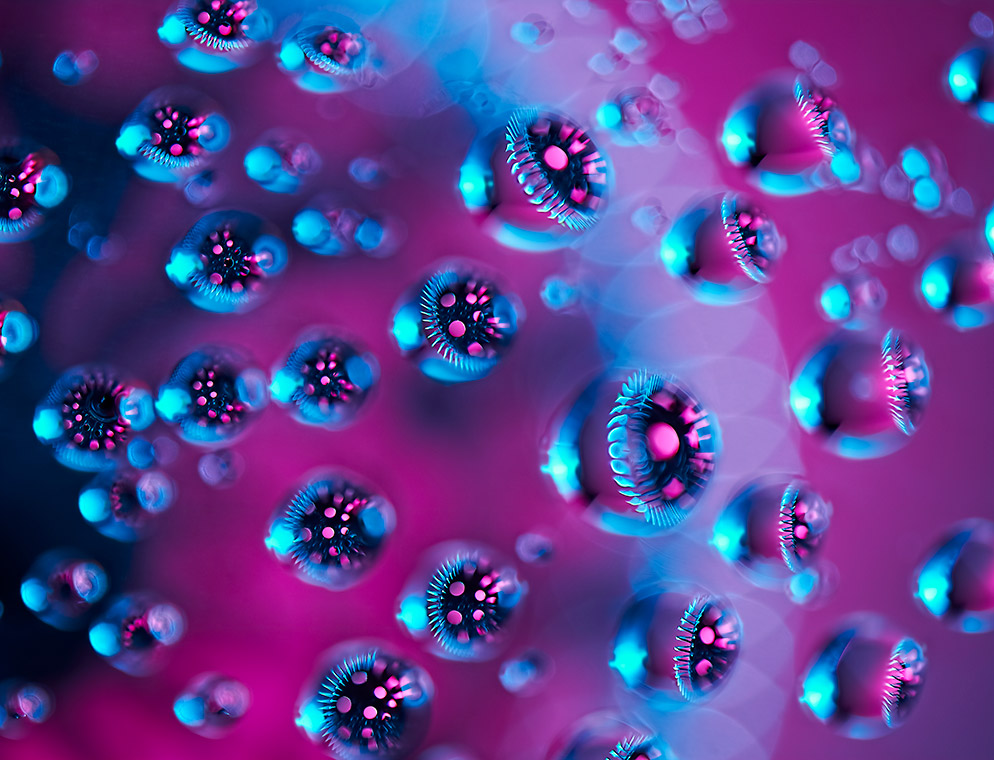
Subject: A drawer liner—the kind that feels a bit like rubber and prevents utensils from moving around inside a drawer. To create interesting "orbs" in the water droplets, only the top left of the liner was illuminated with warm light, while the background that would be seen through the liner was illuminated with cool light. I positioned the camera about 4 inches directly above the glass creating a magnification ratio of nearly 1:1. Exposure: Nikon D810, AF-S VR Micro-NIKKOR 105mm f/2.8G IF-ED, 1/2 second, f/45, ISO 400, manual exposure, Matrix metering, 5600°K White Balance. Lighting: two continuous daylight-balanced LED light sources.
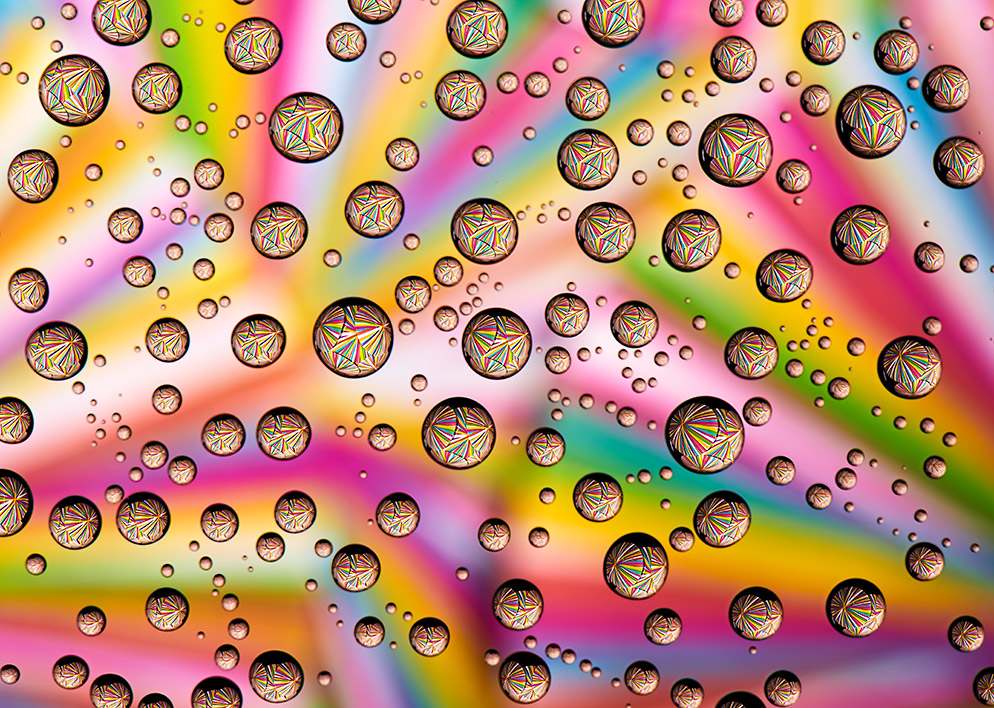
Subject: A metal juice extractor—the kind used to produce juice by hand, by rotating a lemon, lime or orange on the surface. The background was the only source of illumination and it was created by using different colored gels over the light sources while positioning each so they would mix to create a third color. Exposure: Nikon D810, AF-S VR Micro-NIKKOR 105mm f/2.8G IF-ED, 1/4 second, f/45, ISO 400, manual exposure, Matrix metering, 5600°K White Balance. Lighting: two continuous daylight-balanced LED light sources.
The Set-Up
The process begins with a sheet of glass as the surface for the water droplets. It’s important to use the thinnest sheet possible so it will have a minimal impact on the optical quality of what’s being magnified below. I’ve also found that purchasing low-iron glass greatly reduces the green tint that’s apparent in most ordinary glass.
I chose to build my own support table from ABS pipe that I purchased from a local home supply center. I wanted to have the flexibility of positioning a second sheet of glass below the top sheet, while also having the option of varying the spacing between the two sheets of glass. The second sheet would be able to support transparent, translucent, or opaque subjects. And, by changing the spacing, I would also have the ability to change the size of the object within each water droplet.
Essentially, it’s a series of layers that begins with the droplets on the top layer, the subject beneath the droplets and then the background beneath the subject. The spatial relationship between each layer is important and varies depending on the lens magnification, the droplet size, the size of the subject and the lens aperture used.
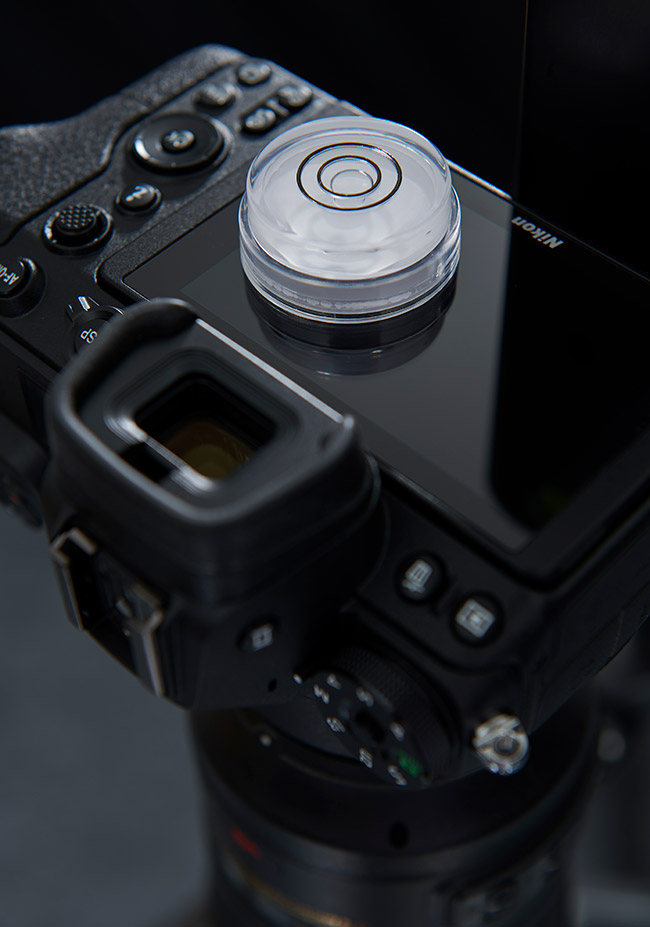
If the camera won’t accommodate a long, multi-angle bubble level, a bullseye-style level is a good option in assuring that the glass surface holding the water droplets is parallel to the sensor.
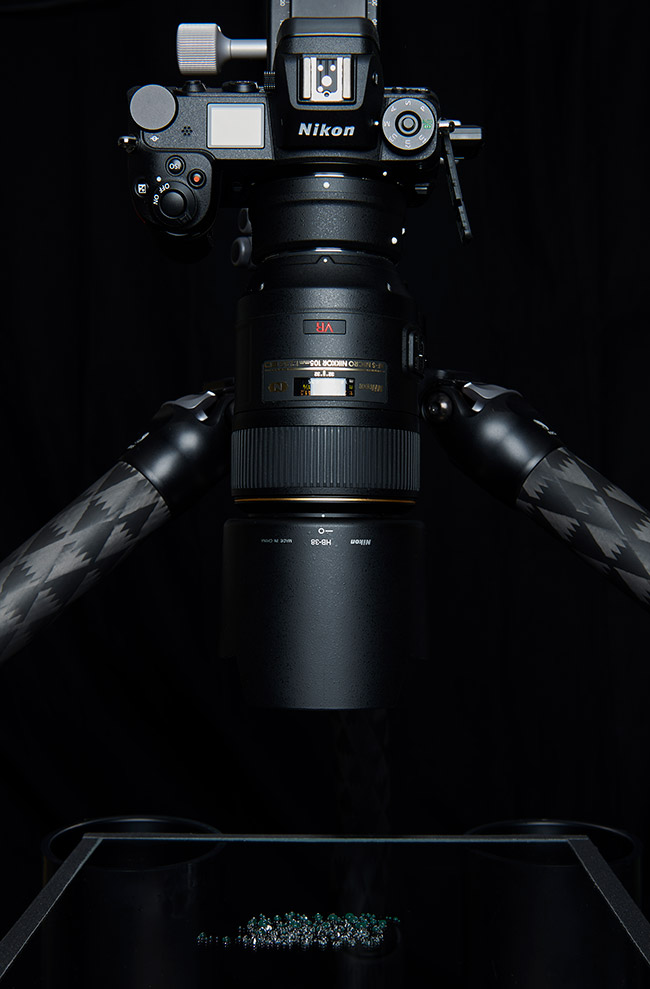
Because the magnification is so great, it’s critical to have the ability to reposition the camera without disturbing the overall alignment. I’ve found that a macro rail mounted to a tripod makes it possible to move the camera in very small increments. Macro rails are controlled by a simple turn of a geared knob to raise or lower the camera. Mounting a second rail perpendicular to the first makes it possible to shift the camera left or right while still maintaining critical alignment.
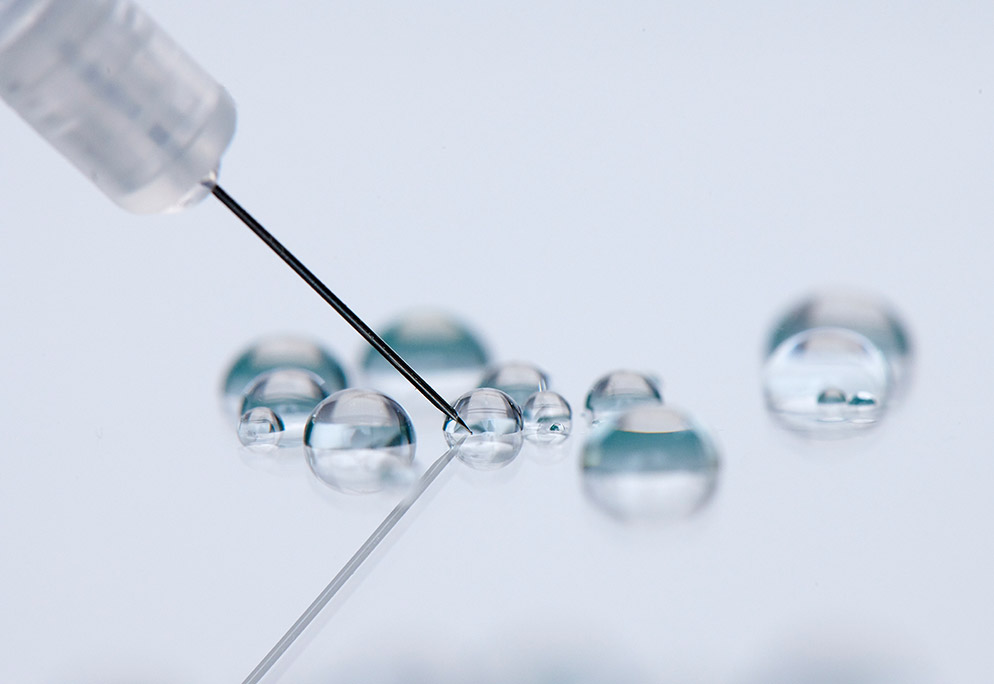
Rather than spray water droplets randomly onto the glass surface, it’s generally more effective to inject them individually using a hypodermic needle. Various needle gauges make it possible to control the size and volume in each droplet. I also use low-iron (Starphire) glass to minimize the green tint apparent in most standard glass.
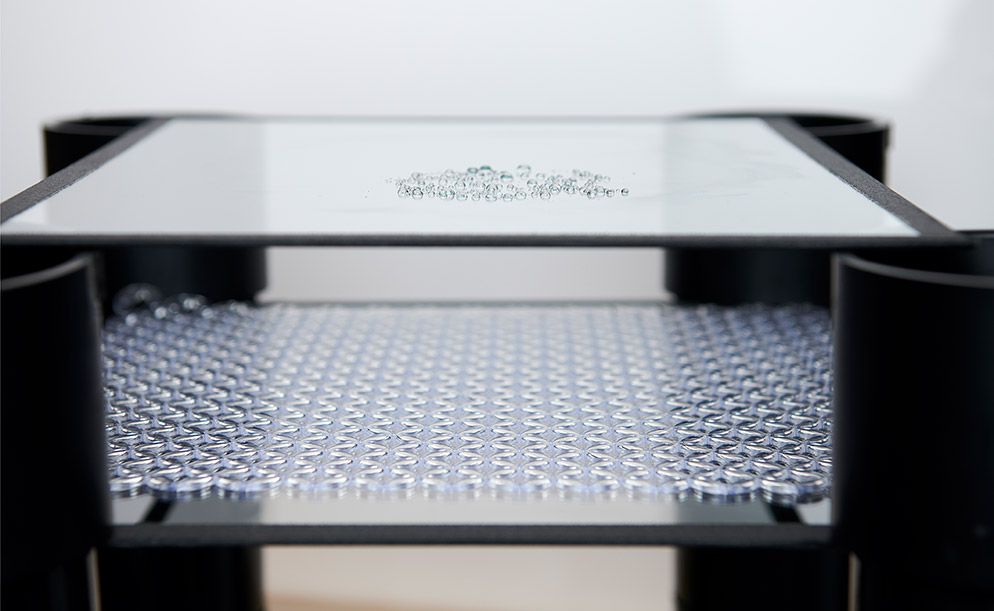
A shooting table constructed specifically for water droplet photography makes it easy to vary the relationship between the droplet surface and the underlying subject. I made my table from ABS pipe purchased at a local home center. I spaced the glass support intervals about 3” apart so that the subject glass could be raised, lowered, or removed depending on the subject.
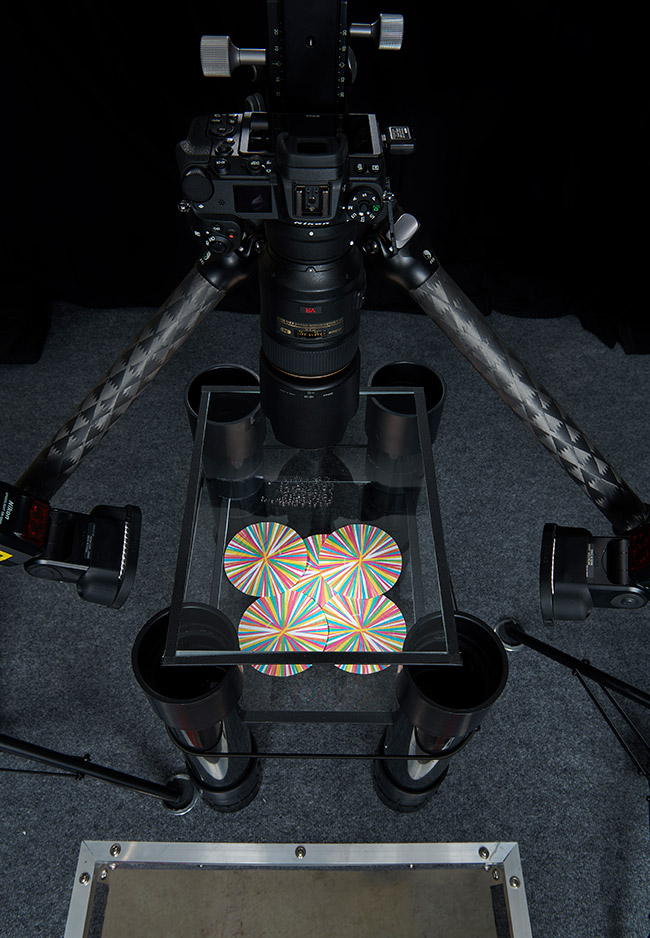
This is a typical water droplet setup using a water droplet stage, a subject stage, two SB-5000 AF Speedlights, modified with grids to control the beam of light, and a camera and macro lens mounted on a sturdy tripod.
Subject: Multiple flattened paper cupcake wrappers. By carefully arranging several cupcake wrappers, it was possible to create interesting patterns of color to form both the water droplet image, but more importantly in this case, the background. This image is much lower magnification than most and the droplets become points of focus rather than the main subject of the image. Exposure: Nikon Z 7, Mount Adapter FTZ, AF-S VR Micro-NIKKOR 105mm f/2.8G IF-ED, 1/250 second, f/22, ISO 64, manual exposure, Matrix metering, 5000°K White Balance. Lighting: two SB-5000 AF Speedlights controlled by a WR-R10.
A critical step to success in water droplet photography is the alignment of the camera sensor and the glass that will hold the drops of water. After mounting the camera on a sturdy tripod, I use a bubble level to insure both are exactly parallel. If they’re not perfectly aligned, only one part of the frame will be in precise focus.
My favorite lens for this type of image-making is the AF-S VR Micro-NIKKOR 105mm f/2.8G IF-ED, although there are several other Nikon macro lenses that I use—depending on the image.
The next step is to choose an interesting subject for the water droplets to magnify. When you’re first starting out, it’s helpful to use a magnifying glass to preview how different subjects might appear within the droplets. The magnifying glass will simulate the curvature seen in a water droplet and help you choose subjects. After a few successes though, you’ll be able to confidently predict which types of subjects will be successful. Generally, well-defined objects with sharp edges or strong patterns work best. Nothing is off limits though!
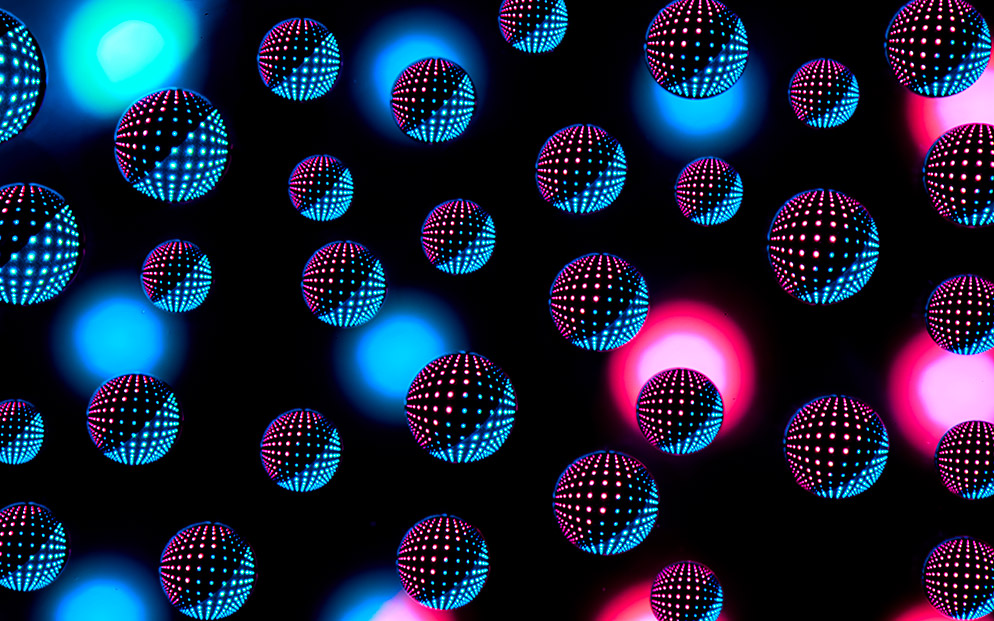
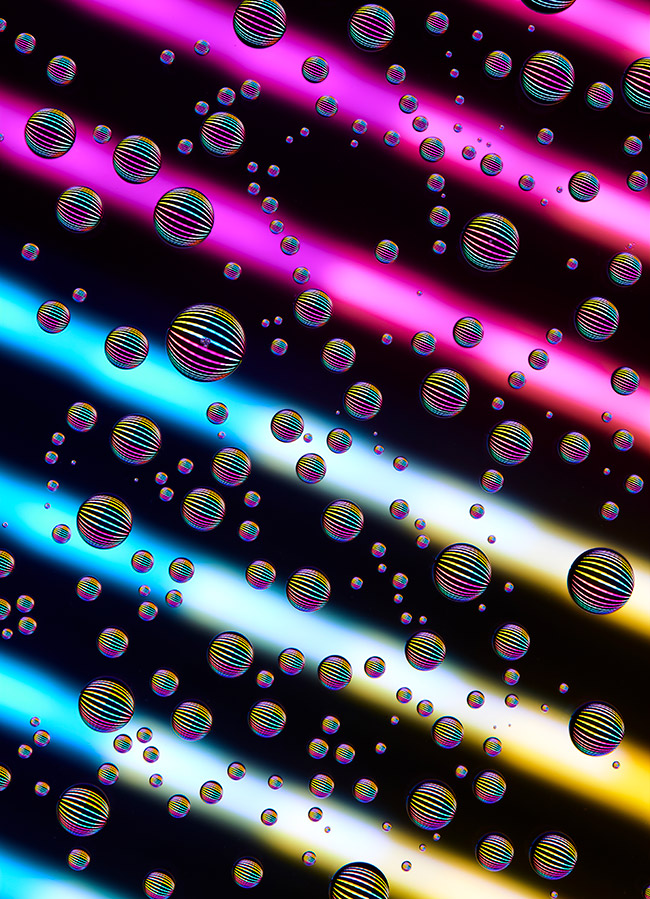
Subject: LED light panel and two colored gels. I used the LED light panel as the subject. I placed the panel 10 inches below the water droplets and covered half of the panel with a blue gel, and the other half with a magenta gel. Each LED in the panel produced a dot of light through the diagonally positioned gels. Within the droplet the dots appear sharp, while in the background they appear much softer and almost glowing. Exposure: Nikon Z 7, Mount Adapter FTZ, AF-S VR Micro-NIKKOR 105mm f/2.8G IF-ED, 1/30 second, f/45, ISO 200, manual exposure, Matrix metering, 4500°K White Balance. Lighting: one 12”x12” LED light panel.
Harmonizing light, color and background
At this stage, it’s a good time to think about lighting, color, background, and how the three will work in harmony with the subject. Of course, it’s entirely possible to create water droplet photographs using available light, but the possibilities really expand when you add directional light to the image. I’ve found that the addition of even a single Speedlight allows me to shape the subject in a much more interesting way. The addition of one or two additional Speedlights makes it possible to light the background separately, add colors to each, and treat each layer of the image as a completely separate element.
Once the subject has been selected, the background chosen, and the lighting established, all of the glass surfaces should be cleaned thoroughly and any residual dust removed. Then, the upper glass sheet needs to be coated with a product that’s normally used to cause water to bead into droplets on a car windshield—available at most auto supply stores (I use Rain X); and will make the water droplets form properly and hold their shape. Simply spray the surface and distribute it evenly and thoroughly on the area where you’ll be placing the droplets. This is usually only a few inches in diameter, so there’s no need to coat the entire sheet of glass. Allow time for it to dry to a haze and then polish the glass until it becomes clear.
The next step is to add the water droplets to the surface of the glass. As tempting as it might be to simply spray the glass with water, it’s actually more effective to inject the droplets using different gauges of hypodermic needles. I’ve found that injecting distilled water from a needle makes it easier to position the water droplets into the exact location needed within the frame. The needles also make it possible to vary the size of each drop by either adding or withdrawing liquid from each. Needless to say, this requires patience and a steady hand, but I’ve found that it’s really the best way to obtain the precise arrangement of droplets desired.
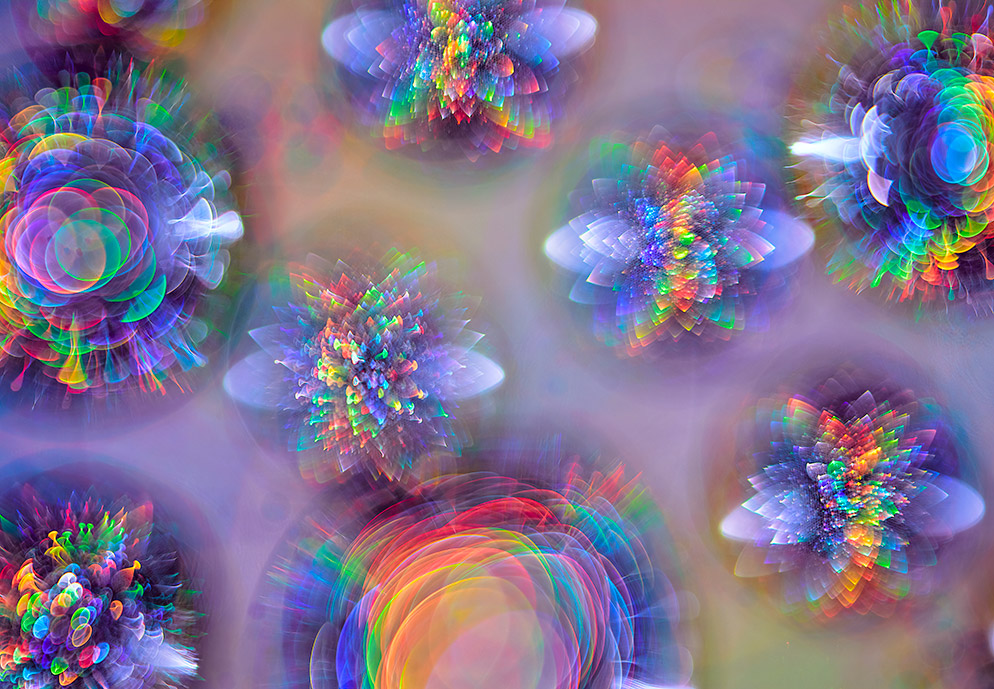
Subject: Bubble wrap. After receiving a shipment from my favorite camera retailer, I grabbed the enclosed bubble wrap that was protecting my new purchase and decided to see what might happen if I passed some gel-colored light through the small, air-filled pockets. At first, it didn’t look that interesting, but after rotating the focus a bit, these amazing color explosions appeared. Exposure: Nikon D850, AF-S VR Micro-NIKKOR 105mm f/2.8G IF-ED, 1/1000 second, f/5.6, ISO 100, manual exposure, Matrix metering, 4250°K White Balance. Lighting: two continuous daylight-balanced LED light sources.
Experimentation leads to better and better images, and once everything is in place, the rest is all experimentation to see what works best. The spatial relationship between the camera lens, each of the three surfaces, and their relationship to each other, all have a strong influence on the look of the final image.
Here are a few general principles that apply to water droplet photography and should help you make a successful image the very first time:
-
Lens to Glass Spacing: Determines the size of the droplets within the frame and also the relative background sharpness.
-
Glass to Subject Spacing: Determines the subject size within each droplet.
-
Subject to Background Spacing: Creates depth and expands lighting possibilities.
-
Lens Aperture: Determines the depth of field within the droplets, as well as to the subject underneath the droplets.
Water droplet photography can be extremely gratifying because the image is a creation of the photographer’s imagination from start to finish. Rather than “taking pictures,” you’ll be consumed by “making pictures,” and the attention you’ll devote to every detail. It’s a place to experiment, to play, to discover, and to refine your skills as a photographer. And along the way, you’ll be creating art in every sense of the word.
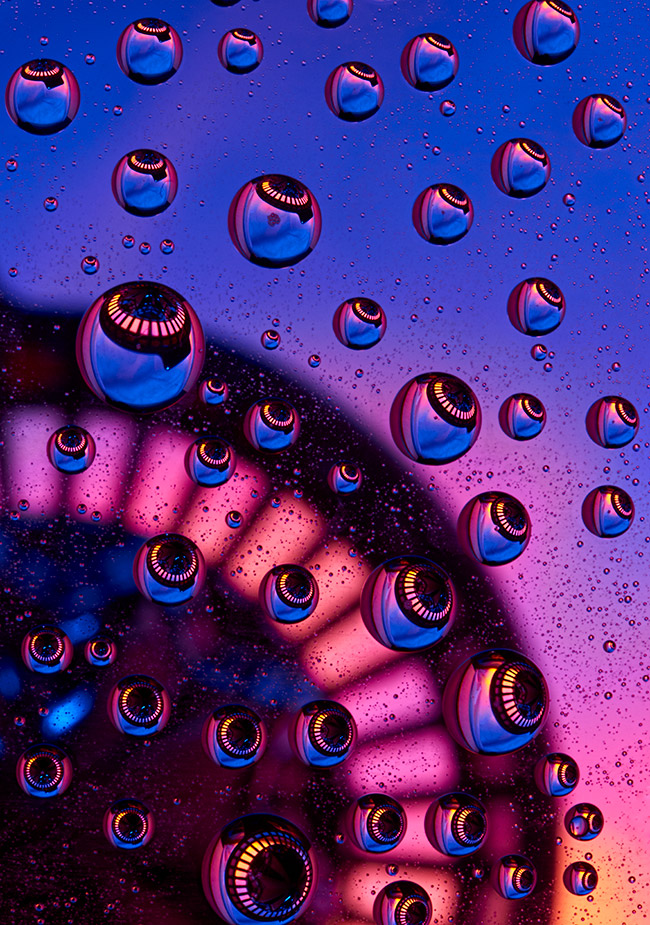
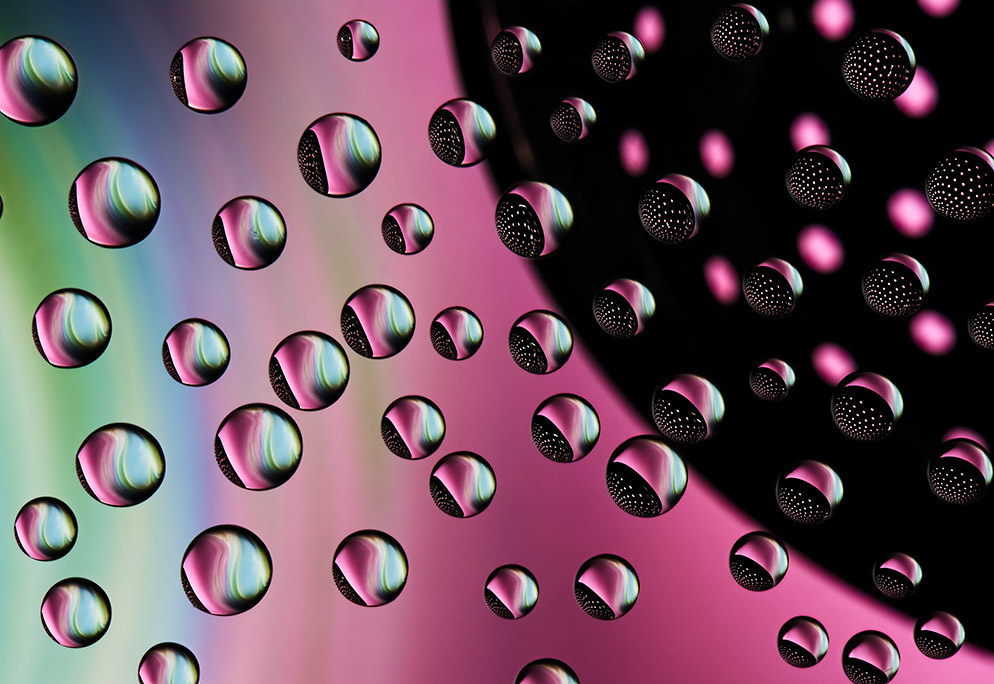
Subject: The bottom strainer from a French coffee press. This picture was made at f/5.6 to obtain a shallow depth of field. What I was striving for was a soft, creamy background, but I still needed the droplets to remain in focus. In order to control the sharpness of the droplets, I used the camera-controlled focus stacking of the D850 to capture 30 separate images—enough to hold focus in a few water droplets—and then blended the stack to yield the final image. I illuminated the background with a magenta-colored light and placed a blue-colored light on the strainer to create some sparkle from a complimentary color. Exposure: Nikon D850, AF-S VR Micro-NIKKOR 105mm f/2.8G IF-ED, 1/30 second f/5.6, ISO 100, manual exposure, Matrix metering, 5250°K White Balance. Lighting: three continuous daylight-balanced LED light sources.
Recap of the Step-by-Step Set-Up:
-
Create a support table to hold the sheets of glass that the subject(s) and water droplets are placed.
-
Place the camera on a sturdy tripod, shooting downward.
-
Align the camera’s sensor with both sheets of glass using a bubble level to ensure the surfaces are exactly parallel.
-
Place your subject on the bottom sheet of glass.
-
Coat the top sheet of glass with a product that will cause the water to bead into droplets. Let it dry to a haze and polish until it becomes clear.
-
Carefully place the water droplets on the top sheet of glass.
-
Use available light or one or more Speedlights to add directional lighting. You can also add gels onto additional Speedlights that are used to illuminate the background.