How to Use Long Exposures to Create Compelling Photos of Moving Water
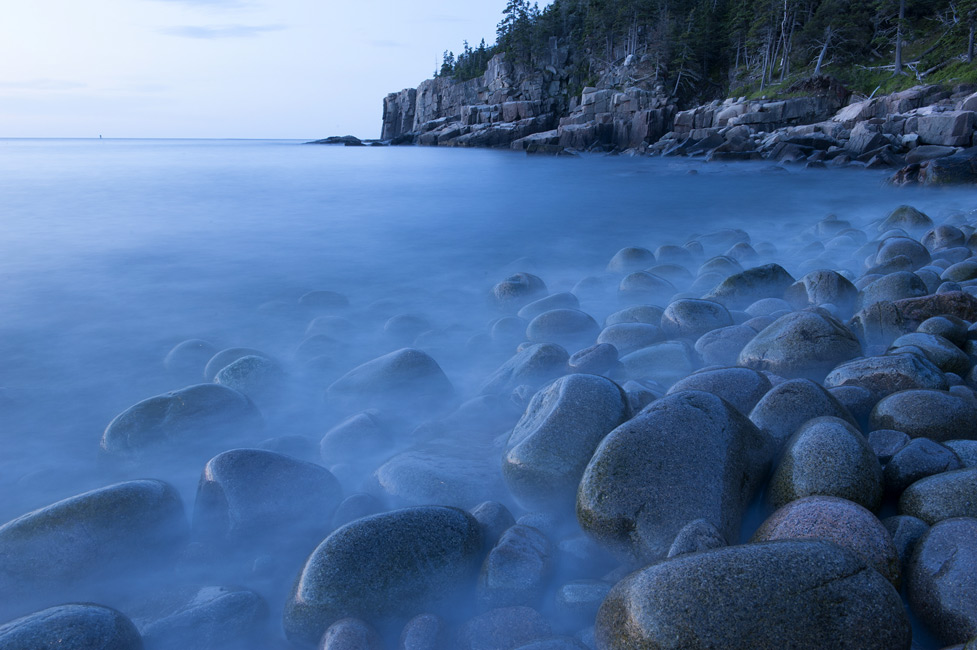
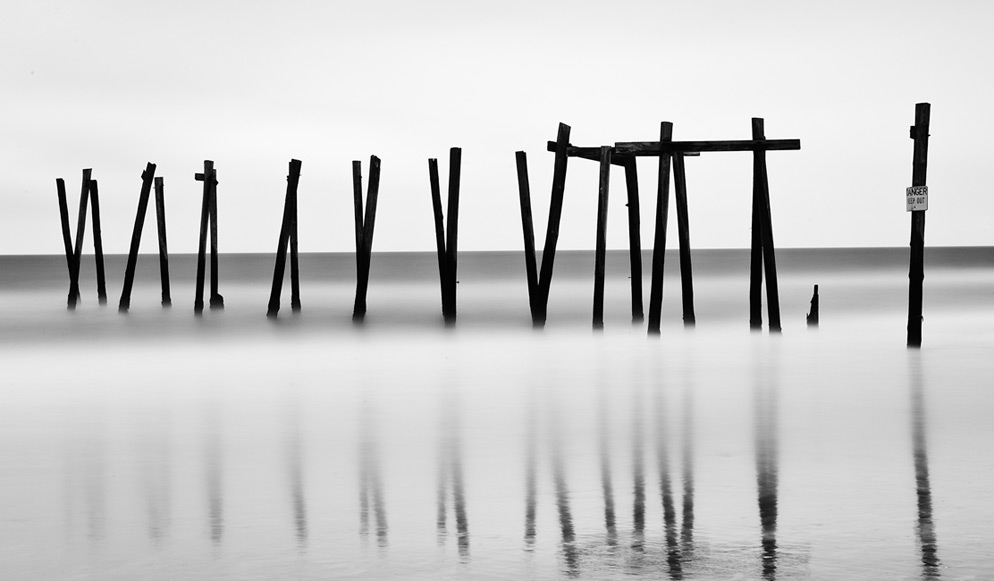
No ND filter was necessary for this image of an overcast dawn in Acadia National Park, Maine. D3, AF-S NIKKOR 24-70mm f/2.8G ED, 30 seconds, f/16, ISO 400, manual exposure, Matrix metering.
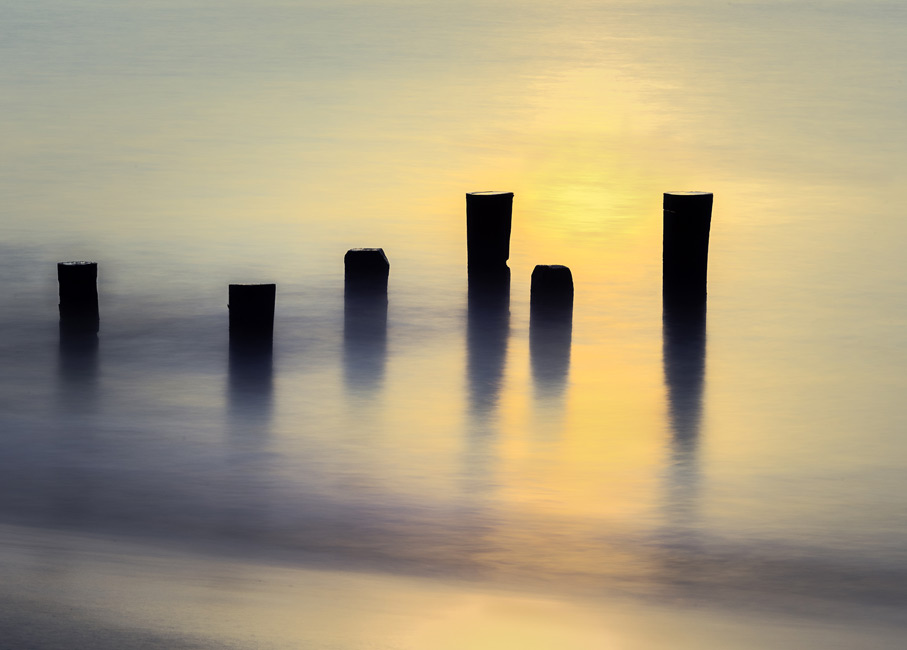

The really cool thing about long exposures of moving water is this: you're photographing something you can't see.
The long exposure captures the passage of time, and while you certainly can experience that passage, you can't see it in anything but a photograph.
The technique of long exposures is relatively easy, and the results will look great—once you nail the basics and log some experience.
Outdoor and nature photographer Tony Sweet knows all about it. He's been photographing moving water for as long as he's been an outdoor and nature photographer figure about 20-plus years—and he teaches the technique at his workshops. "People who attend the workshops want to know how to do it—it's a very popular topic," he says.
How Long is Long?
Generally, long exposures mean about 30 seconds to a minute, but your definition will depend on the degree of the soft and silky effect you want to create.
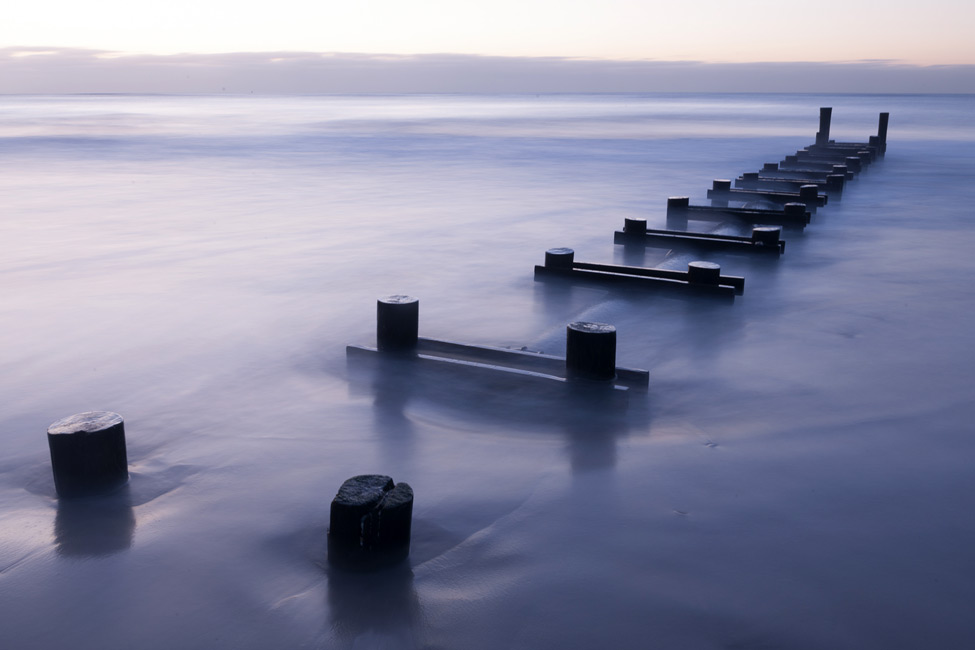
The first thing to consider is the speed of the water. "Ocean waves might be coming in slowly and calmly," Tony says, "and that might mean a 15- or 30-second exposure. If you're photographing a lake, and you want only a shimmering look, you might shoot a quarter- or a half-second exposure."
At first, trial and error will play a big part. "Take several exposures," Tony says. "The idea is to build experience so you start to recognize what the scene offers and what you might get with different exposure times. That's the fun part of it—the experimenting. It's all about what you want to convey, the feeling of the scene and your personal esthetic—what looks good to you."
If Tony's photos accompanying this story look good to you, the exposure data accompanying the captions will be an invaluable guide to your exposure-time starting points.
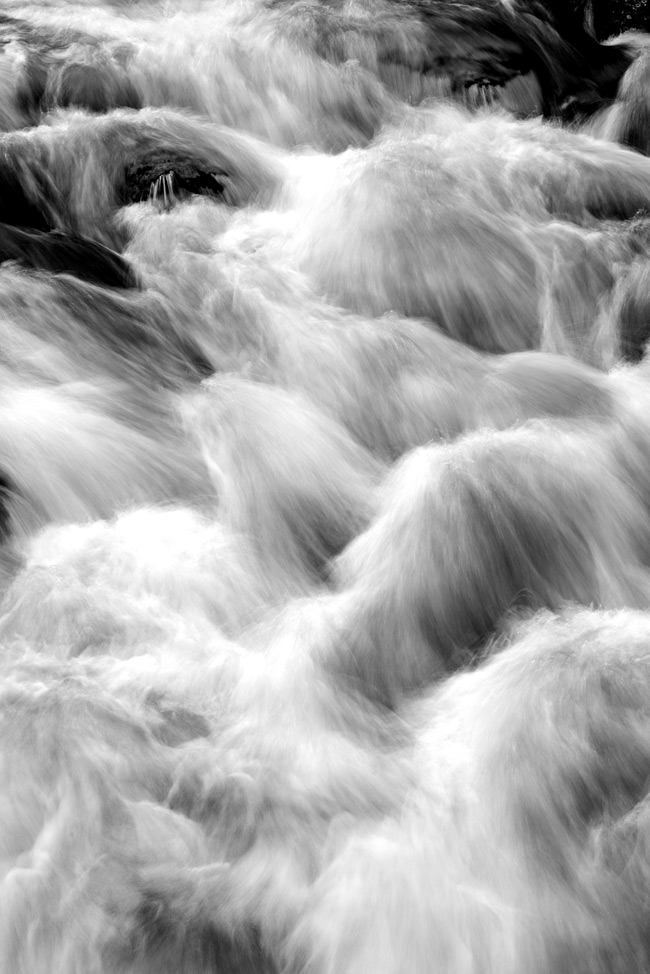
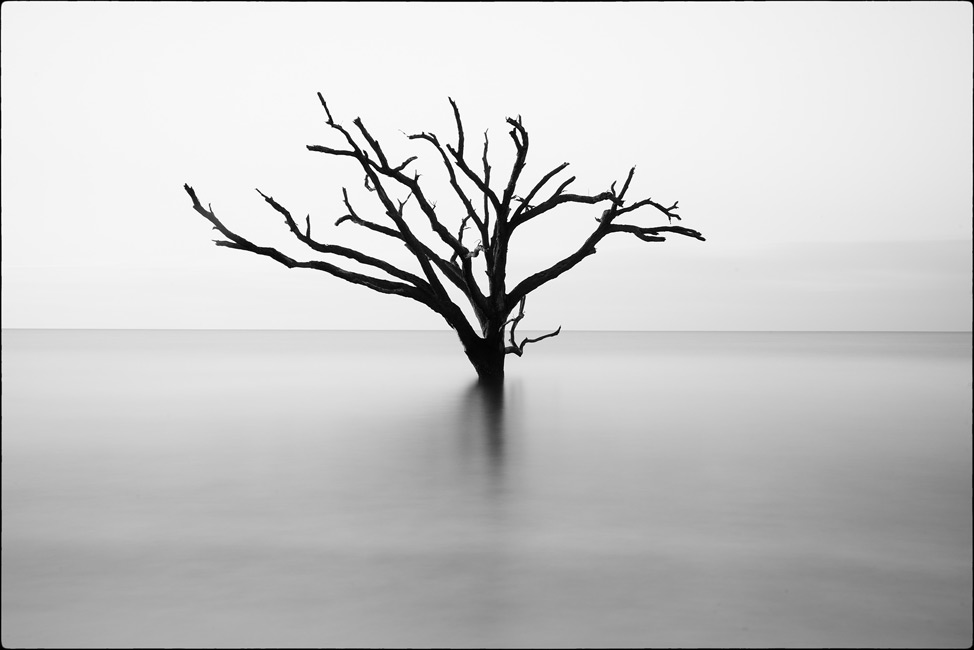
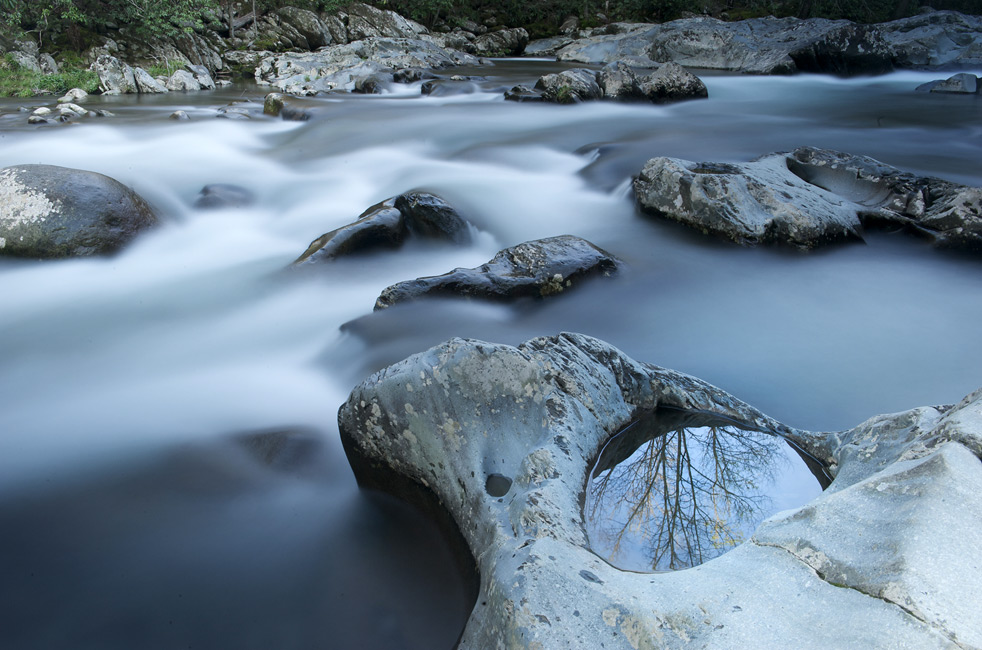
In the Tremont area of the Great Smoky Mountains. "If the exposure is too short, the water will start to look choppy. I didn't need an ND filter, but there was some trial and error to get an exposure that showed what I wanted, which was the power of the water." D810, AF-S NIKKOR 70-200mm f/2.8G ED VR II, 1/4 second, f/16, ISO 100, aperture priority, Matrix metering.
When composing your images, think beyond the water itself. Foreground and background will play a part in the impact of the image; so will contrasts, colors, juxtapositions of texture and structures in the water.
Essential Gear, Basic Techniques
You gotta have a tripod—no surprise there. And a cable release (or wireless remote to fire the shutter) to insure maximum steadiness of the camera. Tony totes a Gitzo GT3542 XLS and an Induro Stealth GIT404XL and uses a Nikon MC-30A Remote Trigger Release with his D810. Because Tony often shoots moving water from the vantage point of a shoreline or a beach, he considers Manfrotto Snow Shoes essential to keep his tripod legs from sinking into the sand. They're formally known as 230 All Weather Tripod Shoes.
In the unlikely instance of being caught short without his cable release, or when he's relying on the camera to time 30-second and shorter exposures, his D810 has a built-in feature called exposure delay mode that'll delay the release of the shutter from one to three seconds—your choice—after the mirror locks up. (Check your camera’s User’s Manual to see if your camera also has the feature.)
For exposures longer than 30 seconds, use your camera's Bulb setting. And regardless of exposure time, always manually focus your lenses.
When composing your images, think beyond the water itself. Foreground and background will play a part in the impact of the image; so will contrasts, colors, juxtapositions of texture and structures in the water.
Ultimately the appeal of long-exposure images may have more to do with emotional response than objective evaluation, so feel free to experiment. Mood might be everything.
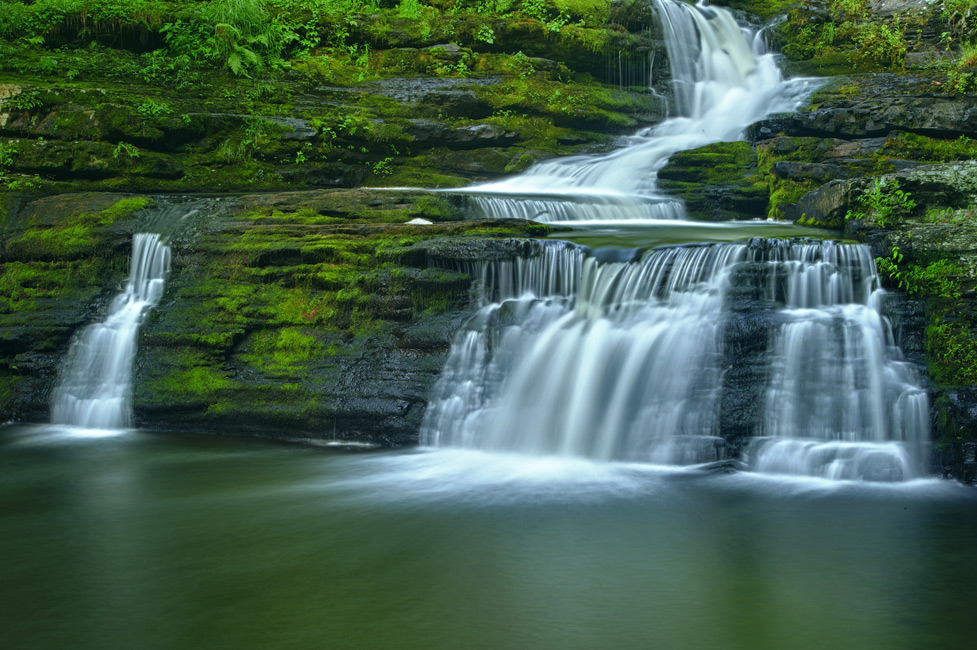
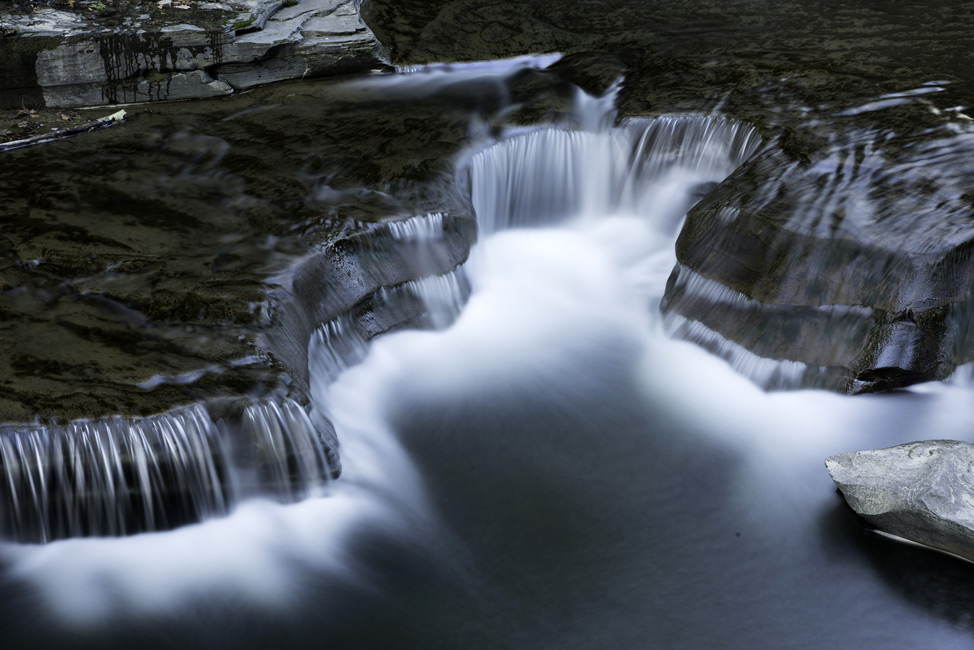
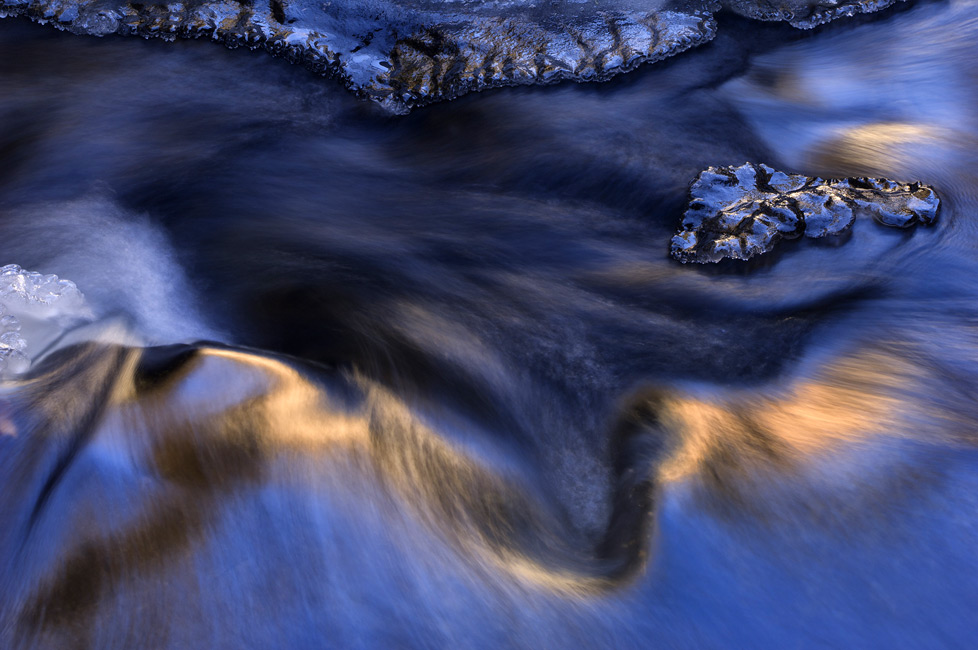
A five-exposure HDR image at the Delaware Water Gap. "It's a long exposure because I wanted to slow up the water for texture contrast with the rocks, and it's HDR because the light was uneven—the lower waterfall was in a darker area than the upper." No ND filter was needed. D3S, AF-S NIKKOR 24-70mm f/2.8G ED, exposures at 4, 8, 15 and 30 seconds, and 1 minute, f/22, ISO 200, aperture priority, Matrix metering.
The Filter Factor
For longer exposures—usually over a few minutes—or exposures in bright light or when the light is changing at the marginal times of day—you're going to have to use a neutral density (ND) filter.
How come? Because a long exposure might let in too much light, and you'll end up with an overexposed, blown-out image no matter how small an f/stop or low an ISO you chose.
ND filters are rated in degrees of f/stop reduction—meaning how much light they reduce. The higher the number, the less light reaches the sensor. Tony carries 5-, 6-, 10-, 15-, 16- and 20-stop Singh-Ray ND filters.
Here's how he uses them:
• First he meters the scene he wants to photograph without regard for the extended time of the exposure. "I just get a properly exposed image using the ISO that I prefer and the f/stop for the depth of field I want for the scene. Then I note the shutter speed."
• Next he uses the NDExposure app on his iPhone. "I input the shutter speed of the properly exposed image in one column and scroll down the list of neutral density stops to select the one I'm going to use. The app calculates the time of the exposure, and that time appears at the bottom of the window."
And that's it.
We know what you're thinking: how does he know how many stops of neutral density he needs...or wants? Will he be using a 5-stop or a 10-stop or a 20-stop ND filter? That's where observation and experience comes in. Bright, strong light? He'll try a 15, check the results and change the filter if necessary. Morning light, or early evening? A 5-stop.
It's truly trial and error when you're starting out, but, Tony says, "If your initial shot was properly exposed, and the long exposure was properly calculated, and if there was no dramatic change in the natural light, fine-tuning adjustments should not be necessary."
There are some judgment calls here, particularly at sunrise and sunset as the light is getting respectively stronger and weaker.
"At sunset it gets dark in a hurry," Tony says, "and I might use my proper exposure shutter speed for a four-minute exposure. But if I see it's getting dark quickly, I might cut off the exposure after two minutes."
As a general guideline, he suggests 5- and 6-stop filters at marginal times of day, 10- 16- and, very infrequently, 20-stops in bright to brightest times.
The more ND filter images you make, the quicker you'll build up a knowledge base of experience. You'll recognize the situation, the light, the speed of the water and know what the scene requires for the result you want.
"I teach the basics of this to students at my workshops in about five minutes," Tony says. "Then the more they do it, the quicker they get the rest of it."


