Fleeting Moments Captured Brilliantly—Photographing Baby’s First Smile

Simple backgrounds let your subject stand out.
Mother of three, Tamara Lackey, recalls her early times trying to photograph her first born. “I was so overwhelmed by how beautiful that innocent little bundle was. I tried photographing her with my camera phone and was so disappointed. I couldn’t match her pale skin tones. I could not capture her softness and glow. I was so discouraged with how unflattering my first photos were. She was changing so quickly and I didn’t want to miss any of it.”
Tamara’s Top Three Photos
Take lots of tight close-up photos where you get right next to the baby. Even the slightest differences in where you pinpoint your focus will yield subtle varieties. Fill the frame. Expressions are priceless. Tiny babies grow so quickly!
Shoot in Aperture priority with the lens wide open so the subject is tack sharp against the background which turns into a soft blur called bokeh. A baby’s features change almost daily. More often than not, when photographing a face, the best point on which to focus is the baby’s eye. By around six weeks a baby will start making direct eye contact. By six months they find fascination with just about everything. Babies are drawn to light so if you need to capture or avert their eyes keep this in mind.
Here’s an idea—take a set of images at specific stages, for example at age three months, six months, nine months and 12 months. A good camera will reveal your baby’s subtle changes. You need to save those moments. Invest in a great basic lens that has a fast wide aperture, for example the AF-S NIKKOR 24-70mm f/2.8G ED. That focal range is an all-around great lens for your initial needs.
Family Affair
Stage photos of the baby with the mother, the father, a sibling. Simply observe. Watch the interaction and wait for innocent moments. Find optimal angles that show faces and points of view that cast meaning to expressions.

Even the slightest differences in where you pinpoint your focus will yield subtle varieties.
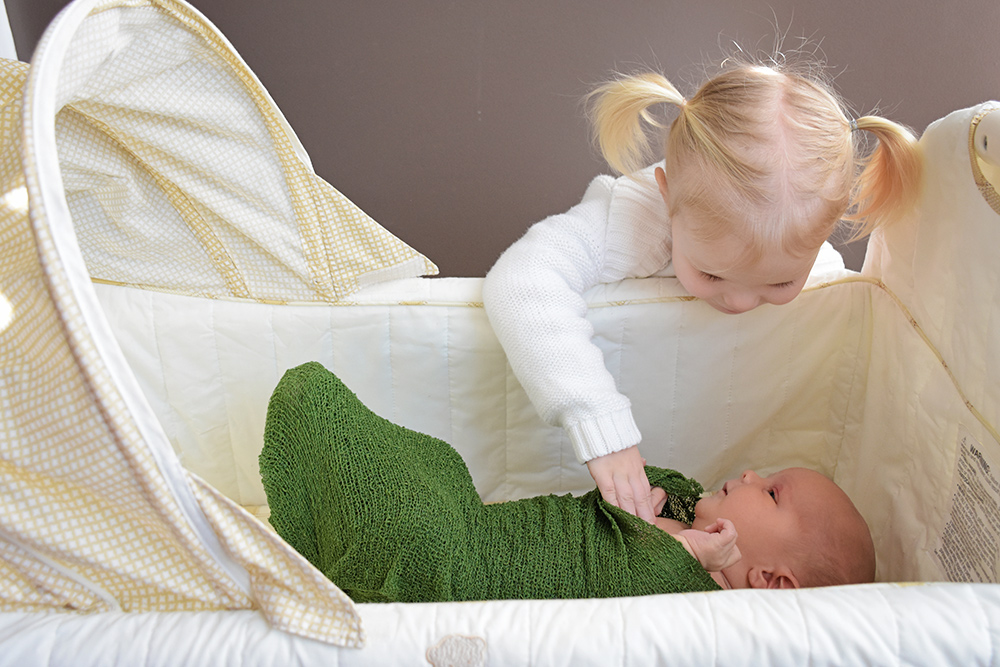
Watch the interaction and wait for innocent moments. Find optimal angles that show faces and points of view that cast meaning to expressions.
Watch your color palette—nothing too harsh or uncomplimentary. Patterned fabrics may be distracting in a final print. Note what’s appearing in the background. Avoid having objects jut out in bad locations.
I like to shoot over and down onto an important moment. This helps ‘bring’ the viewer into things. I’ve been using the Nikon D750 (check-out the new Nikon D5500 as well) with its variable angle LCD that I can swivel and position. That swivel comes in handy for shifting point of view, and seeing how a shot frames-up when I cannot physically get into a position.
Use as much natural light as possible; it’s softer and more flattering. Position subjects close to a window. Sometimes even keeping the curtain sheers drawn helps filter the light and produce a more even texture.

Use as much natural light as possible; it’s softer and more flattering.
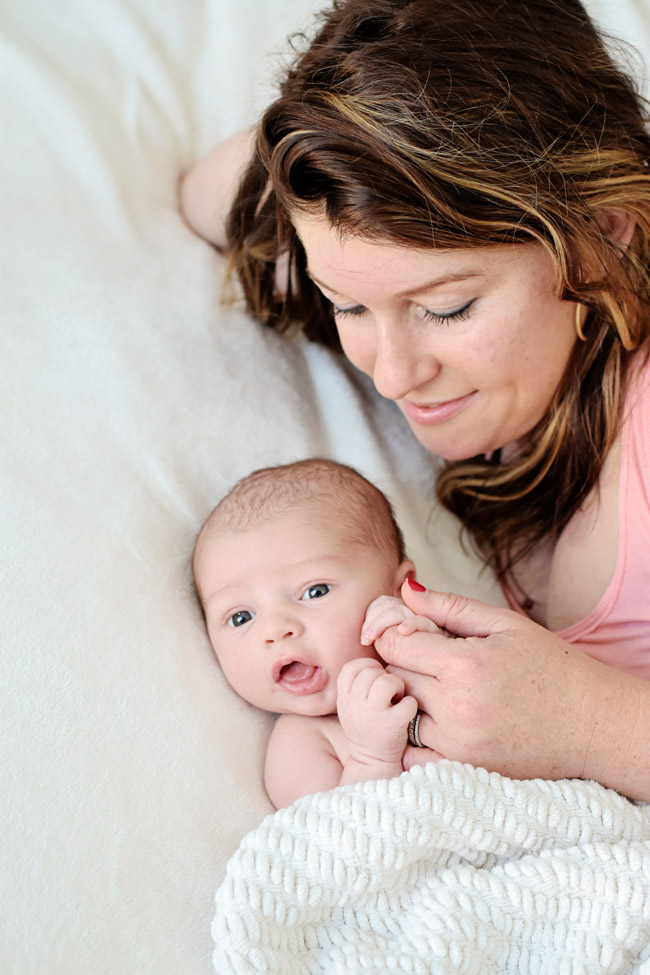
Really showcase emotion between mother and child. Lay aside and watch as they play. This is an unexpected perspective for a photo. I could have used the Nikon Vari-angle LCD display to capture this too. When you’re staging photos of two beings, think beyond just shots with someone standing and holding the baby.
Baby’s First Space in Three-Part Harmony
I love taking photos of the newborn in her ‘first space’ by creating a two- or three-part image. Let’s say I chose to photograph her bedroom. The first shot may be a landscape view. Watch your lighting—pick a time when there’s lots of soft natural light flowing in. Set the camera to Landscape mode; this works indoors too.
It yields a deep depth of field so key items can be in focus and you get even exposure. Plus, you do not need to fuss with aperture. I suggest you also set the camera on a tripod or rest it on something.
For the second shot, step closer to her crib—giving an impression that you’re just peeking over the railing top. Then make your final photo a sweet close-up. A few words about using flash, especially on a sleeping baby: say we are trying to capture that close-up using a smartphone. The flash goes off and you get this bright strobe that casts harsh shadow lines, vivid color tones and probably wakes the baby. With more advanced cameras you can control exposure and aperture such that the flash may not even be required.
What to Tuck Inside a New Parents’ Camera Bag
Any parent interested in making really good photos of their baby should invest in a good camera. Consider the small and light Nikon D3300 (also available in a two lens kit) that creates 24.2 Megapixel photos and 1080p Full HD videos. Or, if you love the idea about having a Vari-angle and a few more features, take a look at the Nikon D5500. Both have Wi-Fi® compatibility that permits you to instantly share photos with family, friends and post to social media.
Other items to add to your new parents’ camera bag include a small fold-up reflector to help fill-in shadowy areas of a photo (it will also serve as an umbrella to block harsh light outdoors), a small tripod, baby wipes, a clean no-pattern blanket and of course snacks. And finally, at some point you may wish to consider a Nikon Speedlight for more advanced flash techniques.
Stage photos of the baby with the mother, the father, a sibling.
Tips
-
Mix it up! Vary your compositions. You need not always place the point of focus in the same spot. Remember the rule of thirds.
-
Get to the subject’s level. Frame from down low.
-
Watch proportions and scale. Anything closer to the lens will appear larger than what’s father from the lens.
-
Check your focus with an LCD preview immediately after you take a photo. Nothing’s more disappointing than realizing too late that part of your photo is fuzzy.
-
Experiment with an in-camera effect. For example, switch to black and white and immediately view what you get.
-
Black and white tends to make images a bit more dramatic and may heighten detail of the eyes. Plus, this two-tone render could eliminate distractions that show when the photo is rendered in color.
-
Using props? Keep it simple and include pieces that are inherently meaningful.