Eye-Detection Autofocus Makes Taking Portraits Easy

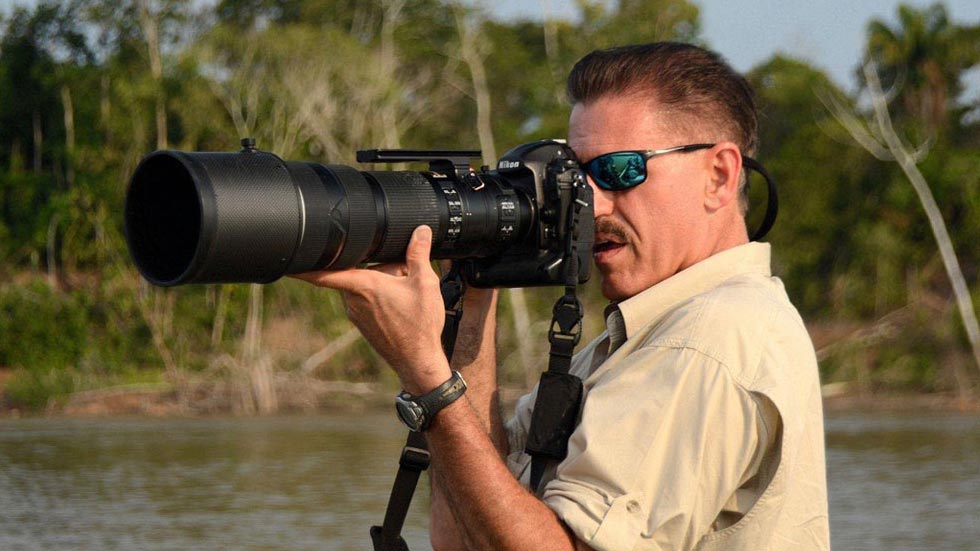
As a content creator, you want to show the world your best self. You need your subject to be in focus whether the subject is you, a friend or your pet. Nikon’s Eye-Detection Autofocus for video and stills quickly locks onto eyes—humans, dogs or cats—and follows them. This is especially useful when you can’t be behind the camera, for first-person videos and selfies as well as photographing people or pets who are moving around in your frame. The Z 30, like other cameras in Nikon’s mirrorless line-up features Eye-Detection Autofocus built-in.
Eye-Detection Autofocus is really helpful in multiple situations. For instance, when you’re trying to capture people or pets who are moving around. Eye-Detection Autofocus lets you get down to really connecting with your subject and freeing you from having to concentrate on “working” the camera. Another instance where Eye-Detection Autofocus is useful when you’re shooting at wide open apertures like f/2.8 or faster.
Without Eye-Detection Autofocus, most photographers would be using single-point AF and either placing the focus point on the eye or focusing and recomposing before taking the shot. Now with mirrorless cameras that feature Eye-Detection Autofocus, the camera does all the work for you, so you can feel confident that the eyes in your images or video will always reliably be in focus.
Select the AF Area Mode
You’re got a few options when using Eye-Detect AF.
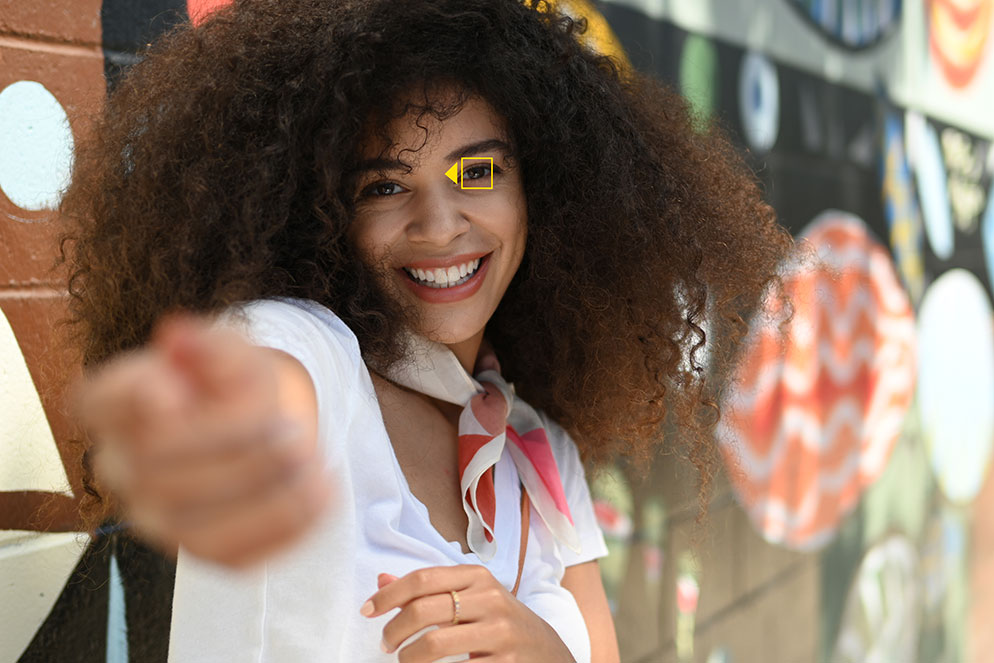
When photographing to capturing video of people, you can set the AF-area Mode to Wide-area AF (L-people) or Auto-area AF (people).
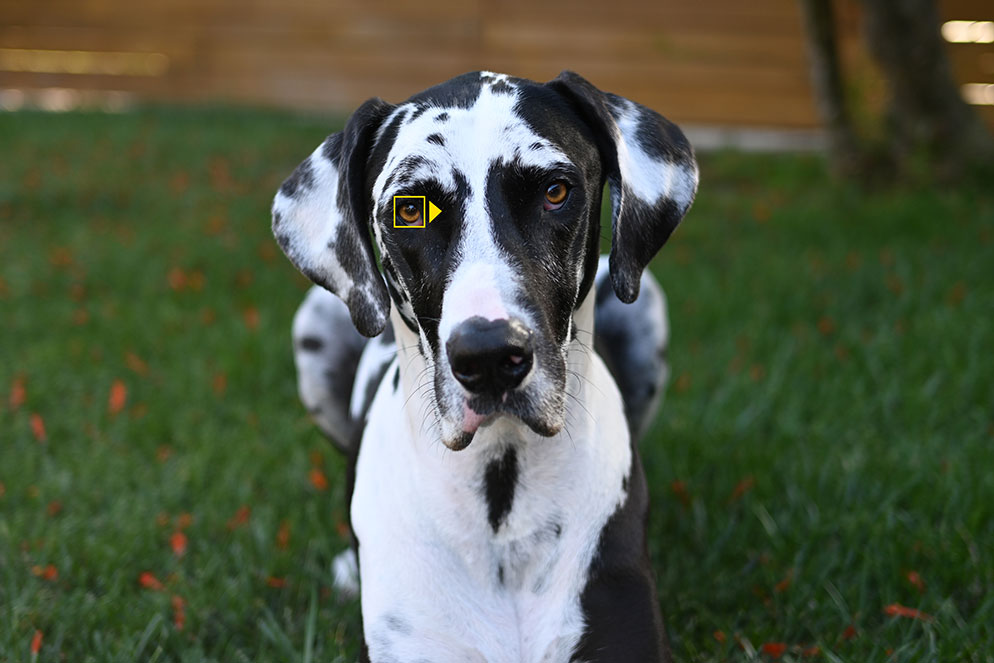
If you’re photographing or capturing video of pets (cats and dogs), choose Wide-area AF (L-animals) or Auto-area AF (animals).
When the subject is large enough in the frame, you’ll see a yellow box visible over the closest eye to the camera. Depending on the distance to your subject, you may see the yellow box over the face, instead of an eye. When more than one eye is visible to the camera, you’ll see a small triangle to the left or right of the eye, depending upon where the eye is in relation to the subject’s other eye. When you see the triangle, you can use the multi-selector (on the rear of the camera body) to move the Eye-Detection Autofocus to the other eye using the left and right buttons of the multi-selector.
Next time you need to make sure the eyes in your shots or videos are sharp, make sure you’re utilizing Eye-Detection Autofocus.